


Key Takeaways:
-
90% of leaks are caused by failed weatherstripping, improper installation, or damaged thresholds - all fixable with DIY methods
-
Immediate action prevents costly water damage - temporary fixes can protect your home while planning permanent repairs
-
Average repair costs range from $50 DIY to $800 professional, compared to $3,000-5,000 for replacement
-
Regular maintenance every 6 months prevents most leak issues before they start
-
What is a french patio door? - Double doors that open to outdoor spaces, requiring special waterproofing attention
Nothing ruins a rainy day faster than discovering water pooling inside your home. When your french patio door leaks when it rains, it's not just an inconvenience—it's a threat to your flooring, walls, and home's structural integrity. After helping dozens of homeowners tackle this exact problem, I've learned that most leaks are surprisingly simple to fix once you understand where water enters and why.
Understanding Why Your French Patio Door Leaks When It Rains
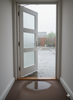
Before grabbing your tools, it's crucial to understand what is a french patio door and why these beautiful features are particularly vulnerable to water infiltration. Unlike single doors, French patio doors feature two door panels that meet in the middle, creating multiple potential entry points for water. The design that makes them aesthetically appealing—large glass panels, minimal framing, and double operation—also presents unique weatherproofing challenges.
Water follows the path of least resistance, exploiting any weakness in your door's defense system. Through years of inspecting leaking exterior french patio door installations, I've identified five primary culprits that account for most water infiltration issues.
Weatherstripping failure tops the list as the most common cause. The flexible seals around your door perimeter compress thousands of times yearly, gradually losing their ability to create a watertight barrier. This deterioration accelerates in harsh climates where temperature extremes cause the material to crack and separate.
Installation errors create persistent leak problems that worsen over time. Even a slight miscalculation in leveling or an improperly sized rough opening allows water to bypass intended drainage channels. I once encountered a homeowner whose beautiful French doors leaked from day one—investigation revealed the installer had reversed the threshold's weep holes, directing water inside rather than out.

Identifying the Exact Source of Your Leak
Pinpointing where water enters requires detective work, but a systematic approach yields quick results. Start your investigation during dry weather to mark problem areas before the next storm.
The Visual Inspection Method
Begin with the door closed and locked. Run your hand slowly along the entire perimeter, feeling for air movement that indicates gaps. Even tiny air leaks become water highways during driving rain. Mark suspected areas with painter's tape for closer examination.
The daylight test reveals gaps invisible to casual observation. On a sunny day, turn off interior lights and look for light penetration around the door frame. Light equals leaks—it's that simple. Pay special attention to the bottom corners where the threshold meets the side jambs, as these complex joints frequently fail.
Check the condition of your weatherstripping by performing the dollar bill test:
-
Insert a dollar bill between the door and frame
-
Close and lock the door normally
-
Attempt to pull the bill out
-
Significant resistance indicates good seal compression
-
Easy removal suggests weatherstripping replacement is needed
The Water Test Strategy
Once you've identified potential problem areas, confirm your suspicions with controlled water testing. This method, used by professional installers, simulates rain conditions to expose exact entry points.
Working with a helper, have one person inside while the other operates a garden hose outside. Start at the bottom of the door and slowly work upward, spraying each section for 2-3 minutes. The inside observer watches for water intrusion, marking entry points immediately. This methodical approach often reveals surprising leak locations, like water entering at the top but appearing at the bottom after traveling through the wall cavity.
Common Leak Locations and Their Specific Solutions
Threshold and Bottom Seal Failures
The threshold bears the brunt of weather assault and foot traffic, making it a primary failure point when your french patio door leaks when it rains. Modern thresholds incorporate multiple defense layers: primary seals, compression gaskets, and integrated drainage systems.
Examine your threshold's drainage system first. Those small slots or holes aren't defects—they're engineered weep holes designed to channel water away from your home. Debris accumulation blocks these critical drainage points, causing water to back up and infiltrate. I've resolved countless "mysterious" leaks simply by clearing clogged weep holes with a wire coat hanger.
If your threshold shows signs of wear—cracks, warping, or permanent compression—replacement provides the only permanent solution. While this seems daunting, most thresholds are designed for replacement without removing the entire door. The investment typically runs $150-300 for materials, far less than water damage repairs.
Door sweep replacement offers immediate improvement for bottom leaks:
-
Measure the exact door width (cut precisely to avoid gaps)
-
Choose appropriate material (vinyl for budget, rubber for durability)
-
Install with door closed to ensure proper ground contact
-
Adjust mounting height so sweep barely touches the threshold
-
Test operation—door should close without excessive resistance
Side Jamb and Header Leaks
Vertical leaks along door sides often trace back to failed caulking or improperly adjusted french patio door hinges. When hinges sag, they pull the door out of square, creating uneven gaps that weatherstripping can't seal effectively.
Start by checking hinge stability. Grab each door at the handle and lift upward—movement indicates loose hinges requiring immediate attention. Tightening hinge screws seems obvious, but use the correct technique: remove one screw at a time and replace it with a longer screw (typically 3-inch) that reaches the framing lumber beyond the jamb.
For persistent side leaks despite good hinge adjustment, the problem likely lies in deteriorated exterior caulking. Remove all old caulk completely—partial removal guarantees future failure. Apply new polyurethane or silicone caulk rated for exterior use, tooling it smooth for optimal water shedding.
The Critical Corner Connections
Corner joints where horizontal and vertical components meet create complex geometry vulnerable to leaks. These areas require special attention because they combine multiple materials and movement points.
Water infiltration at corners often indicates frame separation. Temperature changes cause materials to expand and contract at different rates, gradually opening gaps. Address this by:
-
Cleaning all surfaces thoroughly with denatured alcohol
-
Applying primer if recommended by sealant manufacturer
-
Using backing rod for gaps exceeding 1/4 inch
-
Installing sealant in proper width-to-depth ratio (2:1 optimal)
-
Tooling joint smooth to prevent water pooling
DIY Repair Guide: Step-by-Step Solutions
Replacing Weatherstripping
New weatherstripping transforms a leaking door into a weather-tight barrier. While styles vary, installation principles remain consistent across types.
Begin by documenting your existing weatherstripping configuration. Take photos showing how current stripping routes around corners and meets at joints. This reference prevents confusion during installation. Remove old weatherstripping carefully to avoid damaging mounting grooves or surfaces.
Clean mounting surfaces meticulously—any residue prevents proper adhesion:
-
Scrape away old adhesive with plastic putty knife
-
Clean with appropriate solvent (check manufacturer recommendations)
-
Allow surface to dry completely before installation
-
Test fit new weatherstripping before removing adhesive backing
When installing compression-style weatherstripping, maintain consistent compression around the entire perimeter. Too much compression prevents proper door closure; too little allows water infiltration. The sweet spot creates firm contact without excessive closing resistance.
Adjusting and Shimming Your French Doors
Proper door alignment eliminates many leak issues without replacing components. The process requires patience but delivers professional results.
Check door alignment using a 4-foot level placed vertically against each stile and horizontally across the head and threshold. Document measurements to track adjustment progress. Even 1/8-inch misalignment creates leak potential during wind-driven rain.
For doors requiring significant adjustment:
-
Support door weight with shims under the bottom rail
-
Loosen hinge screws slightly (don't remove completely)
-
Adjust position using wooden shims behind hinges
-
Tighten screws progressively, checking alignment frequently
-
Test operation throughout adjustment process

When Professional Help Becomes Necessary
While many repairs fall within DIY capabilities, certain situations demand professional expertise. Recognizing these scenarios prevents costly mistakes and ensures lasting solutions.
Structural issues exceed typical homeowner skills. If your door frame shows signs of rot, insect damage, or structural movement, professionals must address underlying problems before tackling leaks. These issues often extend beyond visible damage, requiring wall opening and proper reconstruction.
Water damage extending into walls requires immediate professional attention. What appears as minor staining might indicate extensive hidden damage. Professionals use moisture meters and thermal imaging to map damage extent, ensuring complete remediation.
Warranty considerations also influence the DIY-versus-professional decision. Many quality doors from suppliers like Doors and Beyond's Swing Patio Door include warranties that require professional installation and repair to remain valid.
Cost Analysis: Repair vs. Replacement
Understanding repair economics helps make informed decisions when your french patio door leaks when it rains. Let's break down typical costs to provide realistic budgeting guidance.
DIY Repair Costs
Basic weatherstripping replacement represents the most economical solution:
-
Weatherstripping kit: $30-75
-
Threshold seal: $40-100
-
Door sweep: $20-50
-
Caulk and backer rod: $15-30
-
Total DIY investment: $105-255
These materials typically last 5-7 years with proper installation, providing excellent return on investment. Even if you purchase specialized tools like a caulk gun or weatherstripping roller, total costs remain under $300.
Professional Repair Pricing
Professional repairs include labor and expertise that ensure lasting solutions:
-
Diagnostic inspection: $100-200
-
Weatherstripping replacement: $300-500
-
Threshold replacement: $400-600
-
Complete adjustment and sealing: $500-800
While professional repairs cost more initially, they often include warranties and address problems comprehensively. A professional can also identify issues you might miss, preventing future damage.
Understanding Replacement Costs
Sometimes replacement makes more economic sense than extensive repairs. How much is a patio french door depends on multiple factors, but understanding typical pricing helps evaluate options.
Standard exterior french patio door pricing ranges significantly:
-
Basic steel doors: $1,200-2,000
-
Mid-range fiberglass: $2,000-3,500
-
Premium wood doors: $3,000-5,000
-
Installation labor: $500-1,500
These figures help contextualize repair decisions. If repair costs approach 30% of replacement value, consider upgrading to modern doors with improved weatherproofing technology.
Prevention: Long-Term Maintenance Strategies
Preventing leaks costs far less than repairs. Implementing a maintenance routine extends door life while preventing water damage.
Seasonal Maintenance Schedule
Spring maintenance prepares doors for summer storms:
-
Clean and lubricate hinges with silicone spray
-
Clear debris from threshold drainage channels
-
Inspect and clean weatherstripping
-
Check exterior caulk integrity
-
Test door operation and alignment
Fall preparation protects against winter weather:
-
Apply weatherstripping conditioner to prevent cracking
-
Adjust door alignment for seasonal wood movement
-
Verify proper drainage before freeze season
-
Install storm doors for additional protection
-
Document any developing issues for spring repair
Monthly Quick Checks
Five-minute monthly inspections catch problems early. During routine cleaning, observe:
-
Weatherstripping condition and compression
-
Threshold drainage function
-
Door operation smoothness
-
Any new gaps or alignment changes
-
Signs of water staining or damage
This simple routine identifies developing issues before they become expensive problems.
Advanced Solutions for Persistent Leaks
When standard repairs fail, advanced techniques address stubborn leaks. These methods require more skill but provide solutions for challenging situations.
Installing Secondary Defense Systems
Adding redundant protection creates multiple barriers against water infiltration. Storm doors provide the most obvious secondary defense, but other options exist.
Drip caps installed above doors redirect water away from vulnerable top seals. While modern doors include integrated drip edges, adding an additional cap provides insurance against manufacturing defects or installation errors. Choose materials matching your exterior trim for seamless integration.
Modifying Drainage Patterns
Sometimes leaks result from poor site drainage rather than door defects. Water pooling against your threshold eventually finds entry points regardless of seal quality.
Evaluate drainage during heavy rain:
-
Does water flow toward or away from doors?
-
Are gutters directing water appropriately?
-
Has settling created negative grade?
-
Do paved surfaces slope toward entries?
Correcting drainage often involves:
-
Regrading soil to create positive slope
-
Installing French drains to redirect subsurface water
-
Adding gutter extensions to move roof water away
-
Creating swales to channel surface flow
Conclusion
When your french patio door leaks when it rains, swift action prevents minor annoyances from becoming major expenses. The strategies outlined here address virtually every leak scenario, from simple weatherstripping replacement to complex drainage modifications. Remember that most leaks result from maintenance neglect rather than catastrophic failure—regular attention keeps doors weather-tight for decades.
For those considering upgrading their doors entirely, exploring modern options with advanced weatherproofing technology from Doors and Beyond might provide the permanent solution you seek. Quality doors properly installed and maintained transform from potential leak sources into reliable barriers against nature's elements.
The investment in understanding and maintaining your French patio doors pays dividends through protected interiors, lower energy bills, and preserved home value. Whether tackling repairs yourself or hiring professionals, you now possess the knowledge to make informed decisions and achieve lasting solutions.
Frequently Asked Questions
How often should I replace weatherstripping on French patio doors?
Quality weatherstripping typically lasts 5-7 years with proper maintenance. However, harsh climates or heavy use may require replacement every 3-4 years. Annual inspection reveals deterioration before leaks develop.
Can I use regular caulk to seal French door leaks?
Never use basic latex caulk for exterior door sealing. Choose polyurethane or silicone sealants rated for exterior use with appropriate flexibility and adhesion ratings. The extra cost provides superior longevity and performance.
How Can I Replace Glass Pane in French Door?
To replace a glass pane in a French door, you’ll need to carefully remove the damaged glass, clean the frame, and install a new pane with glazing compound or sealant to ensure a secure fit. It’s a simple DIY project if you follow the right steps and safety measures. For a full step-by-step guide, check out this article: How to Replace Glass Pane in French Door – Easy DIY Method
Is it normal for French doors to have some air infiltration?
Minor air movement is normal, but feeling definite drafts indicates inadequate sealing. Modern doors should create nearly airtight seals when properly installed and maintained. Excessive air infiltration wastes energy and predicts future water leaks.
How to adjust French Door Hinges?
To adjust French door hinges, slightly loosen the hinge screws and shift the door up, down, or sideways until it aligns properly with the frame. Then retighten the screws to secure it. For a detailed guide, check out our full article: ……
How To Install Interior French Doors?
Installing interior French doors is easier than you think! Measure your doorway, align the hinges, and secure the doors to ensure a smooth swing and perfect fit. For detailed, step-by-step instructions, check out this full guide: How to Install Interior French Doors.
Your French Patio Door Leaks When It Rains - Complete Repair Guide

Key Takeaways:
-
90% of leaks are caused by failed weatherstripping, improper installation, or damaged thresholds - all fixable with DIY methods
-
Immediate action prevents costly water damage - temporary fixes can protect your home while planning permanent repairs
-
Average repair costs range from $50 DIY to $800 professional, compared to $3,000-5,000 for replacement
-
Regular maintenance every 6 months prevents most leak issues before they start
-
What is a french patio door? - Double doors that open to outdoor spaces, requiring special waterproofing attention
Nothing ruins a rainy day faster than discovering water pooling inside your home. When your french patio door leaks when it rains, it's not just an inconvenience—it's a threat to your flooring, walls, and home's structural integrity. After helping dozens of homeowners tackle this exact problem, I've learned that most leaks are surprisingly simple to fix once you understand where water enters and why.
Understanding Why Your French Patio Door Leaks When It Rains
Before grabbing your tools, it's crucial to understand what is a french patio door and why these beautiful features are particularly vulnerable to water infiltration. Unlike single doors, French patio doors feature two door panels that meet in the middle, creating multiple potential entry points for water. The design that makes them aesthetically appealing—large glass panels, minimal framing, and double operation—also presents unique weatherproofing challenges.
Water follows the path of least resistance, exploiting any weakness in your door's defense system. Through years of inspecting leaking exterior french patio door installations, I've identified five primary culprits that account for most water infiltration issues.
Weatherstripping failure tops the list as the most common cause. The flexible seals around your door perimeter compress thousands of times yearly, gradually losing their ability to create a watertight barrier. This deterioration accelerates in harsh climates where temperature extremes cause the material to crack and separate.
Installation errors create persistent leak problems that worsen over time. Even a slight miscalculation in leveling or an improperly sized rough opening allows water to bypass intended drainage channels. I once encountered a homeowner whose beautiful French doors leaked from day one—investigation revealed the installer had reversed the threshold's weep holes, directing water inside rather than out.
Identifying the Exact Source of Your Leak
Pinpointing where water enters requires detective work, but a systematic approach yields quick results. Start your investigation during dry weather to mark problem areas before the next storm.
The Visual Inspection Method
Begin with the door closed and locked. Run your hand slowly along the entire perimeter, feeling for air movement that indicates gaps. Even tiny air leaks become water highways during driving rain. Mark suspected areas with painter's tape for closer examination.
The daylight test reveals gaps invisible to casual observation. On a sunny day, turn off interior lights and look for light penetration around the door frame. Light equals leaks—it's that simple. Pay special attention to the bottom corners where the threshold meets the side jambs, as these complex joints frequently fail.
Check the condition of your weatherstripping by performing the dollar bill test:
-
Insert a dollar bill between the door and frame
-
Close and lock the door normally
-
Attempt to pull the bill out
-
Significant resistance indicates good seal compression
-
Easy removal suggests weatherstripping replacement is needed
The Water Test Strategy
Once you've identified potential problem areas, confirm your suspicions with controlled water testing. This method, used by professional installers, simulates rain conditions to expose exact entry points.
Working with a helper, have one person inside while the other operates a garden hose outside. Start at the bottom of the door and slowly work upward, spraying each section for 2-3 minutes. The inside observer watches for water intrusion, marking entry points immediately. This methodical approach often reveals surprising leak locations, like water entering at the top but appearing at the bottom after traveling through the wall cavity.
Common Leak Locations and Their Specific Solutions
Threshold and Bottom Seal Failures
The threshold bears the brunt of weather assault and foot traffic, making it a primary failure point when your french patio door leaks when it rains. Modern thresholds incorporate multiple defense layers: primary seals, compression gaskets, and integrated drainage systems.
Examine your threshold's drainage system first. Those small slots or holes aren't defects—they're engineered weep holes designed to channel water away from your home. Debris accumulation blocks these critical drainage points, causing water to back up and infiltrate. I've resolved countless "mysterious" leaks simply by clearing clogged weep holes with a wire coat hanger.
If your threshold shows signs of wear—cracks, warping, or permanent compression—replacement provides the only permanent solution. While this seems daunting, most thresholds are designed for replacement without removing the entire door. The investment typically runs $150-300 for materials, far less than water damage repairs.
Door sweep replacement offers immediate improvement for bottom leaks:
-
Measure the exact door width (cut precisely to avoid gaps)
-
Choose appropriate material (vinyl for budget, rubber for durability)
-
Install with door closed to ensure proper ground contact
-
Adjust mounting height so sweep barely touches the threshold
-
Test operation—door should close without excessive resistance
Side Jamb and Header Leaks
Vertical leaks along door sides often trace back to failed caulking or improperly adjusted french patio door hinges. When hinges sag, they pull the door out of square, creating uneven gaps that weatherstripping can't seal effectively.
Start by checking hinge stability. Grab each door at the handle and lift upward—movement indicates loose hinges requiring immediate attention. Tightening hinge screws seems obvious, but use the correct technique: remove one screw at a time and replace it with a longer screw (typically 3-inch) that reaches the framing lumber beyond the jamb.
For persistent side leaks despite good hinge adjustment, the problem likely lies in deteriorated exterior caulking. Remove all old caulk completely—partial removal guarantees future failure. Apply new polyurethane or silicone caulk rated for exterior use, tooling it smooth for optimal water shedding.
The Critical Corner Connections
Corner joints where horizontal and vertical components meet create complex geometry vulnerable to leaks. These areas require special attention because they combine multiple materials and movement points.
Water infiltration at corners often indicates frame separation. Temperature changes cause materials to expand and contract at different rates, gradually opening gaps. Address this by:
-
Cleaning all surfaces thoroughly with denatured alcohol
-
Applying primer if recommended by sealant manufacturer
-
Using backing rod for gaps exceeding 1/4 inch
-
Installing sealant in proper width-to-depth ratio (2:1 optimal)
-
Tooling joint smooth to prevent water pooling
DIY Repair Guide: Step-by-Step Solutions
Replacing Weatherstripping
New weatherstripping transforms a leaking door into a weather-tight barrier. While styles vary, installation principles remain consistent across types.
Begin by documenting your existing weatherstripping configuration. Take photos showing how current stripping routes around corners and meets at joints. This reference prevents confusion during installation. Remove old weatherstripping carefully to avoid damaging mounting grooves or surfaces.
Clean mounting surfaces meticulously—any residue prevents proper adhesion:
-
Scrape away old adhesive with plastic putty knife
-
Clean with appropriate solvent (check manufacturer recommendations)
-
Allow surface to dry completely before installation
-
Test fit new weatherstripping before removing adhesive backing
When installing compression-style weatherstripping, maintain consistent compression around the entire perimeter. Too much compression prevents proper door closure; too little allows water infiltration. The sweet spot creates firm contact without excessive closing resistance.
Adjusting and Shimming Your French Doors
Proper door alignment eliminates many leak issues without replacing components. The process requires patience but delivers professional results.
Check door alignment using a 4-foot level placed vertically against each stile and horizontally across the head and threshold. Document measurements to track adjustment progress. Even 1/8-inch misalignment creates leak potential during wind-driven rain.
For doors requiring significant adjustment:
-
Support door weight with shims under the bottom rail
-
Loosen hinge screws slightly (don't remove completely)
-
Adjust position using wooden shims behind hinges
-
Tighten screws progressively, checking alignment frequently
-
Test operation throughout adjustment process
When Professional Help Becomes Necessary
While many repairs fall within DIY capabilities, certain situations demand professional expertise. Recognizing these scenarios prevents costly mistakes and ensures lasting solutions.
Structural issues exceed typical homeowner skills. If your door frame shows signs of rot, insect damage, or structural movement, professionals must address underlying problems before tackling leaks. These issues often extend beyond visible damage, requiring wall opening and proper reconstruction.
Water damage extending into walls requires immediate professional attention. What appears as minor staining might indicate extensive hidden damage. Professionals use moisture meters and thermal imaging to map damage extent, ensuring complete remediation.
Warranty considerations also influence the DIY-versus-professional decision. Many quality doors from suppliers like Doors and Beyond's Swing Patio Door include warranties that require professional installation and repair to remain valid.
Cost Analysis: Repair vs. Replacement
Understanding repair economics helps make informed decisions when your french patio door leaks when it rains. Let's break down typical costs to provide realistic budgeting guidance.
DIY Repair Costs
Basic weatherstripping replacement represents the most economical solution:
-
Weatherstripping kit: $30-75
-
Threshold seal: $40-100
-
Door sweep: $20-50
-
Caulk and backer rod: $15-30
-
Total DIY investment: $105-255
These materials typically last 5-7 years with proper installation, providing excellent return on investment. Even if you purchase specialized tools like a caulk gun or weatherstripping roller, total costs remain under $300.
Professional Repair Pricing
Professional repairs include labor and expertise that ensure lasting solutions:
-
Diagnostic inspection: $100-200
-
Weatherstripping replacement: $300-500
-
Threshold replacement: $400-600
-
Complete adjustment and sealing: $500-800
While professional repairs cost more initially, they often include warranties and address problems comprehensively. A professional can also identify issues you might miss, preventing future damage.
Understanding Replacement Costs
Sometimes replacement makes more economic sense than extensive repairs. How much is a patio french door depends on multiple factors, but understanding typical pricing helps evaluate options.
Standard exterior french patio door pricing ranges significantly:
-
Basic steel doors: $1,200-2,000
-
Mid-range fiberglass: $2,000-3,500
-
Premium wood doors: $3,000-5,000
-
Installation labor: $500-1,500
These figures help contextualize repair decisions. If repair costs approach 30% of replacement value, consider upgrading to modern doors with improved weatherproofing technology.
Prevention: Long-Term Maintenance Strategies
Preventing leaks costs far less than repairs. Implementing a maintenance routine extends door life while preventing water damage.
Seasonal Maintenance Schedule
Spring maintenance prepares doors for summer storms:
-
Clean and lubricate hinges with silicone spray
-
Clear debris from threshold drainage channels
-
Inspect and clean weatherstripping
-
Check exterior caulk integrity
-
Test door operation and alignment
Fall preparation protects against winter weather:
-
Apply weatherstripping conditioner to prevent cracking
-
Adjust door alignment for seasonal wood movement
-
Verify proper drainage before freeze season
-
Install storm doors for additional protection
-
Document any developing issues for spring repair
Monthly Quick Checks
Five-minute monthly inspections catch problems early. During routine cleaning, observe:
-
Weatherstripping condition and compression
-
Threshold drainage function
-
Door operation smoothness
-
Any new gaps or alignment changes
-
Signs of water staining or damage
This simple routine identifies developing issues before they become expensive problems.
Advanced Solutions for Persistent Leaks
When standard repairs fail, advanced techniques address stubborn leaks. These methods require more skill but provide solutions for challenging situations.
Installing Secondary Defense Systems
Adding redundant protection creates multiple barriers against water infiltration. Storm doors provide the most obvious secondary defense, but other options exist.
Drip caps installed above doors redirect water away from vulnerable top seals. While modern doors include integrated drip edges, adding an additional cap provides insurance against manufacturing defects or installation errors. Choose materials matching your exterior trim for seamless integration.
Modifying Drainage Patterns
Sometimes leaks result from poor site drainage rather than door defects. Water pooling against your threshold eventually finds entry points regardless of seal quality.
Evaluate drainage during heavy rain:
-
Does water flow toward or away from doors?
-
Are gutters directing water appropriately?
-
Has settling created negative grade?
-
Do paved surfaces slope toward entries?
Correcting drainage often involves:
-
Regrading soil to create positive slope
-
Installing French drains to redirect subsurface water
-
Adding gutter extensions to move roof water away
-
Creating swales to channel surface flow
Conclusion
When your french patio door leaks when it rains, swift action prevents minor annoyances from becoming major expenses. The strategies outlined here address virtually every leak scenario, from simple weatherstripping replacement to complex drainage modifications. Remember that most leaks result from maintenance neglect rather than catastrophic failure—regular attention keeps doors weather-tight for decades.
For those considering upgrading their doors entirely, exploring modern options with advanced weatherproofing technology from Doors and Beyond might provide the permanent solution you seek. Quality doors properly installed and maintained transform from potential leak sources into reliable barriers against nature's elements.
The investment in understanding and maintaining your French patio doors pays dividends through protected interiors, lower energy bills, and preserved home value. Whether tackling repairs yourself or hiring professionals, you now possess the knowledge to make informed decisions and achieve lasting solutions.
Frequently Asked Questions
How often should I replace weatherstripping on French patio doors?
Quality weatherstripping typically lasts 5-7 years with proper maintenance. However, harsh climates or heavy use may require replacement every 3-4 years. Annual inspection reveals deterioration before leaks develop.
Can I use regular caulk to seal French door leaks?
Never use basic latex caulk for exterior door sealing. Choose polyurethane or silicone sealants rated for exterior use with appropriate flexibility and adhesion ratings. The extra cost provides superior longevity and performance.
How Can I Replace Glass Pane in French Door?
To replace a glass pane in a French door, you’ll need to carefully remove the damaged glass, clean the frame, and install a new pane with glazing compound or sealant to ensure a secure fit. It’s a simple DIY project if you follow the right steps and safety measures. For a full step-by-step guide, check out this article: How to Replace Glass Pane in French Door – Easy DIY Method
Is it normal for French doors to have some air infiltration?
Minor air movement is normal, but feeling definite drafts indicates inadequate sealing. Modern doors should create nearly airtight seals when properly installed and maintained. Excessive air infiltration wastes energy and predicts future water leaks.
How to adjust French Door Hinges?
To adjust French door hinges, slightly loosen the hinge screws and shift the door up, down, or sideways until it aligns properly with the frame. Then retighten the screws to secure it. For a detailed guide, check out our full article: ……
How To Install Interior French Doors?
Installing interior French doors is easier than you think! Measure your doorway, align the hinges, and secure the doors to ensure a smooth swing and perfect fit. For detailed, step-by-step instructions, check out this full guide: How to Install Interior French Doors.
Recent Post

How to Cover Sliding Glass Doors: Best Window Treatment Ideas for Every Style and Budget
Read More
Standard Sliding Glass Door Sizes: Width, Height, Rough Opening, and How to Choose
Read More