Doors and Beyond

STYLISH TEXTURES. TIMELESS SPACE. Valid thru 7/31/26
SUMMER HOT SALE

Elevate Every Wall

Our fluted wall panels bring depth, elegance and a modern edge to any interior.

Valid thru 7/31/26
Special Offer

25% off

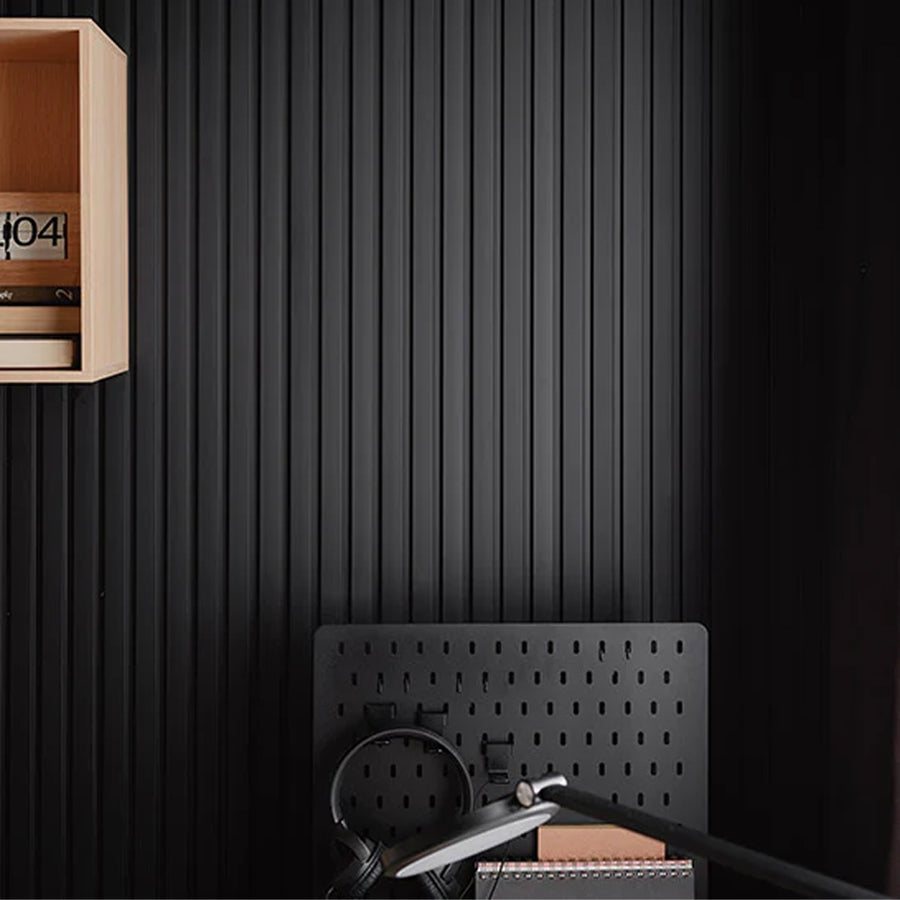
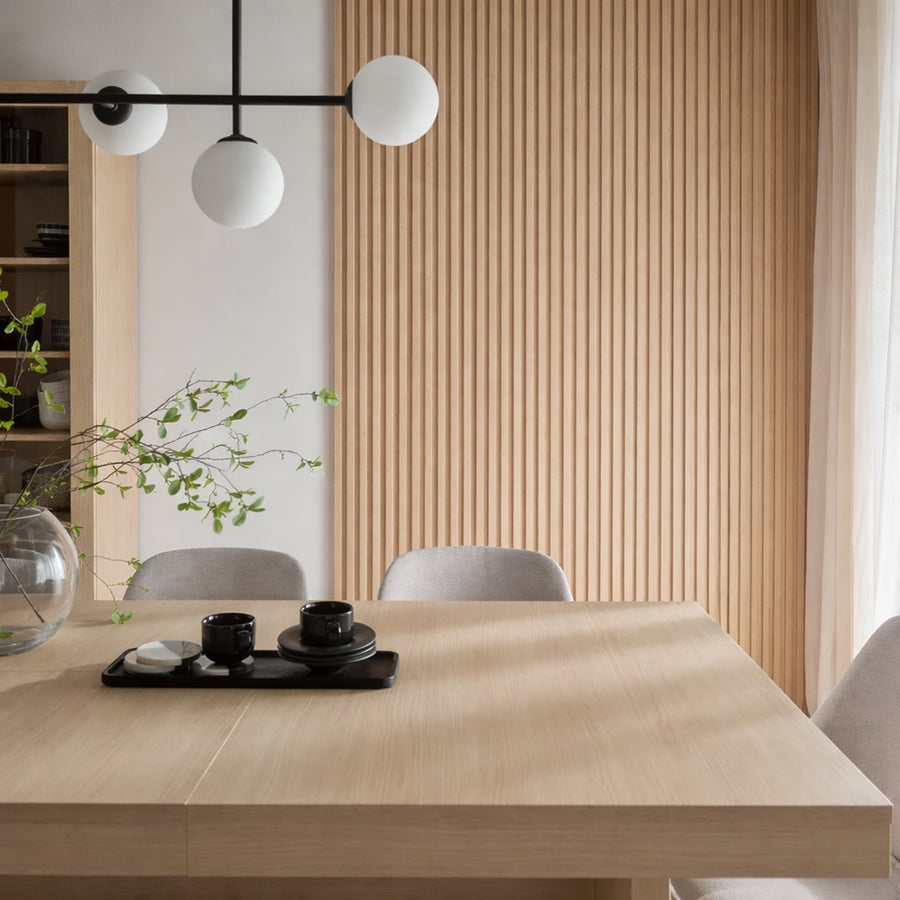
Vox Linerio Slat Panels

3D Fluted Design
Durable & Strong
Moisture Resistant
Easy Installation
FEATURED PRODUCT

$57.00

VOX Linerio Light Oak Slat Panel
NJ & FL Showrooms Bulk Discounts Available Custom Door Options Expert Support — 888-221-7848 Free Samples Available
MADE FOR YOUR SPACE

Custom Sliding Doors

Design sliding doors made precisely for your space. Choose from premium German aluminum profiles in three finishes, then personalize your doors with glass, mirror or wood panels.

Made in the USA
Custom Dimensions
3-Year Warranty
INTERIOR PANELS

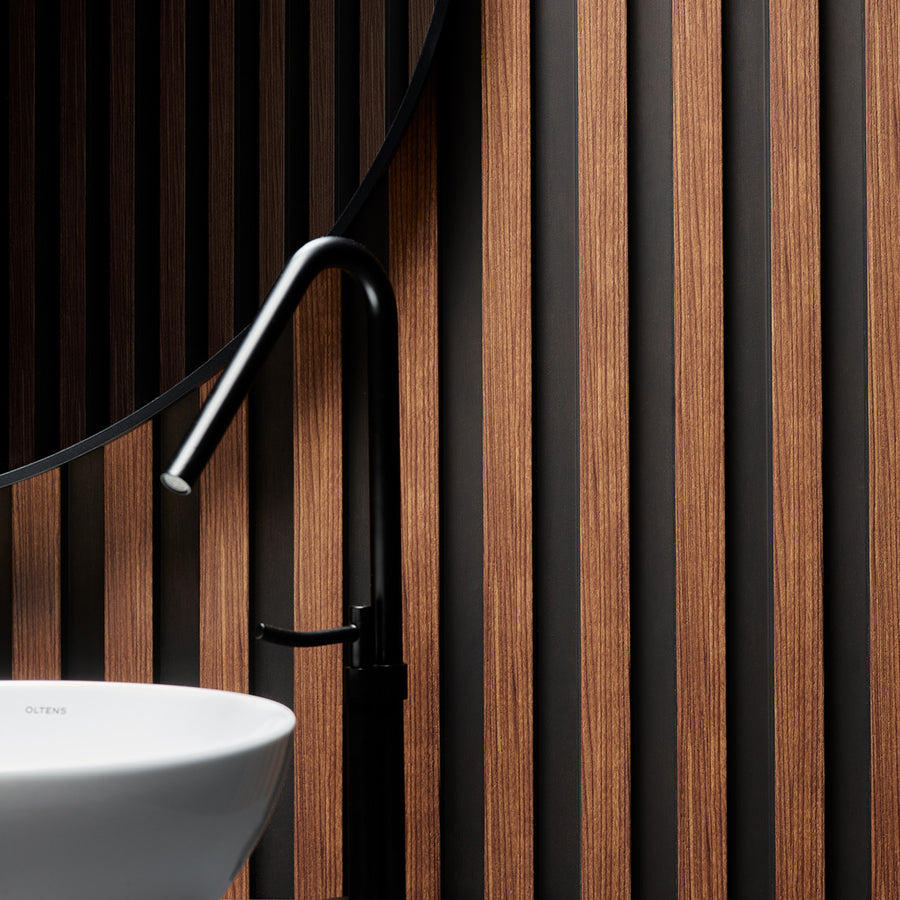
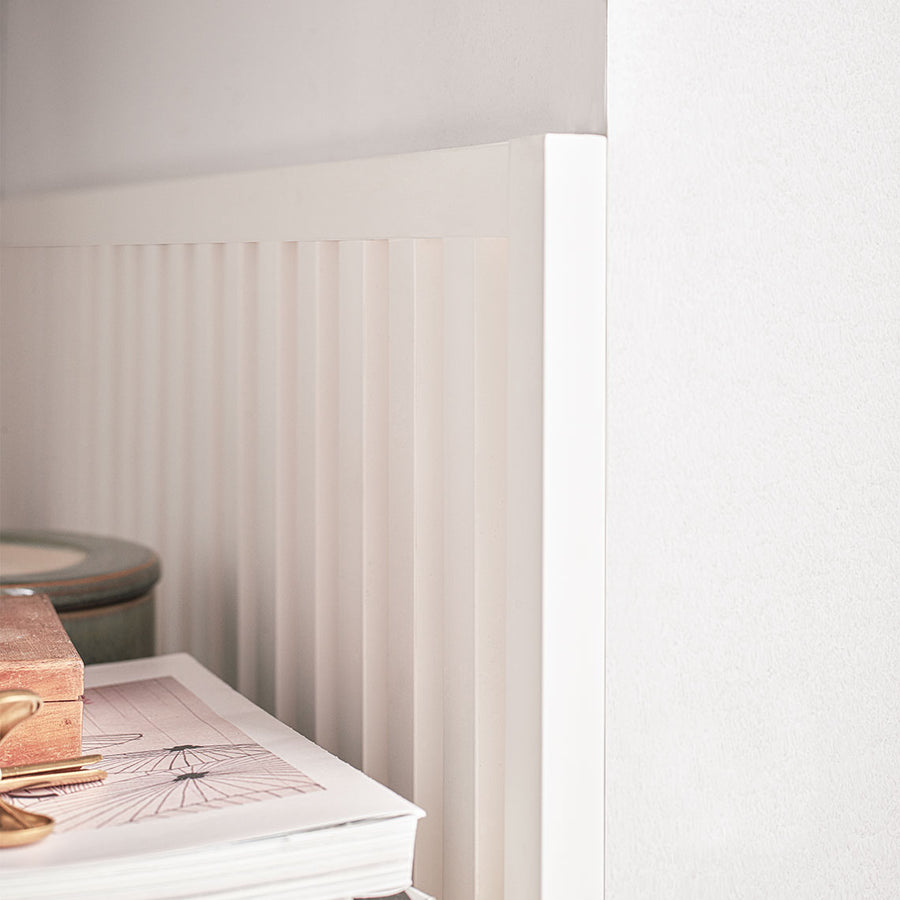
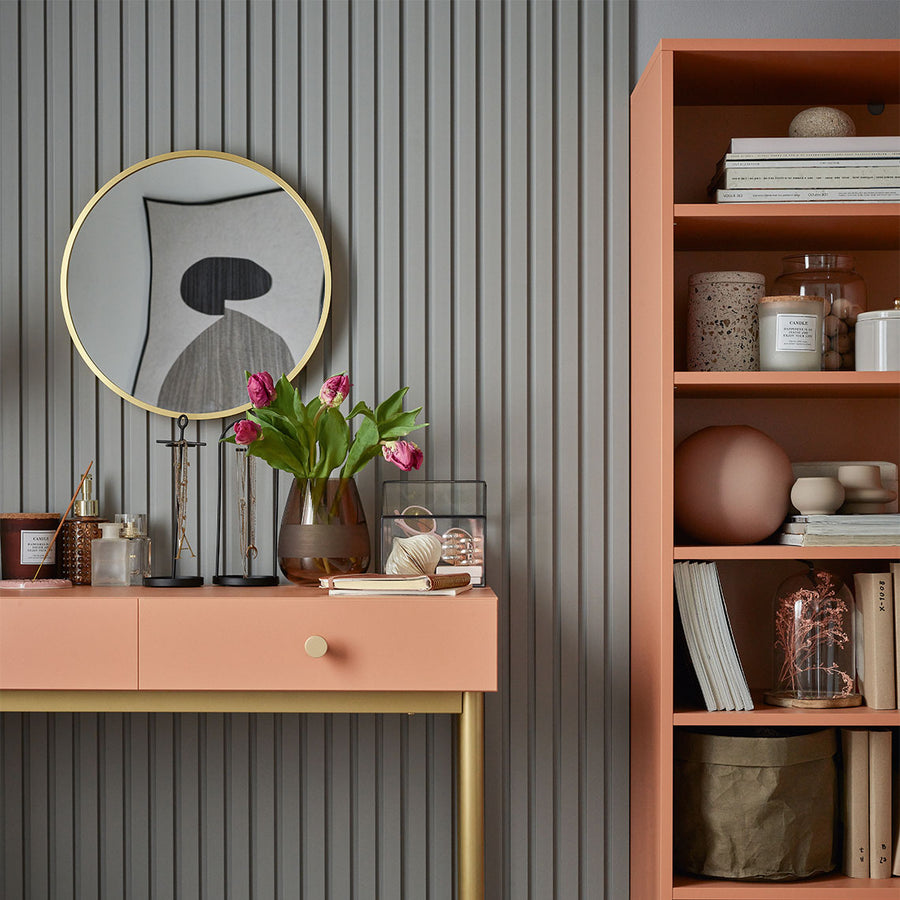
Wall Panels for Modern Interiors

Discover decorative wall panels designed to bring texture, depth and lasting character to residential and commercial spaces.

Explore All Wall Coverings
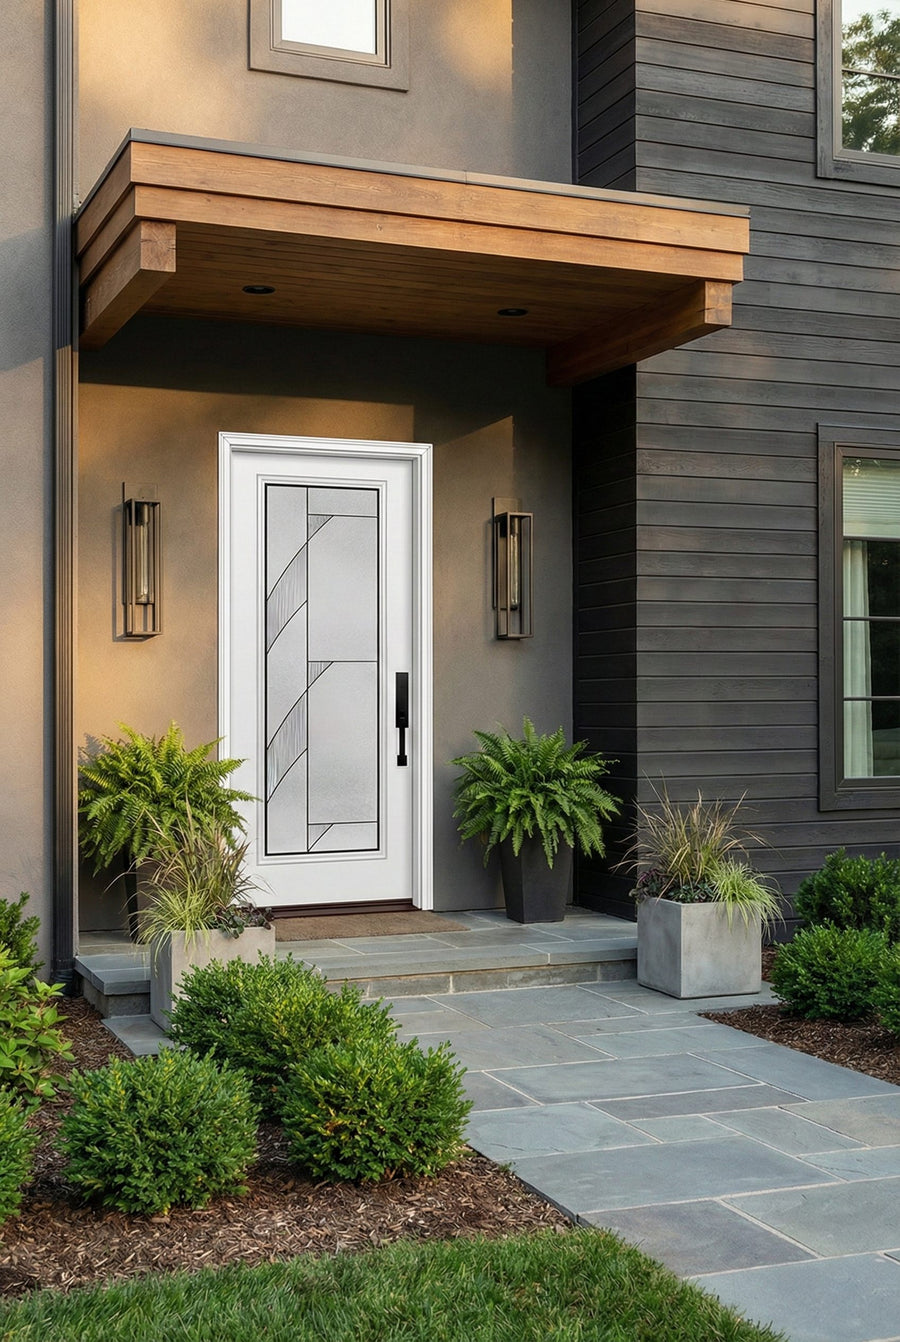
EXTERIOR FINISHING

Soffit Panels

Complete your exterior with soffit panels designed to give roof overhangs a clean, finished appearance. Explore contemporary and wood-inspired finishes that add lasting style, protection, and refined detail to any home.

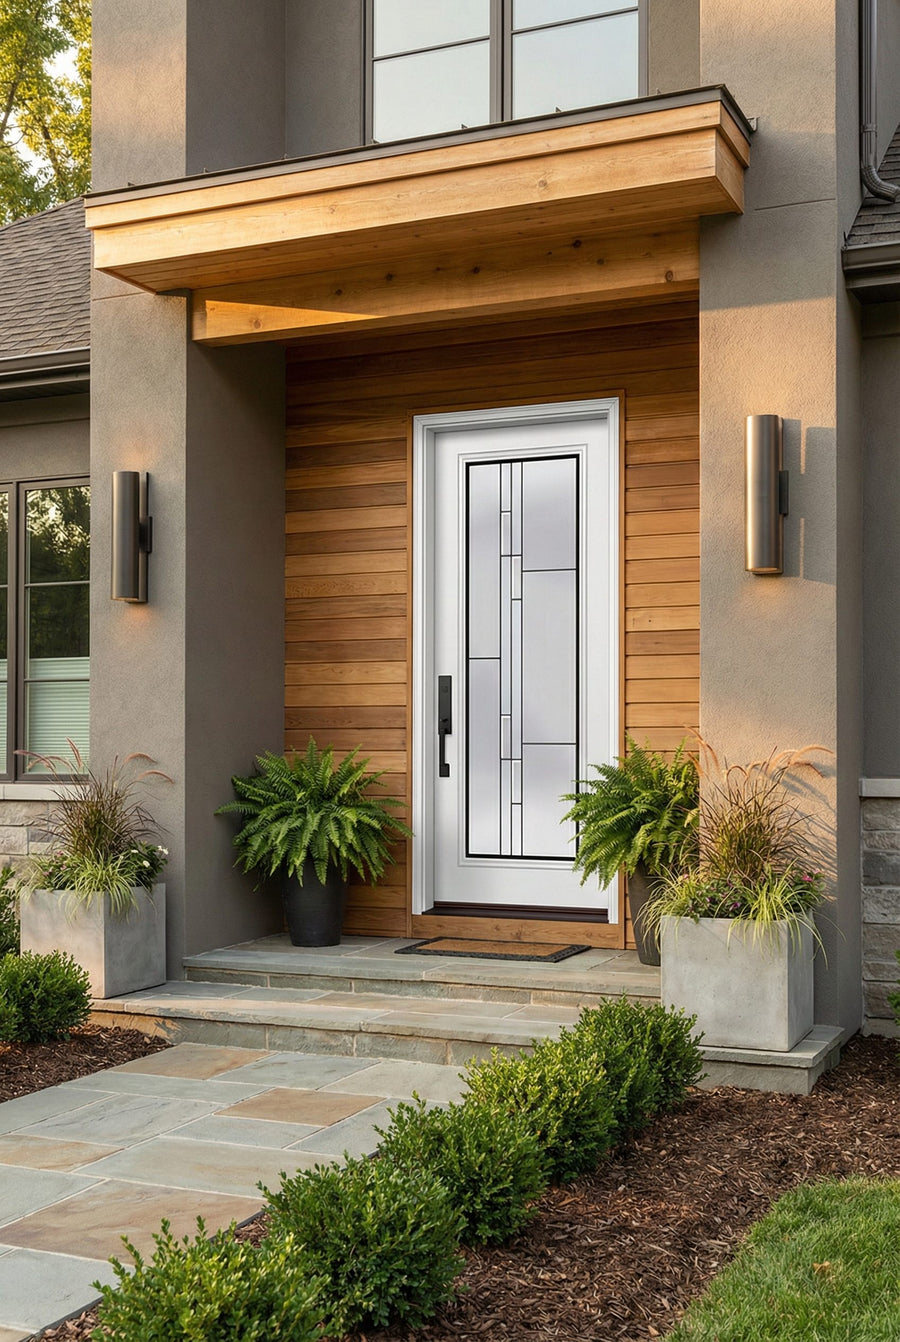
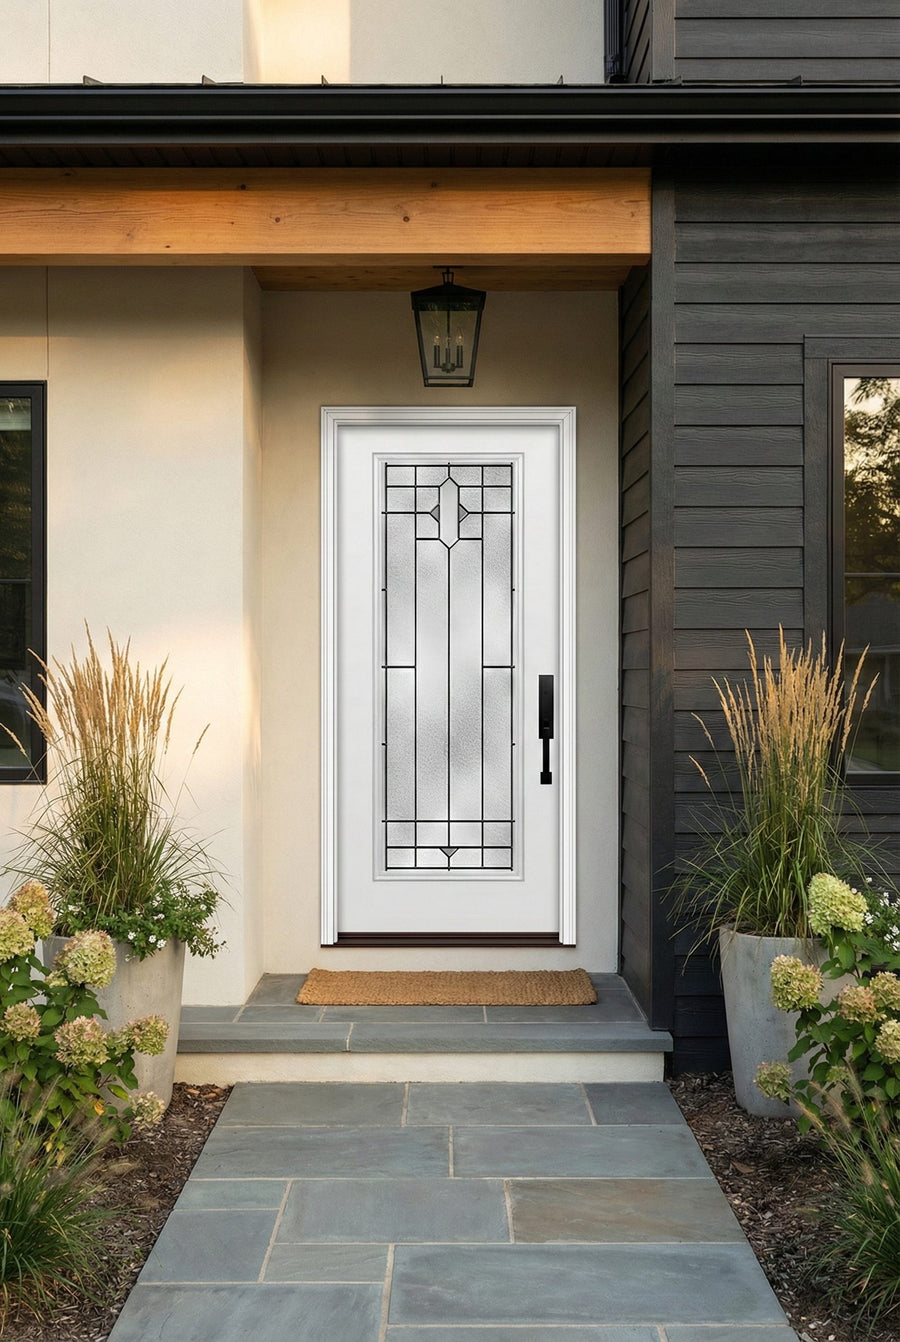
EXTERIOR CLADDING

Vinyl Siding Panels

Discover durable, low-maintenance exterior cladding systems designed to protect your home while creating a clean, modern architectural finish.

01 / 04 VOX

VOX Fronto Max

Modern Slatted Facade Panels

Bring natural warmth and clean architectural rhythm to exterior walls with lightweight, wood-inspired slatted panels. Designed for facades, soffits, terraces and balconies, Fronto Max delivers a durable, maintenance-free finish that can be installed vertically or horizontally.

Waterproof
Impact Resistant
Vertical or Horizontal
02 / 04 VOX

VOX Max-3

DURABLE FLAT FACADE PANELS

Create a clean, contemporary exterior with flat facade panels engineered for demanding weather conditions. Built with three-layer technology, VOX Max-3 combines exceptional mechanical and thermal resistance with a lightweight, maintenance-free system.

Three-Layer Technology
Weather & Temperature Resistant
Maintenance-Free
03 / 04 VILO

VILO Fronto

SLATTED CLADDING FOR INSIDE & OUT

Bring refined slatted texture to facades, terraces, balconies and interior walls with a versatile PVC-U panel system. VILO Fronto delivers a durable, maintenance-free finish while helping improve acoustic comfort across residential and commercial spaces.

Interior & Exterior
Maintenance-Free
Acoustic Comfort
04 / 04 Counter Title

VILO Vinyl Siding

PRACTICAL SIDING FOR MODERN RENOVATION

Refresh exterior walls with lightweight siding designed for fast installation and dependable protection. VILO panels help shield facades from rain, snow, wind and UV exposure while offering woodgrain and solid-color finishes for a wide range of architectural styles.

UV & Weather Resistant
Low Maintenance
Multiple Finishes
Explore all Siding Panels
FROM THE JOURNAL

Ideas, Guides & Inspiration

Expert advice, practical guides and design inspiration to help you choose, install and get more from your doors and architectural finishes.

EXPLORE ALL ARTICLES
Benefits of Tilt and Turn Windows

Benefits of Tilt and Turn Windows: What European Engineering Actually Delivers for US Homeowners

Tilt and turn windows offer six core benefits over standard US window types: controlled ventilation in two distinct modes, superior energy efficiency through multi-point sealing, easier interior cleaning without ladders, stronger security from multi-point locking hardware, better noise reduction through thicker frames and glass, and flexible operation that suits any room and climate. Tilt and turn windows are a European standard that has been slow to gain traction in the US market, partly because most American homeowners have never seen one operate. This guide explains what each benefit actually means in practical terms for a US home, and which homeowners get the most value from making the switch. What Makes Tilt and Turn Windows Different from Standard US Windows For most Americans, the reference point for windows is either the double-hung or the crank-out casement. Tilt and turn windows operate on a completely different principle, which is why their benefits are so different in practice. The Two Operating Modes Explained A single handle controls both operating modes from inside the room. Handle pointing straight down means the window is fully closed and locked, with the multi-point lock engaged around the full sash perimeter. Rotate the handle 90 degrees to horizontal and pull: the top of the sash tips inward approximately 4 inches while the bottom stays fixed, creating the tilt ventilation position. Rotate the handle fully to the upright position and pull: the entire sash swings inward on side hinges like a door, opening to roughly 90 degrees. No tool, no crank, no lifting. Why European Windows Are Built Differently US windows are typically designed around bug screens, outward operation, and standard imperial sizing. European windows developed around different priorities: maximum airtightness, multi-chamber frame profiles that improve thermal performance, and hardware that locks at multiple points simultaneously as a default rather than an upgrade. These design differences are what produce the benefits below, and they are structural rather than cosmetic. Benefit 1: Controlled Ventilation That Works in Any Weather Ventilation is the benefit most commonly cited in descriptions of tilt and turn windows, but it is also the most frequently underexplained. The real advantage is not that the window opens, but that it opens in a way no standard US window type can replicate. Tilt Mode for Rainy Days In tilt position, the top of the sash tips inward while the bottom stays locked in the frame. The geometry of this opening means rain hitting the exterior glass surface runs down and away from the opening rather than in. This allows safe ventilation during light to moderate rain, something that is impossible with a raised double-hung sash or a cracked casement. In humid US climate zones including the Southeast and Mid-Atlantic, this matters every summer. The window can stay open overnight in changing weather without the morning surprise of a wet interior sill. Turn Mode for Maximum Airflow Full turn mode gives an opening equivalent to a casement of the same frame size, with the additional advantage of no outward swing. No exterior clearance is needed, which makes tilt and turn suitable for installations above walkways, patios, and tight exterior spaces where a casement sash would obstruct. Turn mode is also the cleaning position, which is covered under Benefit 3 below. Benefit 2: Superior Energy Efficiency Through Multi-Point Sealing Energy efficiency is the most quantifiable benefit and the strongest financial argument for the premium price of tilt and turn windows. How Multi-Point Sealing Works When the handle is returned to the closed position, the espagnolette bar running around the perimeter of the sash engages locking points at the top, bottom, and both sides simultaneously. This continuous engagement presses the sash against a compression rubber seal along the full perimeter, eliminating air infiltration at every edge. Standard US double-hung windows lock at one or two points, leaving the remaining frame edges in contact with weatherstripping that degrades over time. According to the US Department of Energy, air infiltration through windows accounts for 25 to 30 percent of residential heating and cooling energy use. Sealing the full perimeter consistently is where tilt and turn hardware delivers measurable performance. U-Value and Frame Performance Frame construction matters as much as glass in overall window energy performance. European tilt and turn profiles typically use multi-chamber vinyl or thermally broken aluminum frames that create longer conductive paths for heat transfer, reducing U-values compared to simple extruded frames common in US residential windows. Pairing the tilt and turn mechanism with an appropriate glazing package, including low-e coatings and gas-filled cavities, captures the full thermal benefit of the European frame design. Benefit 3: Clean Both Sides of the Glass from Inside Your Home Cleaning access is the benefit most underestimated before ownership and most appreciated after. The practical impact compounds significantly in multi-story homes. In turn mode, the sash swings fully inward, bringing the exterior glass surface to arm's reach from inside the room. No ladder, no window cleaning service, no risk of leaning out over a window sill. For a two-story home with eight windows, this difference adds up to significant saved cost, saved time, and eliminated fall risk over a 10 to 20 year ownership period. Window Type Can You Clean Both Sides from Inside? Ladder Required for 2nd Floor? Double-hung Partially (if tilt-wash feature installed) No if tilt-wash / Yes if not Casement No Yes Sliding No Yes Tilt and Turn Yes, fully in turn mode No Tilt and turn is the only window type that provides complete interior access to both glass surfaces on upper floors without a ladder. This is also why tilt and turn windows are the standard specification in multi-story European apartment buildings. Benefit 4: Multi-Point Locking Security Security is where tilt and turn windows have the clearest technical advantage over every standard US window type, and it comes built-in rather than as an aftermarket addition. When the handle is in the closed position, locking points engage around the full perimeter of the sash simultaneously. A forced entry attempt at any single point is resisted by the hardware at all other points at the same time. Standard US double-hung windows lock at one meeting-rail latch. Casement windows lock at a single espagnolette or, at best, two points. Neither configuration provides the distributed resistance that a full-perimeter system delivers. Tilt Mode and Security Even in the tilt ventilation position, the bottom pivot and the lower locking points remain engaged. The sash is open at the top but mechanically fixed at the bottom, which makes forced entry from the exterior while ventilating significantly harder than a cracked casement or a raised double-hung sash. For ground-floor windows in particular, tilt mode allows overnight ventilation without the security compromise that other window types require. See more: How to Adjust French Doors to Stop Draughts Benefit 5: Better Noise Reduction Noise reduction is the benefit that converts the most undecided buyers, particularly those near busy roads, rail lines, or airports. The performance comes from two independent factors that stack on top of each other. The continuous perimeter seal eliminates air gaps, which are the primary transmission path for exterior sound. Standard windows with single-point latches allow air infiltration at every unsealed edge, and sound travels freely through those same gaps. Key performance numbers to know when specifying: The hardware seal alone improves on single-latch windows by approximately 3 to 5 STC points Pairing tilt and turn hardware with laminated acoustic glass adds a further 8 to 12 STC points through the PVB interlayer Homeowners near suburban arterial roads regularly report meaningful reductions in daily ambient noise after upgrading from double-hung to tilt and turn with acoustic glass What to Look for If Noise Is Your Primary Goal If noise reduction is the primary reason for choosing tilt and turn, specify laminated glass with an acoustic PVB interlayer in addition to the tilt and turn hardware. The frame seal contribution is meaningful but the glass upgrade is where the largest gains come from. Both improvements together produce windows that make a noticeable difference in daily ambient noise levels. Benefit 6: Child Safety in Tilt Mode Child safety is the most overlooked benefit in every existing article on tilt and turn windows, and for families with young children it is often the deciding factor once they understand it. In tilt position, the operating characteristics that matter for child safety are straightforward: The opening is restricted to approximately 4 inches at the top of the sash, positioned at the upper frame height The gap is too high and too narrow for a young child to access in either direction The tilt limiter hardware prevents the sash from opening further regardless of force applied from inside No window guards, window stops, or safety accessories are required to maintain safe ventilation in this mode US pediatric safety organizations consistently identify window falls as a leading cause of serious childhood injury in residential settings. Tilt and turn windows address this directly through operating mechanics rather than through accessories or restrictions. A partially raised double-hung sash or a propped-open casement creates an accessible opening at or near a child's reach height. Tilt mode structurally eliminates that risk while maintaining full airflow. The same dual-function engineering that makes tilt and turn windows safe for child-present ventilation is standard across our European patio doors collection, where multipoint locking and controlled opening positions are built into the door hardware from the factory. Who Gets the Most Value from Tilt and Turn Windows Not every homeowner benefits equally from the performance advantages of tilt and turn windows. Understanding which situations maximize the return on the premium price helps buyers make a practical decision. Best Fit Scenarios Multi-story homes where ladder-free cleaning has real compounding value over ownership. Homes near roads, railways, or airports where noise reduction is a daily quality-of-life factor. Households with young children where tilt mode ventilation eliminates window fall risk. Climate zones with significant temperature swings where air sealing directly reduces HVAC costs. New construction where European-standard sizing can be designed in from the start. When Standard Windows May Be a Better Fit Single-story homes where ladder-free cleaning provides minimal advantage. Projects where the replacement needs to match existing US-standard rough openings exactly, since tilt and turn windows are typically metric-sized. Situations where contractor familiarity matters more than performance. For context on how other door and window installation scenarios compare, the sliding glass doors installation guide covers how European-standard products fit into standard US residential projects. Tilt and Turn Windows vs. Double-Hung Windows: A Direct Comparison For most US homeowners, the relevant comparison is not against casement or sliding windows. It is against the double-hung that currently occupies roughly 70 percent of residential windows in America. Feature Tilt and Turn Double-Hung Operating modes 2 (tilt + turn) 1 (raise/lower sash) Ventilation in rain Yes (tilt mode) No Interior cleaning access Full, both faces Partial (tilt-wash models only) Air sealing Multi-point perimeter 2-point latch standard Child safety ventilation Yes (tilt restricts opening) No Security hardware Multi-point standard Single latch standard Noise reduction seal Continuous perimeter Weatherstripping at sash edges US market availability Specialty retailers Universal Installed cost Higher Lower Tilt and turn windows outperform double-hung in every performance category. The trade-offs are higher upfront cost and more limited US sourcing. For homeowners where performance matters more than cost, the comparison is not close. Frequently Asked Questions About Tilt and Turn Window Benefits The following questions represent what homeowners most commonly ask when evaluating tilt and turn windows for the first time. What is the main benefit of a tilt and turn window? The main benefit is controlled ventilation in tilt mode combined with full access in turn mode, both operated from inside with a single handle. This dual functionality in one unit is not available in any standard US window type. Are tilt and turn windows more energy efficient than standard windows? Yes. The multi-point perimeter lock creates a continuous compression seal around the full sash edge when closed, reducing air infiltration significantly compared to single or dual-latch US windows. The DOE attributes 25 to 30 percent of residential HVAC energy use to air infiltration. Do tilt and turn windows really help with noise reduction? The continuous seal eliminates air gaps, the primary path for exterior sound. Pair tilt and turn hardware with laminated acoustic glass for maximum results. The hardware alone adds 3 to 5 STC points; acoustic glass adds 8 to 12 more. Are tilt and turn windows safe for homes with children? Yes. In tilt mode the opening is restricted to a narrow gap at the top of the sash, too high and too narrow for a young child to access. Safe upper-floor ventilation is possible without window guards or accessories. Is the price premium for tilt and turn windows worth it? For multi-story homes, families with children, and homes near noise sources, the performance advantages justify the premium. For single-story homes where these benefits are lower priorities, standard US windows may deliver sufficient value at lower cost. See more: Door Slab vs Prehung: What Is the Difference and Which One Is Right for Your Project? Conclusion The benefits of tilt and turn windows cover six categories where European engineering delivers measurable performance that standard US windows cannot match in a single unit: ventilation control, energy sealing, cleaning access, security, noise reduction, and child safety. For homeowners where at least two or three of these benefits align with their situation, the premium over double-hung or casement alternatives is well justified.

READ ARTICLE
How to Open Tilt and Turn Window

How to Open Tilt and Turn Windows: Handle Positions, Both Modes, and What to Avoid

To open a tilt and turn window, start with the handle straight down. Rotate 90 degrees to horizontal for tilt mode, where the top tips inward for ventilation. Rotate 180 degrees to upright for turn mode, where the full sash swings inward. Always close the window completely before repositioning the handle, or the built-in safety mechanism will engage and lock the system. Tilt and turn windows are common in European construction but still unfamiliar to many US homeowners encountering them for the first time. The single handle controls two completely different opening modes, and using it out of sequence can lock the mechanism in seconds. This guide covers the correct handle positions, how to enter each mode, how to close properly, and what to do if the window gets stuck. The Three Handle Positions You Need to Know All operation of a tilt and turn window runs through three fixed handle positions. There are no in-between settings. The handle either sits in one of the three defined positions or it is being rotated between them. If you are new to this type of window and want context on how it differs from standard US casement windows, this comparison of tilt and turn windows vs casement covers the key differences in full. Position Handle Direction Window State When to Use Closed Straight down (6 o'clock) Fully sealed and locked Overnight, rain, security Tilt mode Horizontal (9 or 3 o'clock) Top tips inward ~4 inches Safe ventilation, light rain OK Turn mode Straight up (12 o'clock) Full sash swings inward Cleaning, max airflow, egress The handle rotates clockwise from 6 o'clock (closed) to 3 o'clock (tilt) to 12 o'clock (turn), then counterclockwise back to close. The same multipoint locking system found in our European patio doors uses this sequence -- locking engages automatically each time the handle returns to the closed position. The same multipoint locking engineering used in tilt and turn windows is standard across our European patio doors collection, where the closing sequence locks the sash at multiple points simultaneously without a separate deadbolt. How to Open in Tilt Mode (Safe Ventilation) Tilt mode is the ventilation setting. Only the top of the sash moves, tipping inward by about 4 inches while the bottom stays fixed to the frame. This is the mode to use for overnight ventilation, rooms with young children, or any situation where you want airflow without fully opening the window. Light rain will not enter because the inward angle causes water to run away from the opening. To open in tilt mode: Confirm the window is fully closed. All four edges of the sash should sit flush against the frame before touching the handle. Grip the handle and rotate 90 degrees to the horizontal position (3 o'clock if the hinge is on the right; 9 o'clock if on the left). Pull the top of the sash gently toward you. It will tip inward and stop automatically at approximately 4 inches. Tilt mode is now active. The bottom of the sash remains mechanically fixed. The window cannot be pushed further open from outside. The 4-inch stop point is a deliberate safety feature, not a hardware fault. In tilt mode, the bottom of the sash is locked in the frame perimeter, which means the window cannot be forced open from outside even when left unattended. This is why tilt mode is the recommended setting for overnight and unattended ventilation on any floor. Read more: Are French Doors More Secure Than Sliding Doors - A Full Comparison How to Open in Turn Mode (Full Inward Swing) Turn mode opens the full sash inward like a door, swinging on the side hinges. This delivers maximum airflow, gives complete access to both faces of the glass for cleaning from inside the room, and qualifies as an egress opening when the window is designated as an emergency exit point. To open in turn mode: Start from the fully closed position with the handle straight down. The sash must be completely seated against the frame before rotating the handle. Rotate the handle 180 degrees from straight down to straight up, passing through the horizontal position on the way. Do not stop at horizontal -- continue the full rotation. Pull the sash toward you. The full sash swings inward from the side hinges and opens to approximately 90 degrees. Step clear of the swing path before opening, particularly with larger sash sizes where the inward swing covers more floor area. The handle passes through the 90-degree tilt position on the way to 180 degrees. The window will not tilt open during this rotation as long as the sash started from fully closed. The mishandling device, which is described in detail in the Common Mistakes section below, only engages when the handle is moved while the sash is already in motion or only partially closed. How to Close a Tilt and Turn Window Correctly Closing correctly matters as much as opening. A window that appears closed but is not fully seated against the frame will not engage the multi-point lock properly, and rotating the handle before the sash is home is the leading cause of mechanism lockouts. Closing from Tilt Mode Push the top of the sash back to the fully closed position. Check that all four edges sit flush with the frame. Rotate the handle 90 degrees counterclockwise back to the straight-down position. The multi-point locking system engages as the handle reaches the 6 o'clock position, pressing the sash against the compression seal at multiple points simultaneously. Closing from Turn Mode Pull the sash back to the frame and push it home at all four corners. This step is more important coming from turn mode than from tilt, because the full inward swing allows the sash to drift slightly from the frame if not actively held closed. Rotate the handle from straight up, through horizontal, all the way back to straight down. Confirm the handle is fully in the downward position before stepping away from the window. Critical rule: The handle and the sash must always be in matching positions. A closed handle means a fully closed sash. Rotating the handle while the sash is even slightly ajar, at any stage, will trigger the mishandling device and lock the system until manually reset. Common Mistakes That Damage the Mechanism Most tilt and turn window problems reported by first-time US users trace back to the same three errors. Knowing them in advance prevents the frustration of a locked window and the cost of unnecessary repairs. The first is forcing the handle between positions. The handle has three defined positions and rotates only when the sash is correctly seated. If the handle resists rotation, the window is not fully closed. Applying force strips the internal gearing and breaks the connection between the handle and the locking points. Gentle repositioning of the sash is always the right first step, never force. The second is switching directly from tilt mode to turn mode without returning to closed. Some users try to rotate the handle past 90 degrees while the window is already tilted open. This triggers the mishandling device, a built-in safety mechanism that prevents the window from entering both modes simultaneously. Once triggered, the handle will not move until the device is manually reset. The window must return to fully closed before any mode change. The third is not fully seating the sash before locking. The multi-point lock engages around the full perimeter of the sash. If even one corner is not flush with the frame, the locking pin on that edge will not seat in its keep plate, leaving the window appearing to be locked while it is not. On windows with compression rubber seals, a correctly locked window will feel slightly firm to push inward. Read more: How to Adjust Tilt and Turn Windows - A Complete Step-by-Step Guide What to Do If Your Window Gets Stuck A stuck tilt and turn window is almost always caused by the mishandling device engaging, not by a mechanical failure. This built-in safety component prevents the window from being in tilt and turn modes at the same time. When it triggers, the handle locks in position until the device is manually reset. The fix is straightforward once you know where the release component is. Stuck in Tilt Mode and Will Not Close Push the top corner of the sash firmly toward the frame at the hinge side to re-seat it as fully as possible. Locate the release button or spring-loaded tab, typically a small component on the inside face of the sash edge just below the handle. Press and hold the release. While holding it, rotate the handle upward to the horizontal or upright position. Release the button. Now pull the sash fully open into turn mode. From turn mode, close the window completely and rotate the handle to the closed position. Handle Will Not Rotate at All The sash is almost certainly not fully seated in the frame. Check all four edges for visible gaps, particularly the bottom two corners. Push each corner gently against the frame surface. Once the sash is fully home, the handle should rotate without resistance. If the handle still resists after the sash appears flush, check whether any debris or paint buildup is preventing the sash from seating at the top corners. Sash Drops or Sits at an Angle When Open This is a hinge issue rather than a mishandling device issue. A loose or worn hinge allows the sash to sag under its own weight when in turn mode. Do not attempt to force the window closed or rotate the handle with the sash sitting at an angle. This scenario requires hinge adjustment or hinge replacement. If sash drop continues after hinge adjustment and the unit is older, it may indicate the hardware has reached the end of its service life. Our glass doors collection includes replacement options with modern, factory-adjusted hinge systems designed to maintain correct sash height across their full service life. See more: How to Adjust French Doors to Stop Draughts Conclusion How to open tilt and turn windows comes down to three handle positions: straight down to lock, horizontal to tilt, and straight up to turn. Always start from fully closed, never force the handle, and return to closed before switching modes. Once those three rules are in place, tilt and turn windows are among the most straightforward European-engineered products to operate day to day.

READ ARTICLE
How to Adjust Tilt and Turn Windows: Fix Every Common Problem with the Right Screw

How to Adjust Tilt and Turn Windows: Fix Every Common Problem with the Right Screw

To adjust a tilt and turn window, locate the adjustment screws on the hinges, locking points, and tilt limiter using a 4mm or 5mm Allen key. Turn hinge screws to shift the sash up, down, or sideways. Adjust locking cam screws to improve compression against the seal. Most fixes take under 15 minutes and require no specialist tools. This guide covers every common problem, organized by symptom so you can go straight to the fix that applies to your window. What You Need Before You Start Having the right tools ready before you start saves time and prevents mid-job trips to the hardware store. Tilt and turn windows use European hardware standards, so the sizes differ slightly from what most US homeowners keep in their toolboxes. Tools to prepare: 4mm Allen key (hex wrench), covers most hinge corner screws 5mm Allen key, used for lateral hinge screws on many European brands Flat-head screwdriver, for rotating locking cams Torx T15 or T20 bit, some hardware brands use Torx instead of hex Small flashlight, to see into hinge recesses clearly Clean cloth, to wipe away debris before adjusting A complete set of Allen keys ranging from 3mm to 6mm covers virtually every tilt and turn window brand on the US market. If you have a European window whose manufacturer you can identify, check the manual for the exact sizes before starting. See more: Door Glossary: Terms Every Homeowner Should Know Understanding Your Tilt and Turn Window Before Adjusting Tilt and turn windows operate very differently from standard single-hung or casement windows, and that difference is exactly why adjusting them requires a specific approach. Before touching any screw, it helps to understand what each part does. How Tilt and Turn Windows Work The handle position controls the operating mode. Handle pointing down means the window is locked closed. Handle horizontal opens the window in turn mode, swinging the entire sash inward like a door. Handle pointing up activates tilt mode, allowing the top of the sash to tilt inward for ventilation while the bottom remains secured. This dual-mode function is controlled by an espagnolette bar, a multi-point locking strip that runs around the perimeter of the sash. Every adjustment point on a tilt and turn window is part of or connected to this system. When one point goes out of alignment, it affects how the whole sash sits, closes, and seals. The Three Things That Go Out of Alignment Most tilt and turn window problems come from one of three sources: Hinges and pivots carry the full weight of the sash and may need periodic adjustment over time, which is why a dropped sash is typically a straightforward hinge fix rather than a structural issue. Locking cams are the eccentric rollers that press the sash against the frame seal; when they shift out of position they either cause stiff handles or allow draught gaps to develop. The tilt limiter is the scissor arm that restricts how far the window tilts inward and can extend or slip out of position, causing the window to over-tilt or resist opening in tilt mode. Understanding which of these three is causing your problem is the starting point for every adjustment in this guide. Troubleshooting, Find Your Symptom First Before touching any adjustment screw, identify the symptom accurately. The table below maps the most common tilt and turn window problems to their cause and the section where the fix is explained. Going to the right adjustment point immediately saves you from making unnecessary changes elsewhere. Symptom Most Likely Cause Where to Fix It Window won't close fully Sash dropped, hinges loose Hinge Adjustment (up) Gap at top when closed Sash sitting too low Hinge Adjustment (up) Gap at side when closed Sash shifted laterally Hinge Adjustment (lateral) Gap at bottom corner Sash tilted in frame Hinge Adjustment (in/out) Handle hard to turn Locking cams over-tightened Locking Point Adjustment Draught or air leak when closed Poor compression Locking Point Adjustment Rattling when closed Locking cams too loose Locking Point Adjustment Window tilts too far open Tilt limiter extended Tilt Limiter Adjustment Window stiff to tilt Hinges dry or misaligned Lubrication + Hinge Check Hinge-side gap in tilt mode Bottom pivot needs adjustment Hinge Adjustment (lateral) Most symptoms fall into one of three categories: a dropped or shifted sash (hinge), insufficient compression (locking cams), or a tilt limiter that has moved out of position. Starting with the right category prevents unnecessary adjustments and keeps the fix quick. How to Adjust Tilt and Turn Window Hinges Hinge adjustment is the most common fix for tilt and turn windows. Over time, the weight of the sash causes the hinge screws to back out slightly, allowing the sash to drop, shift sideways, or press unevenly against the frame. Most hinge adjustments take less than five minutes once you locate the right screw. Adjusting the Sash Up or Down The corner screw on the top hinge controls vertical sash position. On most European hardware brands this is a 4mm Allen key socket visible at the corner of the hinge body when the window is open. Steps: Open the window fully in turn mode to access the hinge Locate the corner adjustment screw on the top hinge Turn clockwise to raise the sash, counterclockwise to lower it Make no more than a half-turn at a time Close the window and check the gap at the top and bottom Repeat until the sash sits evenly in the frame Most sash drops are resolved with one to three quarter-turns. If the adjustment screw has no effect or reaches its limit, the hinge itself may need replacing. Adjusting the Sash Left or Right (Lateral Adjustment) A gap on one side of the closed sash typically means the sash has shifted laterally. The side-facing screw on the main hinge controls this movement. Open the window in turn mode and find the side-facing screw on the hinge body, which is usually a 5mm hex. Turning it clockwise moves the sash toward the hinge side; counterclockwise moves it away. Make quarter-turn adjustments and test after each one until the gap closes evenly. Lateral shifts are common after the window has been in use for several years or after a period of very hot weather causes the frame to expand. A shift of 1-2mm is usually all that is needed. Adjusting Sash Depth (In/Out Compression Position) If the sash presses too hard against the frame on one side but not another, or if you have a consistent draught despite correct lateral alignment, the in/out screw on the front face of the hinge adjusts how deep the sash sits into the frame opening. Turning this screw clockwise pulls the sash edge closer to the frame. Counterclockwise pushes it outward. This adjustment affects both draught sealing on the affected side and handle resistance, so make changes in small increments and test the handle action after each one. See more: How to Adjust French Doors to Stop Draughts How to Adjust Tilt and Turn Window Locking Points Locking point adjustment is the fix for draughts, rattling, and stiff handles. The locking cams are eccentric rollers that sit on the perimeter of the sash edge. When the handle is turned to the closed position, these cams engage with strikers set into the frame and pull the sash tight against the weatherseal. If the cams are too loose, air leaks in. Too tight, and the handle becomes difficult to operate. Locating the Locking Cams Open the window fully in turn mode to see the sash edge clearly. The locking cams are the small oval or teardrop-shaped metal pieces visible at intervals around the edge of the sash, usually at the top, bottom, and one or two points on the lock side. Each cam has a slot for a flat-head screwdriver. Increasing Compression to Fix Draughts Steps to increase compression: Mark the starting position of each cam with a pencil or marker Use a flat-head screwdriver to rotate the cam 10-15 degrees in the direction that moves the high point of the eccentric further from center Close and test: the window should seal more firmly and the draught should reduce Check the handle, it should still turn without excessive force Adjust one cam at a time so you can isolate the effect The correct compression level is enough to eliminate air movement at the seal without making the handle hard to operate. If a cam is turned past the correct position, the handle will feel stiff or will not fully latch. Reducing Compression to Fix a Stiff Handle Rotate the affected cam back toward its original position in small steps. A stiff handle is most often caused by one or two cams that are over-tightened rather than a problem with the handle mechanism itself. If the handle remains stiff after backing off all cams, the espagnolette bar may need professional attention. If your window hardware needs replacement rather than adjustment, Doors and Beyond carries European window and door hardware for tilt and turn systems. Visit our showrooms in NJ or FL, or shop online at doorsandbeyond.com. How to Adjust the Tilt Limiter The tilt limiter is a scissor-arm mechanism, usually located at the bottom of the sash or on the lower hinge area, that controls how far the window tilts inward. If your window tilts too aggressively and hits the sill, strains the hinge, or if it does not tilt far enough to provide useful ventilation, the tilt limiter needs adjustment. The symptom guides the fix. If the window tilts too far and touches the sill or wall, the limiter is fully extended and needs to be shortened. If it only tilts a few inches even with the handle fully up, the limiter is set too short or has seized. If it snaps open aggressively in tilt mode, the limiter has come loose from its adjustment position. To adjust, locate the threaded end of the scissor arm. A 4mm Allen key socket is standard. Turning the adjuster clockwise shortens the effective arm length, which restricts the tilt angle. Counterclockwise extends the arm and allows more tilt. Make half-turn adjustments and test the tilt fully after each one. Important safety note: Do not remove the tilt limiter entirely. It prevents the window from opening wide enough to pose a fall risk, particularly in upper-floor rooms with children present. If the limiter is broken or missing, replace it before using the window in tilt mode. See more: Sliding Glass Doors Installation: A Step-by-Step Guide Seasonal Adjustment, Why Your Window Needs Re-Tuning Each Year Most homeowners are surprised to learn that tilt and turn windows require minor re-adjustment with the seasons. This is not a product defect, it is a predictable consequence of thermal expansion and contraction affecting the frame, the surrounding wall structure, and the sash itself. Summer Adjustment: Frame Expansion PVC and aluminum frames expand measurably in summer heat, particularly in climates like the US South, Southwest, and mid-Atlantic states where temperature swings between seasons are significant. A window that operates perfectly in March may feel stiff in July without any physical damage occurring. The summer check is straightforward. First, test whether handle resistance has increased since spring. If it has, back off the locking cam compression by one small increment on the stiff side, lubricate all hinge points and cam surfaces with white lithium grease, and re-test the handle action and tilt operation before considering any further adjustment. Winter Adjustment: Frame Contraction When temperatures drop, frames contract slightly, which can open small draught gaps that were not present in summer. This is the most common reason for seasonal heating efficiency complaints from homeowners who have tilt and turn windows that were sealed correctly at installation. Start the winter check by running your hand around the closed sash edge to locate any air movement. Identify which locking cams sit nearest to the draught location and increase their compression by one small increment. Check the weatherstripping for compression: if it no longer springs back when pressed, replace it regardless of how the cams are set. Finally, confirm that tilt mode still operates freely, since the limiter arm can stiffen in sustained cold. Running this seasonal check takes about 20 minutes per window and eliminates the majority of comfort complaints without any part replacement. When to Adjust Yourself vs. When to Call a Professional Not every tilt and turn window problem is an adjustment issue. Knowing the line between what you can fix and what requires a professional prevents well-intentioned DIY work from turning a minor issue into an expensive repair. The decision tree is straightforward. Situation DIY Safe? Why Sash slightly misaligned, gaps at edges Yes Hinge screw adjustment, designed for user access Draught gap when closed Yes Cam compression adjustment Handle becoming stiff over time Yes Cam over-tightening, reverse adjustment Tilt angle too large or too small Yes Tilt limiter adjustment Window stiff after lubricating Yes Try lateral/depth hinge adjustment first Cracked or bent hinge arm No Requires part replacement Espagnolette bar moves but does not engage No Hardware failure, full replacement needed Frame warped, cracked, or delaminated No Structural issue beyond adjustment Water appearing at frame edges No May be seal failure or installation fault Window came partially off track or pivot No Safety risk, call a professional immediately If a screw reaches the end of its adjustment range without fixing the problem, stop. Forcing screws beyond their designed travel can strip threads or damage the hinge body. A part that has reached adjustment limits needs replacement, not more force. If your window requires new hardware components rather than adjustment, browse the European hinges collection at Doors and Beyond for compatible replacement parts. Maintaining Tilt and Turn Windows After Adjustment Adjustment solves the immediate problem. Regular maintenance prevents it from returning. A twice-yearly routine keeps tilt and turn windows operating at their designed performance level without any specialist equipment. What to Lubricate and How Often Every six months (spring and fall): Hinge pivot points and scissor arm, apply white lithium grease or specialist window lubricant Locking cams and their strikers, a thin film of grease reduces wear on the contact surfaces Tilt limiter arm joints, prevents stiffening in cold weather Espagnolette bar slide points, accessible through the handle opening when in turn mode Important: Do not use WD-40 on window hardware. It displaces moisture short-term but leaves a film that attracts dust and debris, which accelerates wear on precision mechanisms. Use dry lubricants or white grease specifically rated for window hardware. Annual Weatherstripping Inspection Run a finger along the weatherstripping gasket around the sash perimeter with the window closed. A gasket in good condition springs back immediately when compressed. If it stays compressed, leaves an impression, or has visible cracks, it has lost its sealing ability. Replacing weatherstripping is a 30-minute job that restores compression performance no matter how well the cams are adjusted. Frequently Asked Questions About Adjusting Tilt and Turn Windows What size Allen key do I need to adjust tilt and turn windows? Most tilt and turn window hinges use a 4mm Allen key for corner screws and a 5mm for lateral screws. European hardware brands dominate the US tilt and turn market, and 4-5mm covers the vast majority of cases. A full set from 3mm to 6mm handles any variant. Why won't my tilt and turn window close properly after adjusting the hinges? If hinge adjustment did not fully close the gap, check the locking cams next. Misaligned cams can prevent full closure even when the sash position is correct. Adjust one cam at a time on the side where the gap remains and test after each change. If both hinges and cams are correct and the window still does not close, the frame may be out of square. How do I know if my tilt and turn window needs adjustment or replacement parts? If the adjustment screws still have movement range and all hardware components are physically intact, adjustment will almost always solve the problem. If a hinge arm is cracked, a cam is stripped or spins freely, or the espagnolette bar moves without engaging the strikers, those parts need replacement rather than adjustment. Can I adjust a tilt and turn window without any experience? Yes, for hinge and cam adjustments. Both are designed to be user-accessible with basic tools. Work in small increments, test after each change, and stop if you encounter resistance that was not there before. The adjustment range is limited by design, which prevents accidental over-adjustment from causing damage. How often should tilt and turn windows be adjusted? Most homeowners find minor adjustment is needed every one to two years, or after an unusually hot or cold season. The pre-winter check is the most practical routine, verify compression, lubricate all hardware, and confirm the tilt limiter is set correctly before cold weather arrives. Does thermal expansion really affect tilt and turn window adjustment in the US? Yes, more than most homeowners expect. PVC frames can shift measurably between summer highs and winter lows, particularly in climate zones with significant seasonal temperature swings. A window adjusted correctly in spring may need minor cam recalibration in winter. This is normal behavior, not a quality issue. Adjusting tilt and turn windows is one of the most straightforward home maintenance tasks once you understand which screw controls what. Work from the symptom table, adjust one point at a time, and test after each change. Most problems resolve in under 20 minutes. If your window needs new hardware or a full replacement, Doors and Beyond carries tilt and turn windows and European hardware for the US market. Browse tilt and turn windows and European window hardware at Doors and Beyond at Tilt and Turn Windows. Showrooms in Milltown, NJ and Hallandale Beach, FL, or shop online with nationwide shipping. See more: Door Slab vs Prehung: What Is the Difference and Which Is Right for Your Project?

READ ARTICLE
Tilt and Turn Windows vs Casement

Tilt and Turn Windows vs Casement: An Honest Comparison for US Homeowners

Both U.S.-made casement windows and European tilt & turn windows can provide good energy efficiency, but European tilt & turn windows typically offer superior insulation without requiring additional upgrades. Standard U.S.-made casement windows often need up Casement windows open outward on a crank for maximum immediate airflow. Tilt and turn windows open inward in two distinct modes for controlled ventilation and easy inside cleaning. The right choice depends on your home layout, exterior space, and how you use each room.  Most comparisons of tilt and turn windows vs casement online come from European window suppliers with a clear preference for one type. This guide is different. Both window types have genuine strengths and real trade-offs, and the right choice depends on your specific home, floor level, and how you actually use the space. This breakdown covers every factor that matters without steering you toward either option. How Each Window Type Works Before comparing performance, understanding the mechanical difference between the two types makes every other factor easier to evaluate. These windows operate on completely different principles, which affects everything from where they can be installed to how they are cleaned. How Casement Windows Open and Operate A casement window is hinged on one side and opens outward using a crank mechanism, similar to a door swinging away from the frame. The crank rotates a gear that pushes the sash outward, allowing the window to open to a set angle determined by the hardware. When fully open, the entire glass panel is exposed to the outside, which is why casement windows are known for strong, unobstructed airflow. Casement windows are the most common operable window style in American homes. Most residential contractors are familiar with their installation and repair, and replacement parts are available at any major building supply retailer. Here is what defines them in practice: Available from all major US brands including ProVia, Andersen, Pella, Marvin, and JELD-WEN in standard imperial sizing Outward swing requires 24 to 30 inches of exterior clearance depending on sash size Standard locking is single or dual-point; multi-point available on premium product lines Sash swings away from the frame so exterior cleaning is straightforward from ground level but challenging above the first floor How Tilt and Turn Windows Open and Operate A tilt and turn window uses a single handle that controls two completely different opening modes. Rotate the handle to one position and the top of the sash tilts inward by approximately 6 inches, leaving the bottom fixed in place. Rotate to a second position and the entire sash swings inward like a door. The closing action automatically engages a multi-point locking system around the full sash perimeter, typically at 4 to 12 points depending on window size. This is built into the hardware mechanics rather than added as a separate accessory. The key operating characteristics: Single handle controls both modes: tilt (top opens partially, bottom stays fixed) and turn (full inward swing) Multi-point locking engages automatically on every close, no separate deadbolt or latch needed Inward opening means no exterior swing clearance is required Primarily sourced from European manufacturers; most use metric sizing rather than US standard imperial For a detailed look at how the hinge and adjustment system works, see our guide to adjusting tilt and turn windows. Head-to-Head Comparison: Tilt and Turn Windows vs Casement Placing both window types directly against each other across the factors that matter most gives a clearer picture than reading separate descriptions. The table below covers the ten criteria US homeowners ask about most. Factor Casement Windows Tilt and Turn Windows Opening direction Outward; requires exterior clearance Inward; no exterior space needed Ventilation control One setting: fully open or closed Two settings: tilt (partial) or turn (full) Locking mechanism Single or dual point on handle Multi-point, 4 to 12 locks around frame Exterior space required Yes, sash swings outward No Cleaning upper floors Requires exterior access or ladder Fully accessible from inside, both faces Child safety during ventilation No intermediate locked position Tilt mode cannot be pushed open from inside US market availability Widely available, all major brands Fewer suppliers, primarily European imports Egress compliance Yes when fully open Yes when fully open Energy sealing performance Moderate Excellent with compression seal and multi-point lock Contractor familiarity in US High; standard US installation Lower; recommended European hardware experience Casement windows win on US availability for standard colors and sizes, contractor familiarity. Tilt and turn windows win on child safety during ventilation, interior cleaning access on upper floors, multi-point security, superior thermal and noise insulation, tighter weather seal, and suitability where exterior swing space is limited. Ventilation: Which Delivers Better Airflow? Both window types ventilate well, but in fundamentally different ways. Understanding the distinction matters more for daily-use rooms like kitchens and bedrooms than it does for occasional-use spaces. Casement windows in their fully open position expose the entire glass panel to outside air. When positioned correctly relative to wind direction, the outward-swinging sash can act as a scoop that channels a breeze into the room, making casement windows particularly effective for natural cross-ventilation in living areas and kitchens where large volumes of fresh air are needed quickly. Tilt and turn windows in tilt mode open only the top few inches of the sash. This restricted opening delivers less total air volume, but the window can stay open overnight, during light rain, or in homes with pets and young children without creating a safety concern. In turn mode, the tilt and turn window delivers airflow comparable to a casement of the same size, with the added advantage of no exterior obstruction. The practical verdict for ventilation: if maximum immediate airflow is the priority, casement has the advantage. If the window will stay partially open for extended periods, especially in bedrooms or rooms facing the street, tilt mode is the more practical solution for safe long-duration ventilation. Energy Efficiency and Sealing Energy efficiency is the factor most often used to argue for one window type over the other, but the honest answer is more nuanced than most comparison articles acknowledge. Casement windows are recognized by the US Department of Energy as among the most energy-efficient operable window styles because the sash presses tightly against the frame when closed, creating minimal gaps for air infiltration. The National Fenestration Rating Council consistently rates well-made casement windows at competitive U-Factor values. The NFRC also notes that performance depends on the complete window assembly rather than the frame or opening style alone. Tilt and turn windows achieve similar sealing performance through a different mechanism. The multi-point locking system presses the sash against a compression rubber seal at multiple points simultaneously, which can achieve airtightness that matches or exceeds a single-latch casement. European-engineered tilt and turn systems are designed to meet Passive House-level standards in some configurations. In practice, both types can perform well on energy efficiency when built with quality materials and installed correctly. Frame material, glazing configuration including low-e coatings and gas fill, and installation quality have a larger impact on real-world energy performance than the opening style alone. Neither type wins outright on this criterion. Security Considerations Security is where tilt and turn windows show the clearest structural advantage, though modern casement hardware has narrowed the gap significantly in recent years. A standard casement window relies on a handle latch that engages one or two points in the frame. Modern casement windows from reputable US manufacturers have improved significantly, with multi-point locking available on premium product lines, but it is still not the default configuration across the category. A tilt and turn window locks at 4 to 12 points around the frame perimeter every time the handle is returned to the closed position. This is not an optional upgrade but the standard operating mechanism. In tilt mode, the window remains mechanically locked at the bottom while ventilating at the top, which means it cannot be pulled open from the outside. For ground-floor windows and rooms accessible from outdoor structures, this multi-point default locking provides a meaningful security advantage over most standard casement configurations. Read more: Are French Doors More Secure Than Sliding Doors - A Full Comparison Cleaning and Maintenance Cleaning is the category where the practical difference between the two types is most obvious and most consistently underestimated when homeowners are choosing. The impact compounds on multi-story homes. Casement windows clean easily from inside on the interior face. Cleaning the exterior face of a ground-floor window is straightforward. The challenge arrives on the second floor and above: to clean the exterior face of a casement window, you need exterior access, a ladder, or a professional window cleaning service. This is a common frustration in multi-story US homes where casement windows were specified without considering long-term maintenance access. Tilt and turn windows in turn mode allow the full sash to swing inward, giving complete access to both the interior and exterior glass faces from inside the room. Cleaning the outside of a second or third-floor tilt and turn window is a standard household task rather than a project requiring equipment or a service call. Hardware maintenance tells a different story. The casement crank mechanism is simpler than a tilt and turn hinge system. When a casement crank wears out, replacement parts are widely available and the repair is straightforward. Tilt and turn hinge systems are more complex and occasionally need alignment adjustment, though they are engineered for long service life when maintained on a regular schedule. See more: Swing vs Sliding vs Pocket vs Barn Doors - Which Interior Door Is Right for You US Market Availability and What to Expect This is the factor that most comparison articles skip entirely, largely because most of them are written by European window suppliers who have every incentive to downplay it. For US homeowners, it is among the most practical considerations in the decision. Casement windows are manufactured and sold by every major US window brand in standard imperial sizing. Local contractors who have installed windows for any length of time know casement systems well, and repair parts are available at most building supply retailers. Tilt and turn windows in the US are primarily sourced from European manufacturers or specialty importers. The sizing systems are typically metric-based, and window openings in American homes may require modification or custom sizing. Not every US contractor has experience with tilt and turn hinge systems, and an improperly installed tilt and turn window creates alignment and sealing problems that are difficult to diagnose without knowledge of the European hardware. The availability gap has narrowed as European-influenced architecture has grown in the US. For homeowners interested in European-engineered door and window systems, our European patio doors collection applies the same inward-opening and multi-point locking engineering to full-size door panels. Working with a supplier familiar with European hardware standards helps ensure that any European-system product is installed correctly and adjusted properly from day one. Which Type Should You Choose? A Decision Guide by Situation Both window types are excellent when matched to the right application. The clearest way to choose is not to compare them abstractly but to consider the specific room, floor level, and use case. The table below is the framework that most comparison guides omit. Your Situation Better Choice Key Reason Ground floor facing yard or street Tilt and turn Tilt mode keeps window locked while partially open Upper floor bedroom, nighttime airflow Tilt and turn Tilt mode stays open safely without full-open risk Kitchen needing maximum airflow quickly Casement Full opening moves more air volume immediately Home with young children or pets Tilt and turn Tilt mode cannot be pushed fully open from inside Limited exterior space (walkway or patio below) Tilt and turn No outward swing required Standard US contractor handling installation Casement Familiar hardware, no European hardware training needed Matching existing windows in US home Casement Standard sizing, visual and style compatibility New construction with European-style specs Tilt and turn Full integration with European door and window hardware Multi-story building, no exterior cleaning access Tilt and turn Both glass faces clean from inside on any floor Budget-first project Casement Lower upfront with more competitive US supplier options No single type wins across all situations. The most practical approach for many homes is using both: tilt and turn on upper floors and security-sensitive ground-floor openings, casement in high-ventilation rooms with adequate exterior clearance. For homeowners comparing glass configurations across both windows and doors, our glass doors collection includes options that complement both casement and tilt and turn specifications in modern residential projects. See more: Changing French Doors to Sliding Doors - Is It Worth It? Conclusion Choosing between tilt and turn windows vs casement comes down to how each window will actually be used. Casement windows are the US standard for good reason: wide availability, strong airflow, and familiar installation. Tilt and turn windows earn their premium in multi-story cleaning access, child-safe ventilation, and multi-point security. Most homes benefit from both types placed where each performs best.

READ ARTICLE
how to clean tilt in windows

How to Clean Tilt and Turn Windows: Glass, Frame, Hardware, and What Products to Avoid

One of the practical advantages of tilt and turn windows is that both sides of the glass can be cleaned from inside the room without a ladder, using the turn mode to swing the sash inward and bring the exterior glass surface within reach. This guide covers the full cleaning process for glass, frame, tracks, and hardware, along with the products and tools that should never be used on these windows. Quick Answer To clean tilt and turn windows: switch to turn mode to swing the sash fully inward, giving access to the exterior glass from inside. Clean glass with warm water and mild dish soap or a 50/50 white vinegar and water solution using a microfiber cloth, working top to bottom. Dry edges with a lint-free cloth. Never use ammonia-based cleaners, abrasive pads, or petroleum-based lubricants on these windows. What You Need Before You Start Having the right tools and cleaning solutions ready before opening the window makes the process faster and avoids leaving residue on the hardware or seals. Tools Microfiber cloths (2 to 3): one for washing, one for drying, one for the final edge pass. Microfiber leaves fewer lint traces than paper towels or standard cloths. Squeegee (optional): useful for large glass panels; pull top to bottom in overlapping strokes and wipe the blade with a clean cloth after each stroke. Soft dry brush or dry cloth: for removing loose debris from track channels before introducing any moisture. Small soft-bristle brush: for cleaning hardware grooves and corners where a cloth cannot reach. Cleaning Solutions Warm water with a few drops of mild dish soap: the safest and most versatile option for all window components including glass, frame, and seals. 50/50 white vinegar and warm water: effective streak-free alternative for glass surfaces; apply to cloth, not directly to glass. Store-bought glass cleaner: check the label before use; it must be ammonia-free. Ammonia can damage frame finishes and some glazing coatings. See more: How Do Tilt and Turn Windows Work? Handle Positions, Modes, and Troubleshooting Cleaning the Glass: Exterior and Interior The cleaning technique is the same for interior and exterior glass surfaces, but the window mode determines which surfaces are accessible. Using the correct mode for each task is the key to cleaning tilt and turn windows efficiently. Use Turn Mode to Access the Exterior Glass Rotate the handle to the horizontal position and swing the sash fully inward - this brings the exterior glass within arm's reach so you can clean both sides from inside the room without a ladder. Tilt mode only opens the top few inches and is not enough for full exterior cleaning. Use turn mode to clean, then switch to tilt mode to ventilate while the glass dries. Step-by-Step Glass Cleaning Step 1: Clear the window area. Remove any interior window treatments, blinds, or curtains and clear objects from the sill before opening the sash. Step 2: Switch to turn mode. Rotate the handle to the horizontal position and swing the sash inward until it is fully open. Ensure the room has clearance for the sash to swing in completely. Step 3: Apply solution to cloth. Dampen a clean microfiber cloth with the cleaning solution. Apply it to the cloth rather than spraying directly onto the glass to avoid solution running into the hardware or frame channels. Step 4: Clean the exterior glass first. Wipe the exterior glass surface from top to bottom in smooth, consistent strokes. Starting at the top and working down prevents dirty solutions from running over already-cleaned areas. Step 5: Dry the edges. Use a dry lint-free cloth to wipe the edges and perimeter of the glass. This step is critical: edge drips cause streaks when the sash is returned to the upright position. Step 6: Clean the interior glass. Repeat steps 3 to 5 on the interior glass surface while the sash is still in the open position. Step 7: Return to closed and lock. Swing the sash back to the closed position and rotate the handle to the downward locked position. Check that the handle engages fully before finishing. Streak-Free Tips Clean in shade or on overcast days: direct sunlight dries the solution before you can wipe it, leaving streak marks. Apply solution to the cloth, not the glass: spraying directly onto glass lets the solution run into hardware and frames. Work consistently top to bottom: changing direction mid-pane causes streaking. Use a dry lint-free cloth for the final edge pass: standard cloths leave lint on the glass edge that reappears as streaks after drying. Cleaning the Frame and Track Channels The frame and track channels require attention separately from the glass. Dirt and debris in the tracks can affect how smoothly the sash operates over time, and the wrong cleaning product on the frame can damage the finish. Frame Surfaces Wipe the frame on both the exterior and interior faces with a damp cloth and mild soapy water. Rinse with a clean damp cloth and dry immediately with a dry cloth. For uPVC and aluminum frames, this process is sufficient. For wood frames, avoid leaving excess moisture on the surface and dry thoroughly after wiping. Do not use solvent-based cleaners, paint thinners, or acetone-based products on any frame material, as these dissolve protective coatings and permanently damage the finish. Track Channels The track channels along the top and sides of the frame opening collect dust, dirt, and occasionally hardened debris. Always start with a dry soft brush or dry cloth to remove loose material before introducing any moisture. Wetting dry debris turns it into a paste that is harder to remove than the original dirt. After dry brushing, wipe the channels with a damp cloth and pay attention to the corners. Make sure the channels are fully dry before operating the window, as water pooling near the locking hardware can affect long-term mechanism performance. See more: Tilt and Turn Window Problems: 7 Common Issues, Causes, and How to Fix Them Browse tilt and turn window options at Doors and Beyond: Browse Tilt and Turn Windows at Doors and Beyond Hardware and Seal Care The hardware and rubber seals are the components most vulnerable to damage from the wrong cleaning product, and they are what keep the window operating smoothly and sealing tightly over the long term. Cleaning and Lubricating the Hardware The espagnolette rods, locking points, and hinge hardware on the sash edge can be wiped with a damp cloth to remove surface dust and grime. After cleaning, apply a small amount of silicone-based lubricant to the rod surfaces and locking points. Never use oil-based lubricants such as WD-40, which attract and hold debris over time and eventually worsen the buildup they are meant to prevent. Do not spray cleaning solution directly onto the hardware, as excess liquid can work into the mechanism and affect long-term operation. Caring for the Rubber Seals The rubber weatherstripping seals around the frame perimeter compress against the sash when the window is locked, creating the tight seal that gives tilt and turn windows their energy efficiency advantage. Once a year, wipe the seals with a damp cloth all the way around the frame to keep them clean and pliable. Avoid petroleum-based products and solvent-based cleaners on rubber seals, as these cause the rubber to swell, become brittle, or lose its flexibility over time. Seals that are visibly cracked, flattened, or separating from the frame groove should be replaced rather than cleaned. What to Do If the Handle Feels Loose A loose or wobbly handle is usually a simple fix that requires no specialist knowledge. Most European-style tilt and turn window handles have a small cover plate at the base of the handle. Lift this plate and rotate it 90 degrees to expose two screws beneath it. Tighten both screws with a standard Phillips screwdriver until the handle sits firmly. Replace the cover plate. If the handle continues to wobble after tightening, the internal gearbox connection may have worn and a window technician should assess it. See more: Tilt and Turn Windows Pros and Cons: An Honest Assessment for US Homeowners Products and Tools to Avoid Using the wrong cleaning product on a tilt and turn window can damage the glass coating, dissolve the frame finish, or degrade the rubber seals in ways that are not immediately visible but reduce performance over time. The following should not be used on any component of these windows: Ammonia-based glass cleaners: damage frame finishes and some glazing coatings. Always check the product label before use; if ammonia appears in the ingredients, choose a different product. Abrasive cleaners or scouring powders: scratch the glass surface and strip protective coatings from the frame. Abrasive scrub pads or steel wool: same risk as abrasive cleaners; even light scrubbing leaves micro-scratches that cloud the glass over time. Solvent-based products including paint thinner, acetone, and turpentine: dissolve protective coatings on uPVC, aluminum, and wood frames and permanently damage the finish. Oil-based lubricants such as WD-40: attract debris into the hardware mechanism and degrade rubber seals on contact; use only silicone-based lubricant on tilt and turn hardware. Pressure washers directed at the frame or hardware: force water behind the seals and into the mechanism; exterior surfaces should be cleaned by hand only. How Often to Clean Each Component A consistent frequency schedule keeps tilt and turn windows performing well without requiring excessive time or effort at any single session. The table below covers every component and its recommended cleaning interval. Component Recommended Frequency Notes Glass , interior surface Monthly or as needed More often in dusty rooms or near cooking areas Glass , exterior surface (turn mode) Every 1 to 3 months More frequent near trees, construction, or coastal areas Frame , exterior and interior Every 3 months Quarterly wipe-down prevents buildup that is harder to remove later Track channels Every 3 months Clean with dry brush first; damp wipe after; dry before operating Espagnolette and locking hardware Every 3 months (clean); every 6 months (lubricate) Silicone lubricant only; not oil-based Rubber seals Annually Damp wipe; inspect for cracking or separation; replace if degraded Handle screws Annually Check tightness; tighten if any wobble; replace if stripped The three highest-impact cleaning tasks are quarterly glass and track cleaning, six-monthly hardware lubrication, and annual seal inspection. These three together maintain the mechanical and thermal performance of the window and catch the most common early signs of wear before they require professional repair. Final Thoughts Cleaning tilt and turn windows is straightforward once the turn mode access advantage is understood. The exterior glass is reachable from inside on every floor, both surfaces clean with the same mild solution, and the frame and hardware need nothing beyond periodic wiping and annual seal care. The main risk is using the wrong product rather than using the wrong technique. Looking for tilt and turn windows for your home? Browse options at Doors and Beyond: Shop Tilt and Turn Windows at Doors and Beyond

READ ARTICLE
Tilt and Turn Windows as Egress Windows

Single Tilt and Turn Windows as Egress Windows: What You Need to Know

If you are planning a bedroom, basement conversion, or ADU and want to use tilt and turn windows, you may be wondering whether they qualify as egress windows under US building code. The short answer is yes, they can. This guide explains what egress means, why tilt and turn windows are well suited for it, and what the approval process looks like in practice. Single tilt and turn windows can qualify as egress windows under US building code when they are sized to provide a large enough opening in turn mode. The specific minimum dimensions required depend on your location and project type and are confirmed by your architect or local building department. The key is that the window opens fully inward in turn mode, creating a clear, unobstructed exit opening. What Is an Egress Window? An egress window is simply a window large enough to serve as an emergency exit from a sleeping room, basement bedroom, or habitable attic. US building codes require at least one qualifying egress opening in these spaces so that occupants can escape and emergency responders can enter if needed. The requirements cover minimum opening size, minimum height and width, and maximum sill height from the floor. The exact numbers are set by the building code version your local jurisdiction uses, and they are verified by your architect or building department when the project is permitted. You do not need to memorize the figures, but you do need to make sure your window supplier knows the intended use so the window is specified at the right size. See more: Tilt and Turn Windows Pros and Cons: An Honest Assessment for US Homeowners Why Tilt and Turn Windows Work Well for Egress Tilt and turn windows are actually well suited to egress applications, and in some ways better suited than the casement or double-hung windows more commonly used for this purpose in the US. The Turn Mode Opens Fully When you rotate the handle to the horizontal position, the entire sash swings fully open inward like a door. This creates a completely clear, rectangular opening with no frame in the middle and no screen to deal with. That kind of unobstructed opening is exactly what egress requirements are designed to ensure, and they deliver it in a single handle motion from inside the room. Tilt mode, where only the top of the window opens a few inches, does not count as an egress opening. When a tilt and turn window is specified for an egress location, it is the turn mode opening that the architect measures against code requirements. Single-Handle Operation Building codes require egress windows to open from the inside without tools, keys, or special knowledge. Opening in turn mode takes one simple handle rotation. There is nothing complicated about the operation, which is an advantage in an emergency situation where someone needs to exit quickly. Security When Closed One practical benefit in sleeping rooms and basement bedrooms is that the multi-point locking system keeps the window very secure when closed, while still allowing quick egress when the handle is turned. You get both security and code compliance in the same window. See more: How Do Tilt and Turn Windows Work? Handle Positions, Modes, and Troubleshooting Browse tilt and turn window options at Doors and Beyond: Browse Tilt and Turn Windows at Doors and Beyond How Egress Compliance Is Confirmed The process for confirming egress compliance is straightforward and does not require you to do detailed calculations yourself. Your Architect or Building Department Handles the Details When you apply for a building permit for a bedroom, basement conversion, or ADU, your architect or the local building department reviews the window specifications against the applicable code. They check the window's net clear opening in turn mode, confirm it meets the minimum dimensions for your jurisdiction and project type, and sign off on the specification. This is standard practice for any egress window, not just tilt and turn. What you need to provide is the manufacturer's specification sheet for the window, which includes the net clear opening dimensions in turn mode. At Doors and Beyond, we can supply this documentation for any window we carry, and we are familiar with egress applications. If you let us know the window is intended for an egress location, we will make sure the product is specified at the right size for your project. Basements and Ground-Floor Rooms Basement bedrooms and ground-floor sleeping rooms have slightly different egress requirements than above-grade rooms in most jurisdictions. The minimum opening size is typically a little smaller for basement locations. Your architect will confirm the applicable figure for your project, but it is worth knowing that the window sizes available comfortably meet both the standard and the reduced basement requirement. See more: Tilt and Turn Window Problems: 7 Common Issues, Causes, and How to Fix Them What to Tell Your Supplier When ordering a window for an egress application, the most important thing to communicate to your supplier is that the window needs to serve as an egress opening. This tells us two things: the window needs to be large enough in turn mode to meet your local code minimums, and we need to provide the net clear opening specification data for your permit application. You do not need to arrive with specific measurements already calculated. Share the room type (bedroom, basement bedroom, habitable attic), confirm with your architect what the required minimum opening is for your jurisdiction, and let the supplier match a product to that requirement. This is a routine part of specifying windows for new construction and renovation projects, and it is something the team at Doors and Beyond handles regularly. See more: Standard Sliding Glass Door Sizes: Width, Height, and Rough Opening by Panel Count Final Thoughts This window type is a practical and code-compliant choice for egress applications. The full inward opening in turn mode provides exactly the kind of clear, unobstructed exit that building codes require, and the single-handle operation makes them straightforward to use in an emergency. Your architect confirms the specific sizing, and your supplier handles the documentation. The window itself does the rest. Looking for tilt and turn windows for a bedroom or egress application? Talk to the team at Doors and Beyond: Shop Tilt and Turn Windows at Doors and Beyond

READ ARTICLE
How Do Tilt and Turn Windows Work? Handle Positions, Modes, and What to Do When the Handle Gets Stuck

How Do Tilt and Turn Windows Work? Handle Positions, Modes, and What to Do When the Handle Gets Stuck

Tilt and turn windows look like standard windows from the outside but operate in a way that is completely different from any window type common in the US market. A single handle controls two distinct opening modes, and the mechanism that makes this possible is precise enough that even a minor misuse can trigger a built-in safety lock. This guide explains how everything works, from the handle to the internal hardware. Quick Answer Tilt and turn windows work through a single handle with three positions. Handle pointing down closes and locks the window with all locking points engaged. Handle turned 90 degrees to horizontal opens the window fully inward like a door (turn mode). Handle turned 180 degrees upward tilts the top of the sash inward for ventilation while the bottom remains locked (tilt mode). The Three Handle Positions Everything about how a tilt and turn window works starts with the handle. Unlike standard US windows with separate latches, cranks, or locks, the handle position alone determines whether the window is closed, ventilating, or fully open. There are exactly three positions, and each one produces a different window state. Handle Position Window State What Happens Mechanically Pointing down (0 degrees) Closed and locked All locking points engage around the full frame perimeter; rubber seals compress; window is fully secured Pointing horizontal (90 degrees) Turn mode , fully open Side locking points release; concealed lower hinge engages; sash swings inward like a door on vertical hinges Pointing up (180 degrees) Tilt mode , ventilation gap Bottom and side locking points hold; top hinge points release; top of sash tilts inward 4 to 6 inches Handle down is always closed and locked. Handle horizontal is always turn (full open). Handle up is always tilt (top gap for ventilation). The exact angle at which tilt and turn engage varies by manufacturer, with some models reversing the horizontal and upward positions. Always check the label or markings on the handle housing when using a tilt and turn window for the first time. Why the Handle Controls Everything The handle is connected to an internal mechanism that runs a system of locking points all the way around the window frame. When you rotate the handle, this system either locks everything shut, releases the side so the window swings open, or releases the top so it tilts. Each position is designed to do one thing and one thing only. Forcing the handle past its natural stop point can damage the internal mechanism, so if it resists, stop and check that the sash is fully closed against the frame. See more: Tilt and Turn Windows Pros and Cons: An Honest Assessment for US Homeowners Tilt Mode: Controlled Ventilation Tilt mode is what sets tilt and turn windows apart from every standard window type available in the US market. It provides ventilation without creating a security risk, exposing the room to direct draft, or allowing rain to enter the opening. What Happens Mechanically in Tilt Mode When you move the handle to the upward position, only the top of the window opens inward, creating a gap of about 4 to 6 inches. The bottom stays firmly against the frame the whole time. Because the gap faces inward and upward, rain hits the glass and runs away from the opening rather than into the room. This makes tilt mode a practical choice for leaving a window open during light rain or overnight without worrying about water getting in. When to Use Tilt Mode This mode is the correct choice for overnight ventilation in bedrooms, where a fully open window creates both a security concern and an uncomfortable direct draft. Bathrooms benefit from tilt mode's ability to extract moisture and odors continuously without fully opening the room to outdoor conditions. During rain, tilt mode allows fresh air to circulate while the angled gap prevents water entry. At ground level, tilt mode provides ventilation through an opening that is too small to climb through, which maintains security without closing off airflow entirely. The upward-directed airflow from tilt mode works better for slow, continuous background ventilation than for rapidly clearing a room, where turn mode is more appropriate. Turn Mode: Full Inward Opening Turn mode converts the window into what functions like an inward-opening door, providing the same ventilation capacity as a fully open casement window along with interior access to both glass surfaces for cleaning. What Happens Mechanically in Turn Mode When you turn the handle to the horizontal position, the entire window swings open inward like a door. This gives you a fully open, unobstructed opening for maximum airflow and easy cleaning of both sides of the glass from inside the room. The window hinges from one side and rests on a concealed lower hinge that carries the weight of the glass, which is why the quality of the hinge matters for how smoothly the window operates over years of use. When to Use Turn Mode This mode is appropriate when maximum airflow is needed quickly, such as clearing cooking smoke from a kitchen or opening a room after a period of heat buildup. It is also the correct mode when both glass surfaces need cleaning, since the fully inward-swinging sash makes the exterior glass surface accessible from inside the room without a ladder. It can also serve as an emergency exit point where the window size and sill height allow. It is not appropriate for use during rain or in strong wind, because the fully inward-swinging sash can be caught by wind gusts and place undue stress on the lower hinge hardware. See more: How Wide Are French Doors Exterior? Standard Widths and How to Choose the Right Size Browse tilt and turn window options at Doors and Beyond: Browse Tilt and Turn Windows at Doors and Beyond Why the Handle Gets Stuck and How to Fix It A handle that refuses to move from the tilt or turn position back to the closed position is the most common operational issue reported by first-time first-time users of this window type. In almost every case, it is not a broken mechanism. It is a built-in safety feature working exactly as it was designed to work. The Anti-Mishandling Safety Trigger These windows have a small metal lever or tab on the vertical edge of the sash, typically positioned near the locking points on the hinge side. This component is the anti-mishandling safety trigger. Its purpose is to prevent the handle from being rotated to the closed position when the sash is not fully pressed flat against the frame seal. If the handle were forced closed with the sash partially open, the steel locking bolts would drive into the frame at an angle rather than seating cleanly in the keepers, damaging both the bolts and the frame hardware. When the sash is not fully seated, the trigger extends outward automatically, physically blocking the handle from rotating toward the closed position. This is why the handle feels stuck even when the window appears to be in the correct position: the sash is not yet pressed fully against the frame. Step-by-Step: How to Free a Stuck Handle Step 1: Locate the safety trigger. Look along the vertical edge of the open sash for a small metal lever, tab, or button that is pointing outward at an angle away from the frame. It is typically positioned partway up the sash edge near the espagnolette hardware. Do not force the handle while searching for it. Step 2: Press the trigger flat. Using a finger, press the lever or tab flat against the sash edge so it no longer projects outward. On some window models, the trigger is a small button rather than a lever; press and hold it firmly inward. Keep pressure on the trigger throughout the next step. Step 3: Push the sash firmly closed. While holding the trigger flat, push the sash firmly against the frame until the rubber seal is fully compressed on all sides. The sash must be completely flush with the frame for the handle to rotate. A partially seated sash will keep the trigger engaged regardless of how firmly you press it. Step 4: Rotate the handle to close. With the sash fully seated and the trigger held flat, rotate the handle to the downward (closed) position. The handle should move freely once the sash is properly pressed against the frame. Release the trigger after the handle reaches the closed position and the locking bolts have engaged. If the handle still does not move after following all four steps, the espagnolette rods or gearbox may have shifted out of alignment and require professional adjustment. Do not force the handle past any resistance point, as this risks stripping the gearbox connection or bending the espagnolette rods. Most qualified window technicians can adjust or reset the hardware without replacing the full mechanism. See more: Standard Sliding Glass Door Sizes: Width, Height, and Rough Opening by Panel Count The Internal Hardware: What Makes It All Work Understanding the four main internal components explains why this window type behaves the way they do and why handle position controls so much of the window's function. Each component has a specific role, and the failure of any one of them changes how the window operates. The Four Core Components A tilt and turn window has four main internal parts that work together. The handle and gearbox convert your hand movement into mechanical action inside the frame. The locking rod system runs all the way around the window and engages or releases different points depending on the handle position, which is what produces the three window states: closed, tilted, and fully open. The tilt bolt controls how far the top of the window can open and holds it at that fixed distance. The lower hinge carries the full weight of the glass when the window swings open in turn mode, so its quality directly affects how smoothly the window operates over time. The Fail-Safe Corner Drive There is also a built-in safety interlock inside the window that prevents tilt and turn from activating at the same time, which would damage the frame. This is why the handle always stops between positions and cannot jump directly from tilt to fully open. It is not a flaw in the design; it is a deliberate feature that protects the window and keeps it operating reliably for many years. See more: Types of Flush Doors: Hollow Core, Solid Core, and Surface Finishes Explained Final Thoughts Tilt and turn windows work through a single handle that controls three precise mechanical states: closed, tilt ventilation, and full inward opening. Understanding each handle position, knowing when each mode is the right choice, and recognizing the anti-mishandling safety trigger for what it is turns a mechanically unfamiliar window type into one of the most practical and versatile options available for US homeowners today. Ready to explore tilt-and-turn options for your home? Browse options at Doors and Beyond: Shop Tilt and Turn Windows at Doors and Beyond

READ ARTICLE
Tilt and Turn Windows Pros and Cons: Honest Answers for US Homeowners

Tilt and Turn Windows Pros and Cons: An Honest Assessment for US Homeowners

These European-style windows are standard in many countries but still relatively unfamiliar to most US buyers. They open in two distinct ways and offer genuine advantages in energy efficiency, security, and ventilation, but they also come with trade-offs that matter more in the US market than they would in Europe. This guide covers both sides honestly so you can decide whether they are the right choice for your home. Quick Answer Tilt and turn windows can tilt inward from the top for ventilation or swing fully open inward like a door. Key pros include excellent energy efficiency, multi-point locking security, easy interior cleaning, and dual ventilation control. Key cons include the need for interior clearance space, which is easily managed with simple room planning, and limited contractor familiarity in the US, which is addressed by working with an authorized dealer who can recommend installers. How Tilt and Turn Windows Work Before weighing the pros and cons, it helps to understand the mechanism, because the advantages and limitations both flow directly from how tilt and turn windows operate. A tilt and turn window is controlled by a single handle with three positions: closed, tilt, and turn. In the tilt position, the top of the sash tilts inward by approximately 4 to 6 inches, creating a ventilation gap at the top of the window that is too small for entry. In the turn position, the sash swings fully inward on vertical hinges, providing complete access to the window opening for maximum ventilation and cleaning. The entire mechanism is controlled by the handle position alone, with no secondary latches or operators. A multi-point locking system engages steel bolts at multiple points around the frame perimeter when the handle is in the closed position, which is the foundation of both the security and energy performance advantages these windows provide. See more: Standard Sliding Glass Door Sizes: Width, Height, and Rough Opening by Panel Count The Advantages of Tilt and Turn Windows This window type offers genuine advantages that standard US window types cannot match, particularly in energy performance, security, and operational flexibility. Each of the following benefits applies consistently across residential installations. Superior Energy Efficiency The multi-point locking system and specialized air chambers in the frame create a tight perimeter seal that minimizes air leaks more effectively than single-latch window designs. The robust sash construction also accommodates triple-pane glazing, which dramatically improves thermal performance and prevents the heat transfer at the frame edge that reduces efficiency in standard single or double-pane units. In cold US climates with significant heating costs, tilt and turn windows with triple glazing can reduce energy loss at the window perimeter substantially compared to standard replacement windows of equivalent size. Two-Mode Ventilation The tilt position draws fresh air from the top of the window, creating an upward draft that pulls stale air out without directing airflow at seated or sleeping level. This makes tilt ventilation particularly useful in bedrooms, where full-open ventilation can create discomfort overnight, and in bathrooms, where moisture needs to exit without fully exposing the room. The turn mode provides the equivalent of a fully open casement when maximum airflow is needed. Having both modes in a single unit controlled by one handle is a functional advantage that no standard window type replicates. Multi-Point Locking Security Instead of a single latch in the center of the sash, tilt and turn windows have multiple locking points around the full perimeter of the frame. When the handle is in the closed position, steel bolts engage with keepers all the way around the frame, making the window extremely difficult to pry open from the outside. The tilt position also maintains security while allowing ventilation, because the gap is too small for entry. This security posture is not achievable with outward-opening casement windows, double-hung windows, or sliding windows, all of which expose a larger and more accessible opening when ventilating. Easy Cleaning from Inside Because the sash swings fully inward in turn mode, both the interior and exterior glass surfaces are accessible from inside the room. This eliminates the need for exterior ladder access to clean upper-floor windows and makes window maintenance a straightforward interior task. For multi-story homes where exterior cleaning requires professional services, the interior cleaning accessibility of tilt and turn windows provides a practical advantage that compounds in value over the life of the installation. Which Rooms Benefit Most Tilt and turn windows are particularly well suited to bedrooms, where the tilt mode allows overnight ventilation without the security exposure of a fully open window. Bathrooms benefit from the tilt mode's ability to extract moisture and odors without fully opening the space to outdoor elements. Home offices and studies where external noise or security is a concern also benefit from the ability to ventilate without compromising the window's locked perimeter. Ground-floor rooms benefit from the security advantage of the multi-point lock, since these are the openings most likely to be targeted in a forced entry attempt. See more: Pros and Cons of French Doors: An Honest Assessment for Homeowners Considering the Investment The Disadvantages of Tilt and Turn Windows Tilt and turn windows have real trade-offs, and several of them are more significant for US buyers than they would be for homeowners in Europe where this window type is the standard rather than the exception. Requires Interior Clearance Because the sash swings fully inward in turn mode, furniture, curtain rods, blinds, and window treatments must be positioned to allow the sash to clear into the room. In rooms where the window area is adjacent to a bed, sofa, dining table, or built-in storage, this inward swing requirement is a genuine practical constraint that requires planning the room layout around the window rather than treating it as a neutral element. The tilt mode does not require the same clearance, but the window loses its full ventilation capability if turn mode is blocked by furniture placement. US-Specific Challenges One consideration that applies specifically to the US market is contractor familiarity. US installers are generally less experienced with tilt and turn adjustment and service than they are with casement or double-hung units. This is straightforwardly managed by working with an authorized dealer who can recommend qualified local installers or have in-house installers familiar with European-style window systems. Screens are included with tilt and turn windows from Doors and Beyond and are fully compatible with inward-opening operation. Lead times through our network are typically on par with standard window orders. See more: Full Flush vs Seamless Metal Doors: What's the Difference and Which Do You Need? Tilt and Turn vs Common US Window Types The table below compares this window type against the three types most commonly specified in US residential construction across six criteria that matter to homeowners replacing or upgrading windows. Criteria Tilt and Turn Double Hung Casement Sliding Ventilation modes Tilt (top gap) and full inward swing Two sashes, limited draft control Single outward swing One panel slides; limited directional control Security Multi-point lock; tilt allows secure ventilation Single latch; sashes can be lifted Multi-point lock on quality units Single latch; easier to lift panel out Energy efficiency Excellent , tight seal, triple pane capable Good with quality weatherstripping Good Fair , sliding seals wear faster over time Cleaning access Both sides from inside Tilt-in sashes on quality models Exterior side requires ladder on upper floors Interior side only; exterior requires ladder US availability Limited Most widely available; easiest to service Widely available Widely available This window type leads on ventilation flexibility, security, energy efficiency, and interior cleaning access. Working with an authorized dealer addresses installer familiarity. Double-hung windows remain the most practical choice for simple replacement projects where wide local availability and serviceability are the priority. Tilt and turn windows are the better choice when long-term performance and quality are the priority. Browse tilt and turn window options at Doors and Beyond: Browse Tilt and Turn Windows at Doors and Beyond Is a Tilt and Turn Window Right for Your Home? The decision depends on a specific combination of priorities, budget, and home configuration. The following situations indicate when this window option is the stronger choice and when standard US window types are more practical. This window type is the right choice when energy performance is a top priority in a climate with significant heating or cooling costs; the room layout allows inward clearance for the sash to open fully; and the installation is handled through an authorized dealer with qualified local installers. They are particularly well justified for bedroom, bathroom, and ground-floor security-sensitive installations where the dual-mode operation and multi-point locking deliver functional value that standard window types cannot match. Standard US windows are the more practical choice when the project requires sourcing from general contractors rather than working with a specialized window dealer; or when room layout limits inward clearance for the sash.  See more: Types of Flush Doors: Hollow Core, Solid Core, and Surface Finishes Explained Final Thoughts This window design delivers genuine advantages in energy efficiency, security, and operational flexibility that standard US window types cannot match. For homeowners prioritizing long-term performance over familiarity and convenience, they represent one of the most functional window upgrades available in the US market. Ready to explore tilt and turn windows for your home? Browse options at Doors and Beyond: Shop Tilt and Turn Windows at Doors and Beyond

READ ARTICLE
Clean Sliding Glass Doors

The Best Way to Clean Sliding Glass Doors: A Step-by-Step Guide to Streak-Free Results

The best way to clean sliding glass doors is to work in four stages: vacuum and scrub the tracks, wipe down the frame and hardware, clean both glass panels with a squeegee using a top-to-bottom motion, then lubricate the tracks with a silicone-based product. This sequence prevents re-contaminating clean surfaces and delivers streak-free results every time. Sliding glass doors take on a lot: fingerprints, dust, outdoor grime, and track buildup that slows the whole panel down. Most homeowners clean the glass and call it done, then wonder why the door still feels heavy or the view still looks hazy. This guide covers all four parts of the job in the right order, so you get clean glass, a smooth slide, and results that actually last. What You Need Before You Start The right tools matter more than the effort you put in. Using the wrong cloth or the wrong solution is the main reason cleaning attempts end with streaks, scratches, or a track that still feels gritty after all that work. Tool Purpose Avoid Microfiber cloth Streak-free wipe, no lint Paper towels Squeegee Remove solution before it dries Sponge alone Vacuum (crevice nozzle) Pull debris from track grooves Dry cloth only Silicone-based lubricant Smooth track after cleaning WD-40 or oil-based products Distilled water + white vinegar Natural streak-free glass solution Tap water (mineral deposits streak) Old toothbrush Scrub tight track corners Hard wire brush Six tools, most already in the home. Microfiber and squeegee are non-negotiable for streak-free glass. Everything else can be improvised with what you have on hand. Before putting time into tools and a cleaning routine, it helps to confirm you have the right door for your space.  Important Note: Always check your door’s specific material and the manufacturer’s cleaning guidelines before starting. Using the wrong cleaning solution on materials like wood, aluminum, or specialized glass coatings can cause permanent damage and may void your warranty. Read more: French Doors vs Sliding Glass Doors - The Complete Comparison for US Homeowners What to Note Before You Clean: Choosing the Right Solution for Each Surface The cleaning solution you use has as much impact on the final result as your technique. Using the wrong product on the wrong surface can strip protective coatings, leave residue that attracts more dirt, or cause permanent discoloration to the frame material. Surface Safe Solution What to Avoid Glass panels Distilled water + white vinegar (50/50), or mild glass cleaner Ammonia-based cleaners (degrades rubber seals) Vinyl frame Mild dish soap + warm water, or diluted white vinegar Acetone, abrasive pads, bleach-based products Aluminum frame Mild dish soap + warm water only Vinegar (acid breaks down anodized coating) Hardware and metal parts Damp cloth with mild soap, dried immediately Bleach, harsh solvents, abrasive scrubs A simple rule that covers all surfaces: the milder the solution, the safer it is. When trying a new cleaning product for the first time, always test it on a small hidden area of the frame before applying it to the full surface. For glass panels, the most important distinction is between distilled and tap water. Tap water contains dissolved minerals that leave a cloudy film once it evaporates. Switching to distilled water in your cleaning mix eliminates this entirely and is the single most effective change most homeowners can make without spending anything extra.  For frames, the material type determines what is safe. Vinyl tolerates vinegar well; aluminum does not. Using an ammonia-based cleaner on rubber weatherstripping will cause it to dry out and crack over time, leading to drafts that no amount of cleaning can fix. See more: French Doors vs Patio Doors - What Is the Actual Difference and Which One Is Right for Your Home Step-by-Step: The Best Way to Clean Sliding Glass Doors Order matters more than most people realize. Cleaning the glass before the tracks means debris kicked up from below will re-settle on panels you just cleaned. Always start from the bottom components and work upward, and always clean interior surfaces before tackling the exterior. Step 1 - Clean the Tracks (10 minutes) Start with a vacuum and a crevice nozzle to pull out loose dust, hair, and debris sitting in the track grooves. Follow up with an old toothbrush to break up stuck-on grime, working it into the corners where buildup concentrates most. Wipe the track clean with a damp cloth, then dry it thoroughly. Skipping the drying step leaves moisture behind that encourages mold growth over time. Step 2 - Wipe Down the Frame and Hardware (5 minutes) Dampen a cloth with a mild detergent solution and work it along the entire frame, paying extra attention to corners and edges where dirt collects. Use a lightly abrasive scouring pad on the threshold and bottom rail, which take the most foot traffic and tend to accumulate the most ingrained grime. Finish the hardware with a dry cloth, removing all moisture from metal parts to prevent tarnishing. Step 3 - Clean the Glass Panels - Both Sides (10-15 minutes) Apply a soapy water solution to the glass surface first using a microfiber cloth or soft sponge. This loosens the layer of grime and fingerprints before the main cleaning solution goes on. Once wiped away, apply your distilled water and white vinegar solution across the full panel, then immediately run a squeegee from top to bottom in straight, overlapping pulls. Wipe the squeegee blade after every pass. Repeat the full process on the other side of the panel. Work on a cloudy day or in the early morning when the glass is cool, since solution drying too fast on warm glass is one of the leading causes of streaking. If your panels have deteriorated past what regular cleaning can restore, browsing our glass doors collection is a practical next step toward finding a replacement that fits your opening and style. How to Get Streak-Free Results - and Why Most Attempts Fail Streak-free glass is less about which product you use and more about how and when you use it. Most homeowners who end up repeating the job made the same three mistakes without realizing it. The first is cleaning in direct sunlight or during the hottest part of the day. When the glass surface is warm, the cleaning solution evaporates before you can wipe it off, leaving behind a residue that shows as streaks or hazy patches. Moving the job to early morning or a cloudy day eliminates this problem entirely. The second mistake is reaching for paper towels. They break down on contact with liquid, leave lint behind on the glass, and streak consistently. A clean microfiber cloth does the same job without any of those drawbacks. The third is using tap water in the cleaning solution. Tap water contains mineral deposits that leave white or cloudy marks once the water evaporates. Switching to distilled water in your vinegar mix removes this issue at the source. Finish every session by running a dry microfiber cloth vertically down the glass to catch any remaining moisture before it has a chance to settle into a streak. Vinyl vs Aluminum Frame - What Changes in Your Approach Cleaning the glass panels is consistent across all door types. The frame is where material differences start to matter. Using the wrong solution on the wrong frame type can cause lasting damage to the finish or the protective coating underneath.   Vinyl Frame Aluminum Frame Safe cleaner Mild detergent + water Mild detergent + water Stubborn stains Baking soda paste, applied gently Commercial aluminum cleaner Special check Weatherstripping condition Signs of oxidation or chalking Read more: Are French Doors More Secure Than Sliding Doors - A Full Comparison Maintenance Schedule - How Often to Clean Each Part A consistent maintenance routine prevents the heavy buildup that makes cleaning feel like a major project each time. When tracks and glass stay reasonably clean between sessions, each full clean takes under 30 minutes and requires no extra effort. Frequency Task Weekly Quick dry-wipe of glass surface with microfiber Monthly Full clean: tracks + glass + frame Every 3 months Apply silicone lubricant to tracks Every 6 months Inspect weatherstripping, rollers, and screws Monthly full clean takes under 30 minutes once you have the right tools and routine in place. The 6-month inspection catches small mechanical issues before they become costly repairs. The weekly wipe keeps fingerprints and light dust from building into a layer that requires real effort to shift. The 6-month inspection is the step most homeowners skip entirely. Catching a worn roller or a failing weatherstrip early prevents structural damage that leads to costly repair or full replacement. If your sliding patio door has reached the end of its service life, our vinyl sliding patio doors are built for long-term performance and easy maintenance from day one.   When Cleaning Is No Longer Enough A clean door that still performs poorly is sending a clear signal that something mechanical needs attention. There are three situations where continued cleaning will not fix the underlying problem and a different course of action is needed. The first is a door that remains heavy or difficult to slide even after a thorough clean and fresh lubrication. This usually points to worn or misaligned rollers rather than dirty tracks. Most roller systems have adjustment screws accessible behind small plugs at the bottom of the door panel. Adjusting these can restore smooth movement without replacing anything. If adjustment does not help, the rollers themselves likely need replacing. The second situation is glass that stays cloudy no matter how many times you clean it. On double-pane panels, cloudiness that appears between the two layers means the seal has failed. Condensation and debris have entered the cavity and cannot be reached from the surface. Cleaning the exterior will not resolve this - the affected panel needs to be replaced. The third is visible oxidation, pitting, or corrosion on the track or frame itself. This type of deterioration is structural rather than cosmetic. Once a track corrodes to the point where it affects door movement, cleaning and lubricating only delays the inevitable. At that point, evaluating a full door replacement is the more cost-effective path forward. Read more: How to Replace a Sliding Glass Door with French Doors - Cost, Steps and What to Know Conclusion The best way to clean sliding glass doors comes down to three steps in the right order: tracks, frame, and glass. Keep in mind that the ideal cleaning method always depends on your door's specific material, so be sure to consult the manufacturer's guidelines first. By using the right solution for each surface and sticking to a monthly routine, each session will stay under 30 minutes. When cleaning stops solving the problem, it is usually a sign that something mechanical needs attention or the door has reached the end of its useful life.

READ ARTICLE
Sliding Glass Doors Installation: A Complete Step-by-Step Guide

Sliding Glass Doors Installation: A Complete Step-by-Step Guide

Sliding glass doors installation involves five stages: preparing and squaring the rough opening, setting and shimming the frame, installing the stationary panel, hanging and adjusting the sliding panel, then sealing all edges with caulk and weatherstripping. Done in the right order with accurate measurements, the entire process takes one day and delivers a weathertight, smooth-operating door. Installing a sliding glass door is one of the most impactful home upgrades you can make: more natural light, a better connection to outdoor space, and real energy savings when done correctly. Most problems that appear later, from sticking to leaking to drafting, trace back to installation errors rather than the door itself. This guide covers every step in order, plus the cost data and key decisions you need before you start. Installation Tip: While DIY installation is perfectly fine if you are comfortable with home projects, we strongly recommend hiring a professional. Proper alignment is key to ensuring your doors slide, latch, and lock smoothly for years to come.  Is a Sliding Glass Door the Right Choice for Your Opening? Before ordering anything, the most useful step is confirming that a sliding glass door is the right fit for the specific opening you have in mind. Understanding what the sliding glass doors installation process involves helps clarify whether the opening is genuinely suitable before any money is spent on the unit itself. Sliding glass doors work best where floor space on either side of the opening is limited, because the panels glide parallel to the wall rather than swinging into the room. They are a strong choice for patio and backyard access points where a wide, unobstructed view matters. The practical limitation is that only one panel opens at a time in a standard two-panel configuration, which narrows the usable opening width compared to a full French door swing. If you want to see how different glass doors configurations compare across panel counts and sizes before committing to a specific model, browsing by door type is the fastest way to narrow down the options. Read more: Swing vs Sliding vs Pocket vs Barn Doors - Which Interior Door Is Right for You   How to Choose and Size Your Sliding Glass Door Once sliding is confirmed as the right door type, the next decision is material and size. Getting both right before ordering saves more time and money than any other preparation step. Selecting the correct unit before installing sliding glass doors prevents the most common and costly mid-project corrections. Material Best For Energy Efficiency Vinyl Budget, low maintenance High (double-pane standard) Aluminum Modern look, outstanding durability High (superior thermal performance) Wood-clad Traditional aesthetic Moderate Vinyl is the most balanced choice on price and performance for most US homes. Aluminum is highly durable and engineered with excellent energy efficiency, making it a perfect fit for modern aesthetics and diverse climates without sacrificing thermal performance. Wood-clad offers a premium, traditional look on the inside with protective cladding on the outside. Standard sizing covers 6-foot and 8-foot wide by 80-inch tall openings, which fits the majority of residential applications. For homeowners who want tighter tolerances, better thermal performance, and the slim sightlines that most US-market options rarely achieve, European patio doors bring multi-point locking systems and engineering standards that go significantly beyond what standard box-store sliding doors provide. Tools and Materials You Need Missing even one item from this list can stop the job partway through. Gathering everything before the work starts is the most practical preparation step, and it eliminates the mid-project runs that cause delays and rushed decisions. These are the tools required for a proper installation of sliding glass doors in any standard residential opening. Tool Purpose Tape measure (25ft+) Measure rough opening accurately 4-foot level Ensure frame is plumb and sill is flat Power drill + bits Drive screws through frame and shims Pry bar Remove old door or trim cleanly Cedar or plastic shims Level and square the frame in the opening Caulk gun + exterior sealant Weatherproof all edges after installation Flashing tape (6" wide) Waterproof the sill before frame goes in Safety glasses + gloves Handle heavy glass panels safely This is a two-person (or more) job without exception. Glass door panels are heavy and awkward to position alone, and attempting to set a panel without a second person creates real risk of breakage or injury. Plan accordingly before the door arrives.   Step-by-Step: How to Install Sliding Glass Doors Whether you are learning how to put in sliding glass doors for the first time or tackling a full replacement, the sequence below applies to both scenarios. The order of these steps is not interchangeable. The frame must go in before the panels, the stationary panel before the sliding one, and sealant always comes last. Reversing any of these stages requires full disassembly to correct. Step 1 - Prepare the Rough Opening Clear the opening of any old frame, caulk, nails, and debris before install sliding glass doors. Use a level to confirm the sill is flat, then measure diagonally from corner to corner in both directions. The two diagonal measurements must match within 1/8 inch for the opening to be square. Wrap the entire opening with weather-resistant house wrap, then apply flashing tape along the sill and up each side. Allow 1/4 inch of clearance on each side and 1/2 inch at the top to leave room for shimming. Step 2 - Set and Shim the Frame Carry the frame into the opening from the exterior. Insert cedar or plastic shims at each anchor point along the sides and head jamb, adjusting until the frame reads level and plumb on all planes. Drive screws through the jamb, shims, and into the 2x4 framing. Check level again after each screw before driving the next. Once all screws are in, cut or snap off the excess shim material flush with the frame face. Step 3 - Install the Stationary Panel Working from the exterior, tilt the top of the stationary panel into the outer channel of the head jamb first. Then rotate the bottom inward until it seats into the lower groove. Slide the panel tightly against the side jamb. Secure it using the panel anchor and the specified screws through the anchor into the frame header and bottom rail. Step 4 - Hang the Sliding Panel and Adjust Rollers Tilt the top of the sliding panel into the upper track, then lower the rollers down into the lower track. Slide the door back and forth several times to test movement. Locate the roller adjustment screws at the bottom edges of the panel and turn them clockwise to raise the panel or counterclockwise to lower it. The target is an even gap along both sides and a latch that aligns precisely with the strike plate on the jamb. Step 5 - Seal, Weatherstrip, and Install Hardware Apply a continuous bead of exterior-grade silicone sealant around the entire perimeter of the frame on the outside. Run a wet finger along the bead to smooth it before it skins over. Install weatherstripping along all contact edges using a T-shape or brush-style seal. Mount the handle, lock, and latch according to the manufacturer's instructions, then test the lock engagement with the door closed. Trim any protruding shims flush to the wall surface before adding interior trim. Completing a successful sliding glass doors installation requires patience at the measurement and shimming stages far more than at the sealant stage. Rushing the early steps is the primary cause of doors that underperform long-term. Read more: French Doors vs Sliding Glass Doors - The Complete Comparison for US Homeowners   DIY vs Professional Installation - What to Weigh Before You Decide Sliding glass door installation involves more variables than most homeowners expect. The decision between doing this yourself and hiring a professional is not purely about money -- skill level, opening condition, and door size all factor in, and making the wrong call can cost more in the long run than the labor savings justify. Factor DIY Professional Time required 1-2 days (intermediate skill) 4-8 hours Structural issues Risk missing problems Caught and fixed on-site Permit handling Homeowner's responsibility Often included in service Warranty impact May void manufacturer warranty Protected Risk of leaks/misalignment Higher Low While a DIY approach is acceptable if you are highly experienced and comfortable with complex home improvement projects, we do not encourage it. We strongly recommend professional installation for all sliding glass door projects to guarantee proper sealing, structural alignment, and long-term performance. Professional installation is especially critical when creating a new opening, making structural modifications, or fitting custom-sized doors. One additional factor that does not appear in the table: most professional installations are completed in 4 to 8 hours. A first-time DIY project on the same door commonly stretches across a full weekend, and any errors discovered late in the process mean going back to earlier steps to disassemble and redo. Read more: How to Replace a Sliding Glass Door with French Doors - Cost, Steps and What to Know Common Installation Mistakes That Cause Long-Term Problems Most sliding glass doors installation failures are not caused by a poor-quality door. They were poorly installed. Four mistakes account for the majority of these long-term problems. The most common is skipping the diagonal measurement check before setting the frame. If the rough opening is not square and the frame goes in anyway, the door will never slide evenly. The gap on one side will be wider than the other, the rollers will wear unevenly, and no amount of adjustment will fully correct it after the fact. The second is leaving the sill unprotected before the frame goes in. Flashing tape on the sill is not an optional upgrade. Without it, any water that gets past the exterior sealant has a direct path into the subfloor. In most climates, wood rot becomes visible within one to two seasons. The third is reaching for WD-40 instead of a silicone-based lubricant when the rollers feel stiff. WD-40 is oil-based and attracts dust and debris into the track over time. What starts as a stiff door becomes a door that is genuinely difficult to move within a few months. Silicone lubricant leaves no residue that collects particulates. The fourth is skipping the permit step. Many jurisdictions require a permit for any exterior door replacement that touches an exterior wall, and some require inspection before the work is concealed by trim. Installing without a permit can create real complications when selling the property or filing an insurance claim. Read more: Are French Doors More Secure Than Sliding Doors - A Full Comparison Conclusion Sliding glass doors installation comes down to five steps done in the right sequence: prepare the opening, set the frame, install the stationary panel, hang and adjust the sliding panel, then seal and finish. Get the measurements right from the start, use the correct materials at each stage, and the result is a door that operates smoothly and holds its seal for decades. Frequently Asked Questions (FAQs) 1. Can I install a sliding glass door by myself (DIY)? While DIY is possible if you are highly experienced, we strongly recommend professional installation. Proper alignment and sealing are critical to prevent leaks and ensure smooth operation. 2. How long does it typically take to install a sliding glass door? Professionals can usually complete the installation in 4 to 8 hours. A first-time DIY project often takes a full weekend and risks costly mistakes. 3. What is the most critical step in the installation process? Ensuring the rough opening and sill are perfectly level, square, and waterproofed. Even a tiny misalignment will cause the door to stick, leak, or fail to lock. 4. Do I need to apply flashing or waterproofing tape around the opening? Yes, absolutely. Proper flashing and sill pan flashing are essential to prevent rainwater from leaking into your walls and causing structural rot or mold. 5. How do I know if my newly installed sliding door is aligned correctly? The door should slide effortlessly with one hand, latch smoothly without forcing, and show an even gap between the door panel and the frame when closed.

READ ARTICLE
How to Cover Sliding Glass Doors: Best Window Treatment Ideas

How to Cover Sliding Glass Doors: Best Window Treatment Ideas for Every Style and Budget

There are five main options when it comes to how to cover sliding glass doors: panel track blinds, vertical blinds, curtains and drapery, roller or Roman shades, and plantation shutters. Each works differently depending on how often you use the door, how much light control you need, and your room style. Panel track blinds are the most versatile choice for most homes. Sliding glass doors bring natural light and outdoor access, but they also create privacy gaps, heat buildup, and glare at the wrong time of day. The right covering solves all three without making the door a chore to open. This guide walks through the five best approaches to how to cover sliding glass doors, room-by-room recommendations, and the mistakes that lead most people to buy the wrong treatment. What to Consider Before You Choose a Covering There are many ways to cover sliding glass doors, and the right one for your home depends on three practical variables that narrow the shortlist faster than any style guide. The first is how often you use the door. A covering that looks beautiful but takes time to operate becomes a daily frustration on a patio door used five or more times a day. Treatments that slide horizontally, such as panel tracks, vertical blinds, and curtains on a traverse rod, work far better for high-traffic doors than anything that requires raising and lowering. The second is how much light control and privacy the room needs. A bedroom door facing east needs full blackout capability from dawn. A north-facing living room may only need glare softening. This single variable eliminates several options before you start browsing. The third is how much wall space is available beside the door. Panel tracks, curtains, and shutters all need clearance on one or both sides to stack when the door is open. A door flanked by furniture or walls with limited clearance needs a treatment that stacks compactly or distributes evenly to both sides. The Five Best Coverings for Sliding Glass Doors The sliding glass doors covering ideas below range from the most affordable to the most architectural. Understanding what sets each option apart is more useful than any single ranking, since the right choice depends entirely on how you live with the door. Panel Track Blinds Flat vertical fabric panels suspended from a ceiling or wall-mounted track. They slide horizontally in the same direction as the door, making them the most functionally compatible covering for any high-traffic sliding glass door. Fabric options run from sheer to full blackout across hundreds of colors and textures. When open, the panels stack compactly to one side or split to both ends. Panel tracks suit modern and transitional rooms equally well and are the most versatile single choice for most homeowners. Vertical Blinds Individual vanes on a top track that tilt to control light and slide aside for door access. The most affordable option and still the most practical for doors used constantly throughout the day. Modern fabric vane versions have replaced the outdated vinyl look, and cordless or motorized configurations are widely available. Best for rental properties, budget-conscious homeowners, and any door where daily ease of use outweighs design impact. Curtains and Drapery Floor-to-ceiling fabric panels on a traverse rod or ceiling-mounted track add the most design flexibility of any covering type. Available in every fabric from sheer to blackout, every pattern, and every price point. A traverse rod is essential for smooth daily operation on a sliding door, since standard rods with rings stop at the center bracket and block full coverage of the opening. Best for bedrooms and formal living rooms where warmth, texture, and visual impact matter most. Roller and Roman Shades Roller shades roll up compactly above the door frame; Roman shades fold into horizontal fabric pleats. Both must be raised fully to allow door access, which makes them a better fit for doors opened occasionally rather than constantly. Roller shades have a minimal profile when raised and a clean architectural look when lowered. Roman shades add softness and pattern interest. Both are available with blackout or light-filtering liners. Best for doors used a few times a day at most, in rooms where a streamlined look is the priority. Plantation Shutters Large louvered panels on a sliding track mounted above the door opening. A premium option that offers precise light control through adjustable louvers, looks built-in, and adds long-term property value. The panels slide along the track for full door access, though standard two-panel configurations leave one section of the door partially covered at all times. Best for homeowners who want a permanent, high-end installation that matches shutters used elsewhere in the home. For homeowners upgrading their door at the same time as choosing a new covering, our vinyl sliding patio doors include contemporary frame profiles that pair cleanly with panel track and plantation shutter installations without requiring frame modifications. These are the most practical ideas to cover sliding glass doors that work across different room styles and budgets. Whatever you select, the main goal when figuring out how to cover sliding glass doors is finding a treatment you will actually use consistently every day. Which Covering Fits Your Situation: A Quick Comparison If you are trying to work out what is the best covering for sliding glass doors in your specific situation, the table below maps each option to the situations it handles best, making it easier to shortlist two or three before measuring or visiting a showroom. Covering Best For Light Control Daily Ease Panel track blinds Modern style, frequent use Good Very easy Vertical blinds Budget, high traffic Very good Very easy Curtains / drapery Style-focused rooms Good to blackout Easy (traverse rod) Roller / Roman shades Occasional use, clean look Good to blackout Moderate Plantation shutters Permanent, premium look Excellent Easy Panel track blinds and vertical blinds lead on daily convenience. Curtains lead on design flexibility and insulation value. Roller and Roman shades offer the cleanest look when raised. Plantation shutters provide the best long-term light control and highest resale contribution, when budget allows. For most homeowners, the best way to cover sliding glass doors that sees daily use is a panel track or vertical blind, since both slide horizontally and stay clear of the opening. There is no shortage of window coverings for sliding glass doors; ideas range from simple vinyl blinds to custom plantation shutters, so there is something workable at every budget. Room-by-Room Recommendations Homeowners often ask what are the best window treatments for sliding glass doors in a specific room  and window coverings for sliding glass doors ideas. The answer shifts significantly depending on where the door sits, since each room has different usage patterns and design priorities.  In the living room, panel track blinds or curtains on a traverse rod are the strongest choices. The door is likely used throughout the day, so horizontal operation is essential. Sheer panels work well for rooms with limited privacy concerns and north or east-facing exposure. Blackout lining adds meaningful energy efficiency in south or west-facing rooms that overheat in summer afternoons. In the bedroom, blackout curtains or roller shades with a blackout liner are the non-negotiable priority. A bedroom sliding door facing east can make early mornings unworkable without full coverage. Layering sheer roller shades for daytime and blackout curtains for night gives full flexibility without committing to a single treatment for all light conditions. In the dining room, drapery or plantation shutters suit the space best. Dining rooms are typically more formal and the door is used less frequently than elsewhere in the home, which shifts the priority toward style over ease of operation. Floor-to-ceiling drapery in a tailored pleat adds an elevated look. Plantation shutters are a strong second choice for rooms where the door shares a wall with an existing shutter installation. Read more: French Doors vs Patio Doors - What Is the Actual Difference and Which One Is Right for Your Home Tips for Covering Large Sliding Glass Doors (8ft and Wider) Standard coverings are designed for 6-foot door openings. Understanding how to cover large sliding glass doors that run 8 feet wide or beyond requires different thinking around stacking space, visual scale, and mounting height. When planning how to cover sliding glass doors at this width, ceiling mounting is the better starting point over frame mounting. On wide doors it gives the covering more stacking room on each side and visually extends the height of the room, making the treatment look intentional rather than added as an afterthought. Plan for generous stacking clearance. A panel track covering an 8-foot door needs 18 to 24 inches of wall space on one side when fully open. If that clearance does not exist, a split configuration distributes the stack to both ends, halving the space needed on either side of the opening. Choose large-scale fabrics or solid colors. Small patterns look visually cluttered on wide panels. Solid colors and large geometric or textural weaves maintain proportion and read cleanly across the full width of the covering. Consider motorization. Raising or closing a wide covering manually becomes awkward above 8 feet. Motorized options on a remote or smartphone app eliminate the reach problem and make the covering easier to operate consistently every day. Read more: Swing vs Sliding vs Pocket vs Barn Doors - Which Interior Door Is Right for You Common Mistakes When Covering Sliding Glass Doors Most problems people encounter when planning how to cover sliding glass doors come from a mismatch between covering type and door realities, not from a bad product. Three mistakes account for the majority of homeowner regret. The first is choosing a treatment that fights the door's function. Roller shades or Roman shades on a door used five or more times a day require a full raise every single time the door opens. Within a week, this becomes a deterrent that leads to leaving the covering permanently raised or permanently down. The simple rule: match the operating direction of the covering to the operating direction of the door. The second is mounting too close to the glass. A covering installed flush with the frame edge leaves no room for the treatment to clear the glass when stacked, and no visual breathing room between the covering and the door. Mount at least 4 to 6 inches beyond the frame on each side and 3 to 4 inches above the header. This allows full light when open and makes the door feel visually larger. The third is underestimating stack depth. Every covering type takes up wall space when open. Plantation shutters in a standard two-panel configuration permanently cover roughly a third of the opening even when the shutters are slid aside. Roman shades bunch visibly at the top when fully raised. Measuring the actual stack depth of the specific product before ordering is the step most people skip, and the reason for most returns. Read more: French Doors vs Sliding Glass Doors - The Complete Comparison for US Homeowners When the Covering Is Not the Full Answer The right covering improves light control, privacy, and aesthetics considerably. But when the underlying door has structural problems, even the best treatment cannot fully compensate for what the door itself is failing to do. The first situation is a door with a failed seal or single-pane glass. No covering compensates for cold air coming through a compromised frame or condensation forming between glass layers. A new door with properly insulated glazing solves the root problem; the covering then becomes a finish layer on a solid foundation rather than a workaround for a failing one. The second is a door frame so warped or corroded that it misaligns any horizontal treatment. Panel tracks and plantation shutters require a plumb, square frame to hang and operate correctly. A door with a sagging or twisted frame causes every covering to look uneven and slide poorly, regardless of how precisely it was measured. When that point is reached, browsing a current glass doors range with modern insulated glazing and precision-engineered frames is the practical starting point before committing to new coverings on an aging door. Read more: How to Replace a Sliding Glass Door with French Doors - Cost, Steps and What to Know Conclusion The answer to how to cover sliding glass doors well comes down to three questions: how often the door is used, how much light control the room needs, and how much wall space is available. Match the treatment's operating direction to the door, allow enough clearance on each side, and measure the stack depth before buying. When the door itself is causing the problem, no covering is a long-term substitute.

READ ARTICLE
Standard Sliding Glass Door Sizes: Width, Height, and Rough Opening

Standard Sliding Glass Door Sizes: Width, Height, Rough Opening, and How to Choose

Standard sliding glass doors come in a defined set of widths and heights that cover the majority of US residential patio openings. Knowing the correct dimensions before ordering prevents the most common installation mistake: a door that does not fit. This guide covers all standard sizes by panel configuration, rough opening conversions, and how to measure accurately before placing an order. Quick Answer The most common standard sliding glass door size is 72 inches wide by 80 inches tall in a two-panel configuration. Standard widths for two-panel doors are 60, 72, and 96 inches; three-panel doors run 108 to 144 inches wide; four-panel doors span 144 to 192 inches. Standard heights are 80, 82, or 96 inches. The rough opening must be 2 to 4 inches larger than the door unit in both dimensions. Standard Sliding Glass Door Widths by Panel Configuration Width is determined primarily by the number of panels. Each additional panel increases the total unit width and the size of the usable opening when the sliding panels are fully open. Two-Panel Sliding Glass Doors (Most Common) A two-panel unit consists of one fixed panel and one sliding panel. The sliding panel travels behind the fixed panel to open, and the usable passage when fully open is approximately half the total unit width. Standard widths are 60 inches (5 feet), 72 inches (6 feet), and 96 inches (8 feet), all at a standard 80-inch height. The 72 by 80-inch configuration is the most widely stocked size in the US and fits the standard patio opening found in most homes built after 1970. The 60-inch unit suits smaller wall sections and narrower patios. The 96-inch unit provides a wider opening for decks and larger outdoor spaces. Three-Panel Sliding Glass Doors Standard US patio doors typically feature one active sliding panel and two fixed panels. Depending on your preference, the active panel can be positioned on the left, right, or center. However, two panels are never active together in a standard US configuration. For those looking for more flexibility, we also offer premium European patio doors (hoặc chèn link cụ thể của bên bạn vào đây) which can be configured with two active sliding panels and two fixed panels. Our standard widths for three-panel units are 104", 112 3/8", and 140 1/8" at heights of 80 to 96 inches. This configuration is perfect for living rooms and dining areas where you want a wider connection to your outdoor space. Four-Panel Sliding Glass Doors Four-panel configurations provide the widest openings for large outdoor entertainment spaces. Our standard widths for four-panel units are 140", 150 5/8", and 187 5/8" at heights of 80 to 96 inches. This configuration typically uses a bi-parting design where two center panels slide outward toward the fixed outer panels, creating a massive central opening that seamlessly merges your indoor and outdoor living areas. See more: How Wide Are French Doors Exterior? Standard Widths and How to Choose the Right Size Standard Sliding Glass Door Heights Standard door heights are more consistent across US residential construction than widths. Three height options cover the large majority of patio door applications, and the choice between them depends primarily on ceiling height and design intent. Height Inches Feet Best For Standard 80 inches 6 ft 8 in Most US homes; fits standard 8-foot ceiling height Tall 96 inches 8 ft Homes with 9 to 10-foot ceilings; contemporary or luxury design 80 inches is the standard height for the vast majority of residential sliding glass doors in the US and is the most widely available size at standard pricing. The 96-inch tall option is increasingly common in new construction where 9 and 10-foot ceiling heights have become standard in higher-end homes.  Per-Panel Width: A Common Source of Confusion The width listed for any sliding door refers to the total unit width, not the width of a single panel. For example, on a standard 72-inch two-panel sliding glass door, many assume they will get a clear 36-inch opening. In reality, because the panels must overlap when opened and often stop short to prevent the handles from colliding—the actual usable passage is always smaller than 36 inches. The exact clearance you get depends entirely on the manufacturer’s design and frame profiles. This distinction is incredibly important to keep in mind when planning for furniture movement, appliance delivery, or accessibility. If you require a specific, wide clearance, you will need to opt for a larger total unit width or a multi-panel configuration rather than a standard two-panel unit. See more: Rough Opening for Bypass Doors: The Correct Formula, Standard Size Table, and How to Measure Browse sliding glass door options at Doors and Beyond in standard and custom configurations: Browse Glass Doors at Doors and Beyond Which Sliding Glass Door Size Is Right for Your Space? Knowing what sizes exist is only the starting point. When choosing the right width and panel configuration, your decision will largely depend on whether you are working with an existing space or building a brand-new one: For Replacements: Your size is dictated by your current rough opening. However, if you have structural room to expand the wall, you can certainly look into larger sizes. For New Construction: You have complete freedom. You can go as wide or as tall as your architectural design and wall space allow. Space / Situation Recommended Width Panel Config Key Reason Standard patio or deck (average US home) 72 inches 2-panel Matches existing rough opening; direct same-size swap with minimal wall modification. Small patio or balcony 60 inches 2-panel Fits tighter wall sections; provides adequate daily access for compact spaces. Large deck with outdoor dining 96 to 120 inches 2 or 3-panel Creates a wider opening for entertaining and easier furniture movement. Open-plan living room to backyard 120 to 144 inches 3-panel Delivers a seamless indoor-outdoor connection with maximum natural light. Luxury or new construction with tall ceilings 144 to 192+ inches 4-panel Unrestricted by standard sizes; creates an architectural statement with a full glass wall effect. Homes with 9 to 10-foot ceilings 72 to 144 inches (at 96" height) 2 to 4-panel Allows for taller, grander doors that are visually proportional to high ceilings. The 72 by 80-inch two-panel sliding glass door is the right starting point for most standard US residential patio replacements. Upgrading to a wider unit or a three-panel configuration is justified when the wall section allows and a broader outdoor connection or more natural light is the goal. Always confirm wall clearance on both sides of the opening before specifying a wider unit, as the sliding panel requires wall space to fully clear the opening. How to Measure Your Existing Opening Accurate measurement before ordering is the single most important step in any sliding glass door replacement or new installation. However, because walls settle and frames are rarely perfectly square, taking these measurements requires a high level of technical precision. Who Should Take the Measurements? We Strongly Recommend a Professional Installer: Unless you are planning a strict DIY installation, always have your professional installer take the final measurements. They are responsible for evaluating the rough opening, accounting for any framing irregularities, and ensuring the correct unit size is ordered. Having an expert handle this eliminates the risk of ordering an expensive custom door that doesn't fit. If You Are Doing a DIY Installation: Only if you are highly experienced and comfortable taking full responsibility for the dimensions should you perform the technical measurements yourself. The Technical Measurement Method (For DIYers Only) If you are handling the installation yourself, you must use the Three-Point Method to account for any framing shifts or settling over time: Three-Point Width: Measure the width of the rough opening at three distinct points: near the top, at the middle, and near the bottom. Use the smallest of the three measurements as your working width. Three-Point Height: Measure the height from the subfloor to the underside of the header at three points: the left side, center, and right side. Again, record the smallest measurement. Calculate the Unit Size: To find your correct door unit size, subtract 2 to 4 inches from your smallest rough opening width and height measurements to allow for proper plumbing, leveling, and shimming during installation. See more: Changing French Doors to Sliding Doors: Costs, Feasibility and What to Expect Final Thoughts Standard sliding glass door sizes cover the majority of US residential patio openings. The 72 by 80-inch two-panel unit fits most homes built after 1970 and is the most readily available at standard pricing. Measuring at three points, confirming the rough opening, and matching the panel count to the space's width requirement prevents the most common and most costly sizing errors before an order is placed. FAQs 1. What is the most common size for a sliding glass door? The most common standard size is 72" wide by 80" tall. While standard widths also include 60" and 96", you can easily order custom, larger sizes to fit your specific design. 2. If I buy a 72-inch sliding door, is the walkable clearance exactly 36 inches? No, it is always smaller. Because the glass panels must overlap in the middle and the door handles limit retraction, the actual walk-through clearance will be less than 36 inches, depending on the manufacturer's design. 3. Do sliding glass door size measurements include the frame? Yes. Standard dimensions represent the overall outer frame assembly, not just the glass. The rough opening in your wall must be slightly larger than these dimensions to allow for proper leveling, shimming, and sealing. 4. What is the rough opening (RO) required for a standard sliding door? Generally, the rough opening should be 1/2 to 1 inch larger than the door frame. For a standard 72" x 80" door, the rough opening is typically 72.5" x 80.5’’. Always have an installer confirm these measurements. 5. Can I get sliding glass doors that are wider or taller than typical market standards? Yes, absolutely. You are not restricted by box-store standards. Premium European systems offer much wider, taller glass panels with heavy-duty rollers, allowing you to create expansive glass walls without sacrificing energy efficiency or durability.

READ ARTICLE
01–04 / 12
Explore all Articles
REAL INSTALLATIONS

Before, After &
Real Project Inspiration

Discover how a thoughtfully chosen door can redefine a home’s curb appeal, security, and architectural character, then explore selected installations from completed projects.

EXPLORE ALL PROJECTS

Premium Materials

Built to last.

Enhanced Security

Peace of mind.

Tailored to You

Style that fits.

Expert Installation

Done right.

Exterior before installation Exterior after installation
PROVIA ENTRY DOORS

Find the Right ProVia Door for Your Home

Explore premium fiberglass and 20-gauge steel entry doors, each engineered to deliver lasting beauty, energy-efficient performance, and dependable protection for your home.

PREMIUM FIBERGLASS

Signet Fiberglass Doors

Bring the warmth and character of real wood to your entryway with ProVia’s most customizable fiberglass door collection.

Choose from authentic woodgrain textures, distinctive glass designs, and an extensive selection of panel styles and finishes.

Authentic woodgrain appearance
Widest selection of styles and glass
15-year finish warranty
Explore Signet
WHITE OAK FIBERGLASS

Ascent Fiberglass Doors

Authentic White Oak character meets durable fiberglass construction, delivering refined grain detail, lasting performance, and versatile styles for modern and traditional homes.

Explore Ascent
20-GAUGE STEEL

Legacy Steel Doors

Professional-class 20-gauge steel delivers exceptional strength, security, and long-term performance while maintaining a refined appearance for your home’s entrance.

Explore Legacy
Explore all Legacy Steel Doors
TRUSTED BY HOMEOWNERS

What Our Customers Say

See why homeowners trust Doors & Beyond for expert guidance, custom door solutions, and a smooth experience from selection to delivery.

NJ & FL Showrooms Bulk Discounts Available Custom Door Options Expert Support — 888-221-7848 Free Samples Available

Login

Forgot your password?

Don't have an account yet?
Create account