


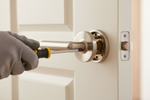
Removing a door handle takes under 10 minutes once you know which type you are dealing with - but the steps are completely different depending on the mechanism. A lever with visible screws, a knob with a hidden detent hole, and a European lever with a threaded rose all come off differently. This guide walks through all four types in order, with a troubleshooting table for when the handle refuses to budge.
To remove a door handle, identify the type first: lever with visible screws, lever with a concealed release slot, doorknob with a detent hole, or European lever with a hex set screw. Each uses a different release method. In most cases, a flathead screwdriver, Phillips screwdriver, or 3-4 mm hex key is all that is needed. The full process takes 5 to 15 minutes.

Tools You Need Before You Start
Using the wrong tool on the wrong handle type is the fastest way to scratch the door finish, strip a screw, or crack a decorative cap. Whether you are removing a door handle for painting, for repair, or to change a door handle entirely, having the right tools on the table before you start prevents the most common damage. The list below covers every scenario in this guide.
|
Tool |
When You Need It |
Size / Note |
|---|---|---|
|
Flathead screwdriver |
Prying off decorative caps; pressing a release slot on concealed-screw levers |
Small blade, 1/8" or 3/16" |
|
Phillips screwdriver |
Removing visible mounting screws on the rose or backplate |
#1 or #2 - check screw head size first |
|
Hex key (Allen wrench) |
Loosening a recessed set screw on lever neck or European lever spindle |
3 mm or 4 mm most common; bring both |
|
Straightened paperclip |
Pressing the spring detent inside a doorknob detent hole |
Any stiff wire works (thin nail, bobby pin) |
|
Masking tape |
Protecting door finish around the rose when prying or screwdriving |
Apply before any tool touches the door |
|
Utility knife |
Scoring paint seal around a rose that has been painted over |
Score lightly - do not cut into the door |
Quick summary: A flathead screwdriver and a set of hex keys cover the majority of door handle removal scenarios. The paperclip and utility knife are needed only for specific handle types - have them ready before you discover you need them mid-removal.
Identify Your Handle Type First
Attempting to remove a door handle without identifying the mechanism first is the single most common reason homeowners damage their hardware. The four types below account for virtually all residential door handles in US homes. The essential parts of a door guide on the Doors and Beyond blog covers the full anatomy if you want a broader reference before you start.
Lever Handle with Visible Screws
Look at the rose (the round or square plate that sits against the door surface). If you can see screw heads on the face of the rose or along its edge, this is the most straightforward type. No prying, no hidden slots, no special tools beyond a Phillips screwdriver.
Lever Handle with No Visible Screws
The rose appears completely smooth. Look for a small slot, notch, or button on the underside of the lever arm or on the neck where the lever meets the rose. This is the release point. European-style levers almost always fall into this category but use a different mechanism from standard concealed-screw levers - covered in its own section below.

Round Doorknob
Doorknobs use one of two attachment methods: a small hole in the neck of the knob (the detent hole, accessed with a paperclip), or a recessed hex screw inside the neck or under the rose (accessed with an Allen wrench). Rotating the knob while pulling sometimes reveals the hole if it is not immediately visible.
European Lever Handle
European lever handles are identifiable by their longer, often more angular profile and the absence of any visible screws or release slots on the lever itself. The rose typically unscrews counterclockwise as a single unit. Underneath it, mounting screws attach the mechanism to the door. These are the most common type sold with European interior door systems and require a hex key at the set screw before anything else moves.
How to Remove a Lever Door Handle with Visible Screws
This is the most common lever handle configuration in US residential construction and the most forgiving to remove. The mounting screws are on the interior side of the door, so start by working from inside the room.
Step 1: Stabilize the door.
Wedge the door open so it cannot swing while you work. A folded towel under the bottom edge works if a door wedge is not available. Lay masking tape around the perimeter of the rose to protect the door finish.
Step 2: Remove the mounting screws on the interior rose.
Using a Phillips #2 screwdriver, remove the two screws visible on the interior rose or backplate. Hold the lever lightly with your free hand to prevent it from dropping when the last screw comes out.
Step 3: Pull both sides of the lever away from the door.
Once the screws are out, the interior and exterior lever sides will separate from the spindle. Pull both away from the door face. If the exterior side resists, it is held by the spindle - pull both sides simultaneously outward.
Step 4: Remove the rose or backplate if it is a separate piece.
Some levers have a two-piece assembly where the rose detaches separately after the lever is removed. Check for additional screws underneath; if the rose still feels bonded, score the paint seal with a utility knife before prying.
Step 5: Remove the latch plate (only if replacing it with a different brand).
The latch plate sits on the door edge, held by two screws. If you are installing a replacement from the same brand, the existing latch will fit and can stay in place. If switching brands, unscrew the latch plate and pull the latch mechanism straight out from the bore hole. Total time for this procedure: 5 to 8 minutes.

How to Remove a Door Handle with No Visible Screws
No visible screws on a door handle is the most common source of confusion for homeowners. The handle is not locked in permanently - the manufacturer has concealed the release mechanism to keep the finished surface clean. The interior and exterior sides of the door are structurally different, so always work from the interior side first. Understanding which side you are looking at is covered in the right vs. left swing door guide if you are unsure.
Method 1 - Release Slot on the Lever Neck (most common)
This method applies to most modern lever handles sold in the US. Look at the underside or the side of the lever arm near the point where it meets the rose. There will be a small slot or notch, typically 1 to 2 mm wide. Insert the tip of a small flathead screwdriver into this slot and press firmly inward. While maintaining that inward pressure, pull the lever handle straight outward away from the door. It will slide off the square spindle. Repeat on the other side of the door. The rose screws are now accessible.
Method 2 - Detent Hole on a Round Doorknob
Standard passage and privacy doorknobs have a small round hole in the neck of the knob, usually 3 to 4 mm in diameter. Rotate the knob slowly while looking for it - the hole is not always at the front. Insert a straightened paperclip, a bobby pin, or a thin nail into the hole and push firmly inward. This depresses a spring-loaded detent pin inside the knob. While holding the pin depressed, pull the knob straight outward off the spindle. Then locate the thin slot on the edge of the rose, insert a flathead, and rotate the rose counterclockwise to remove it and expose the mounting screws.
Method 3 - Recessed Hex Set Screw
Some levers and doorknobs are held by a small set screw recessed into the underside of the lever arm or inside the neck of the knob. Look with a flashlight. The screw head is hexagonal, requiring an Allen wrench. The most common sizes are 3 mm and 4 mm - if you do not know which, try 3 mm first. Turn counterclockwise until the lever or knob slides free from the spindle. Do not remove the set screw entirely; loosening is sufficient to release the handle.
Method 4 - Decorative Cap Concealing Screws
Some handles and knob roses have a small decorative cap pressed over the screw access point. Look at the edge of the rose for a thin hairline gap or a small notch on one side. Apply masking tape to the door surface around the rose. Insert a small flathead screwdriver at the notch and apply steady, gentle outward pressure. The cap will pop free, revealing the mounting screws underneath. Use a Phillips screwdriver to remove the screws, then pull both sides of the handle away from the door.
Replacing the handle after removal?
Doors and Beyond carries a full range of European interior door hardware, including passage sets, privacy sets, and concealed-mechanism levers. Visit the showroom in Milltown, NJ or Hallandale Beach, FL to match your door system in person. Call 888-221-7848.

How to Remove a European Lever Door Handle
European lever handles operate on a different principle from standard US residential hardware. The lever attaches to a square or round spindle via a hex set screw at the base of the lever arm, and the rose unscrews as a single threaded unit rather than being held by mounting screws on its face. This mechanism is common on frameless interior door systems, concealed-hinge doors, and any door fitted with European hardware - and it is absent from every other how-to guide published in the US market.
Step 1: Locate the hex set screw on the underside of the lever.
The set screw sits at the base of the lever arm, on the underside, approximately 1 to 2 cm from the rose. It is a small hexagonal recess. The most common size is 3 mm; some systems use 4 mm. Bring both sizes.
Step 2: Loosen (do not fully remove) the set screw.
Insert the correct hex key and turn counterclockwise until the lever arm has slight play on the spindle. Removing the set screw entirely is unnecessary and risks losing the small screw inside the door mechanism.
Step 3: Slide the lever off the spindle.
With the set screw loose, the lever will slide off the spindle by pulling outward while rotating the lever slightly up or down. If it resists, the set screw may need another half-turn of loosening. Do not force it straight back - a slight angled pull reduces friction on the spindle.
Step 4: Unscrew the rose counterclockwise.
European roses are threaded rather than screwed. Grip the rose firmly and rotate it counterclockwise. It will unthread from the mounting plate behind it in 2 to 3 full turns. This is the step most people miss - they look for a pry point on a rose that simply unscrews. Once the rose is off, the two mounting screws behind it are visible.
Step 5: Remove the mounting screws and pull the mechanism free.
Remove the two mounting screws with a Phillips screwdriver. The internal mechanism (spindle carrier and latch connection) will pull away from the bore hole cleanly. Repeat the process on the other side of the door. Total time for European lever removal: 8 to 12 minutes once the mechanism type is identified.

Troubleshooting: When the Door Handle Won't Come Off
Following the correct steps for your handle type resolves most removal problems, but a few situations require a different approach. The scenarios below cover the most common issues encountered when removing door handles in existing residential construction, including the point at which DIY removal should be handed to a professional.
|
Problem |
Most Likely Cause |
Solution |
|---|---|---|
|
Handle pulls free from screws but still won't detach from door |
Spindle is bent or spring-loaded clip is still engaged |
Rock the lever gently side to side while pulling outward - do not force straight back |
|
Mounting screw is stripped and won't turn |
Overtightening or previous improper removal attempt |
Place a wide rubber band over the head for grip, or use a screw extractor bit (3/32" typically) |
|
Rose or backplate is stuck solid after screws are out |
Painted over - paint film is bonding rose to door surface |
Score the perimeter with a utility knife, then ease a thin flathead under the edge |
|
Decorative cap won't pry off without flexing |
Cap is press-fit very tightly or adhesive-backed |
Apply steady inward pressure at the notch point - do not lever from the center of the cap |
|
Handle came off but door won't open - latch is stuck |
Spindle disconnected from latch mechanism inside door |
Insert a flathead into the latch slot on the door edge and turn to retract; call a locksmith if latch is broken internally |
|
When to call a professional |
Lock cylinder is mechanically failed, door slab is cracked around bore, or exterior deadbolt is involved in a security issue |
DIY removal is appropriate for all handle types above; professional involvement is warranted when the lock body itself is damaged |
Quick summary: The large majority of stuck handles are caused by painted-over roses, stripped screws, or an unreleased spring clip - all fixable without professional help. The only scenario that reliably warrants calling a locksmith is a mechanically broken latch or lock cylinder that is preventing the door from operating.
What to Measure Before Buying a New Door Handle
If you are removing a door handle in order to change a door handle to a new style, taking four measurements before you order prevents the most common compatibility problems. Hardware that does not match the existing bore dimensions will require additional drilling - avoidable with 90 seconds of measuring before the handle comes off.
Measurements to Take Before Ordering Replacement Hardware:
|
Measurement |
How to Take It |
Standard US Sizes |
|---|---|---|
|
Backset |
Measure from the edge of the door to the center of the bore hole (the large round hole the handle sits in) |
2-3/8" (most common) or 2-3/4" (common in older homes) |
|
Cross bore diameter |
Measure the diameter of the large round hole in the door face |
2-1/8" is US standard for almost all residential handles |
|
Door thickness |
Measure the door slab at the edge, excluding the frame |
1-3/8" standard interior; 1-3/4" solid core / exterior |
|
Latch bore diameter |
Measure the hole on the door edge where the latch slides in |
15/16" or 1" - most replacement latches cover both |
|
Handle handing |
Stand on the side where the hinges are visible and note which side the handle is on |
Most levers are reversible; knobs are not handed |
Quick summary: Backset is the measurement most often overlooked and the one that causes the most returns. The 2-3/8" backset is standard in most US homes built after 1980; older homes more commonly have 2-3/4". Measure before ordering; most quality handles accommodate both backsets with an adjustable latch included in the box.
For doors fitted with European hardware systems, the spindle size and rose thread diameter are additional specifications that must match the existing door preparation. The how to install interior French doors guide covers European hardware fitting in the context of full door installation, including spindle sizing and latch alignment.
See more: Luxury Interior Doors: A Complete Guide to Premium Styles, Materials and Design
Looking for a replacement handle that works with your door system?
Doors and Beyond carries European lever door handles in passage, privacy, and keyed configurations, along with US standard knob sets, concealed hinges, and soft-close hardware. Visit the showroom in Milltown, NJ or Hallandale Beach, FL to match your existing door preparation. Call 888-221-7848.
Conclusion
Removing a door handle comes down to two things: identifying the mechanism type and using the right tool for that mechanism. Visible screws, concealed release slots, detent holes, hex set screws, and threaded European roses all release differently - but each releases cleanly when approached correctly. Take the four measurements in the table above before ordering a replacement, and the new handle will fit the existing door preparation without additional modification.
How to Remove a Door Handle: Step-by-Step Guide for Every Handle Type

Removing a door handle takes under 10 minutes once you know which type you are dealing with - but the steps are completely different depending on the mechanism. A lever with visible screws, a knob with a hidden detent hole, and a European lever with a threaded rose all come off differently. This guide walks through all four types in order, with a troubleshooting table for when the handle refuses to budge.
To remove a door handle, identify the type first: lever with visible screws, lever with a concealed release slot, doorknob with a detent hole, or European lever with a hex set screw. Each uses a different release method. In most cases, a flathead screwdriver, Phillips screwdriver, or 3-4 mm hex key is all that is needed. The full process takes 5 to 15 minutes.
Tools You Need Before You Start
Using the wrong tool on the wrong handle type is the fastest way to scratch the door finish, strip a screw, or crack a decorative cap. Whether you are removing a door handle for painting, for repair, or to change a door handle entirely, having the right tools on the table before you start prevents the most common damage. The list below covers every scenario in this guide.
|
Tool |
When You Need It |
Size / Note |
|---|---|---|
|
Flathead screwdriver |
Prying off decorative caps; pressing a release slot on concealed-screw levers |
Small blade, 1/8" or 3/16" |
|
Phillips screwdriver |
Removing visible mounting screws on the rose or backplate |
#1 or #2 - check screw head size first |
|
Hex key (Allen wrench) |
Loosening a recessed set screw on lever neck or European lever spindle |
3 mm or 4 mm most common; bring both |
|
Straightened paperclip |
Pressing the spring detent inside a doorknob detent hole |
Any stiff wire works (thin nail, bobby pin) |
|
Masking tape |
Protecting door finish around the rose when prying or screwdriving |
Apply before any tool touches the door |
|
Utility knife |
Scoring paint seal around a rose that has been painted over |
Score lightly - do not cut into the door |
Quick summary: A flathead screwdriver and a set of hex keys cover the majority of door handle removal scenarios. The paperclip and utility knife are needed only for specific handle types - have them ready before you discover you need them mid-removal.
Identify Your Handle Type First
Attempting to remove a door handle without identifying the mechanism first is the single most common reason homeowners damage their hardware. The four types below account for virtually all residential door handles in US homes. The essential parts of a door guide on the Doors and Beyond blog covers the full anatomy if you want a broader reference before you start.
Lever Handle with Visible Screws
Look at the rose (the round or square plate that sits against the door surface). If you can see screw heads on the face of the rose or along its edge, this is the most straightforward type. No prying, no hidden slots, no special tools beyond a Phillips screwdriver.
Lever Handle with No Visible Screws
The rose appears completely smooth. Look for a small slot, notch, or button on the underside of the lever arm or on the neck where the lever meets the rose. This is the release point. European-style levers almost always fall into this category but use a different mechanism from standard concealed-screw levers - covered in its own section below.
Round Doorknob
Doorknobs use one of two attachment methods: a small hole in the neck of the knob (the detent hole, accessed with a paperclip), or a recessed hex screw inside the neck or under the rose (accessed with an Allen wrench). Rotating the knob while pulling sometimes reveals the hole if it is not immediately visible.
European Lever Handle
European lever handles are identifiable by their longer, often more angular profile and the absence of any visible screws or release slots on the lever itself. The rose typically unscrews counterclockwise as a single unit. Underneath it, mounting screws attach the mechanism to the door. These are the most common type sold with European interior door systems and require a hex key at the set screw before anything else moves.
How to Remove a Lever Door Handle with Visible Screws
This is the most common lever handle configuration in US residential construction and the most forgiving to remove. The mounting screws are on the interior side of the door, so start by working from inside the room.
Step 1: Stabilize the door.
Wedge the door open so it cannot swing while you work. A folded towel under the bottom edge works if a door wedge is not available. Lay masking tape around the perimeter of the rose to protect the door finish.
Step 2: Remove the mounting screws on the interior rose.
Using a Phillips #2 screwdriver, remove the two screws visible on the interior rose or backplate. Hold the lever lightly with your free hand to prevent it from dropping when the last screw comes out.
Step 3: Pull both sides of the lever away from the door.
Once the screws are out, the interior and exterior lever sides will separate from the spindle. Pull both away from the door face. If the exterior side resists, it is held by the spindle - pull both sides simultaneously outward.
Step 4: Remove the rose or backplate if it is a separate piece.
Some levers have a two-piece assembly where the rose detaches separately after the lever is removed. Check for additional screws underneath; if the rose still feels bonded, score the paint seal with a utility knife before prying.
Step 5: Remove the latch plate (only if replacing it with a different brand).
The latch plate sits on the door edge, held by two screws. If you are installing a replacement from the same brand, the existing latch will fit and can stay in place. If switching brands, unscrew the latch plate and pull the latch mechanism straight out from the bore hole. Total time for this procedure: 5 to 8 minutes.
How to Remove a Door Handle with No Visible Screws
No visible screws on a door handle is the most common source of confusion for homeowners. The handle is not locked in permanently - the manufacturer has concealed the release mechanism to keep the finished surface clean. The interior and exterior sides of the door are structurally different, so always work from the interior side first. Understanding which side you are looking at is covered in the right vs. left swing door guide if you are unsure.
Method 1 - Release Slot on the Lever Neck (most common)
This method applies to most modern lever handles sold in the US. Look at the underside or the side of the lever arm near the point where it meets the rose. There will be a small slot or notch, typically 1 to 2 mm wide. Insert the tip of a small flathead screwdriver into this slot and press firmly inward. While maintaining that inward pressure, pull the lever handle straight outward away from the door. It will slide off the square spindle. Repeat on the other side of the door. The rose screws are now accessible.
Method 2 - Detent Hole on a Round Doorknob
Standard passage and privacy doorknobs have a small round hole in the neck of the knob, usually 3 to 4 mm in diameter. Rotate the knob slowly while looking for it - the hole is not always at the front. Insert a straightened paperclip, a bobby pin, or a thin nail into the hole and push firmly inward. This depresses a spring-loaded detent pin inside the knob. While holding the pin depressed, pull the knob straight outward off the spindle. Then locate the thin slot on the edge of the rose, insert a flathead, and rotate the rose counterclockwise to remove it and expose the mounting screws.
Method 3 - Recessed Hex Set Screw
Some levers and doorknobs are held by a small set screw recessed into the underside of the lever arm or inside the neck of the knob. Look with a flashlight. The screw head is hexagonal, requiring an Allen wrench. The most common sizes are 3 mm and 4 mm - if you do not know which, try 3 mm first. Turn counterclockwise until the lever or knob slides free from the spindle. Do not remove the set screw entirely; loosening is sufficient to release the handle.
Method 4 - Decorative Cap Concealing Screws
Some handles and knob roses have a small decorative cap pressed over the screw access point. Look at the edge of the rose for a thin hairline gap or a small notch on one side. Apply masking tape to the door surface around the rose. Insert a small flathead screwdriver at the notch and apply steady, gentle outward pressure. The cap will pop free, revealing the mounting screws underneath. Use a Phillips screwdriver to remove the screws, then pull both sides of the handle away from the door.
Replacing the handle after removal?
Doors and Beyond carries a full range of European interior door hardware, including passage sets, privacy sets, and concealed-mechanism levers. Visit the showroom in Milltown, NJ or Hallandale Beach, FL to match your door system in person. Call 888-221-7848.
How to Remove a European Lever Door Handle
European lever handles operate on a different principle from standard US residential hardware. The lever attaches to a square or round spindle via a hex set screw at the base of the lever arm, and the rose unscrews as a single threaded unit rather than being held by mounting screws on its face. This mechanism is common on frameless interior door systems, concealed-hinge doors, and any door fitted with European hardware - and it is absent from every other how-to guide published in the US market.
Step 1: Locate the hex set screw on the underside of the lever.
The set screw sits at the base of the lever arm, on the underside, approximately 1 to 2 cm from the rose. It is a small hexagonal recess. The most common size is 3 mm; some systems use 4 mm. Bring both sizes.
Step 2: Loosen (do not fully remove) the set screw.
Insert the correct hex key and turn counterclockwise until the lever arm has slight play on the spindle. Removing the set screw entirely is unnecessary and risks losing the small screw inside the door mechanism.
Step 3: Slide the lever off the spindle.
With the set screw loose, the lever will slide off the spindle by pulling outward while rotating the lever slightly up or down. If it resists, the set screw may need another half-turn of loosening. Do not force it straight back - a slight angled pull reduces friction on the spindle.
Step 4: Unscrew the rose counterclockwise.
European roses are threaded rather than screwed. Grip the rose firmly and rotate it counterclockwise. It will unthread from the mounting plate behind it in 2 to 3 full turns. This is the step most people miss - they look for a pry point on a rose that simply unscrews. Once the rose is off, the two mounting screws behind it are visible.
Step 5: Remove the mounting screws and pull the mechanism free.
Remove the two mounting screws with a Phillips screwdriver. The internal mechanism (spindle carrier and latch connection) will pull away from the bore hole cleanly. Repeat the process on the other side of the door. Total time for European lever removal: 8 to 12 minutes once the mechanism type is identified.
Troubleshooting: When the Door Handle Won't Come Off
Following the correct steps for your handle type resolves most removal problems, but a few situations require a different approach. The scenarios below cover the most common issues encountered when removing door handles in existing residential construction, including the point at which DIY removal should be handed to a professional.
|
Problem |
Most Likely Cause |
Solution |
|---|---|---|
|
Handle pulls free from screws but still won't detach from door |
Spindle is bent or spring-loaded clip is still engaged |
Rock the lever gently side to side while pulling outward - do not force straight back |
|
Mounting screw is stripped and won't turn |
Overtightening or previous improper removal attempt |
Place a wide rubber band over the head for grip, or use a screw extractor bit (3/32" typically) |
|
Rose or backplate is stuck solid after screws are out |
Painted over - paint film is bonding rose to door surface |
Score the perimeter with a utility knife, then ease a thin flathead under the edge |
|
Decorative cap won't pry off without flexing |
Cap is press-fit very tightly or adhesive-backed |
Apply steady inward pressure at the notch point - do not lever from the center of the cap |
|
Handle came off but door won't open - latch is stuck |
Spindle disconnected from latch mechanism inside door |
Insert a flathead into the latch slot on the door edge and turn to retract; call a locksmith if latch is broken internally |
|
When to call a professional |
Lock cylinder is mechanically failed, door slab is cracked around bore, or exterior deadbolt is involved in a security issue |
DIY removal is appropriate for all handle types above; professional involvement is warranted when the lock body itself is damaged |
Quick summary: The large majority of stuck handles are caused by painted-over roses, stripped screws, or an unreleased spring clip - all fixable without professional help. The only scenario that reliably warrants calling a locksmith is a mechanically broken latch or lock cylinder that is preventing the door from operating.
What to Measure Before Buying a New Door Handle
If you are removing a door handle in order to change a door handle to a new style, taking four measurements before you order prevents the most common compatibility problems. Hardware that does not match the existing bore dimensions will require additional drilling - avoidable with 90 seconds of measuring before the handle comes off.
Measurements to Take Before Ordering Replacement Hardware:
|
Measurement |
How to Take It |
Standard US Sizes |
|---|---|---|
|
Backset |
Measure from the edge of the door to the center of the bore hole (the large round hole the handle sits in) |
2-3/8" (most common) or 2-3/4" (common in older homes) |
|
Cross bore diameter |
Measure the diameter of the large round hole in the door face |
2-1/8" is US standard for almost all residential handles |
|
Door thickness |
Measure the door slab at the edge, excluding the frame |
1-3/8" standard interior; 1-3/4" solid core / exterior |
|
Latch bore diameter |
Measure the hole on the door edge where the latch slides in |
15/16" or 1" - most replacement latches cover both |
|
Handle handing |
Stand on the side where the hinges are visible and note which side the handle is on |
Most levers are reversible; knobs are not handed |
Quick summary: Backset is the measurement most often overlooked and the one that causes the most returns. The 2-3/8" backset is standard in most US homes built after 1980; older homes more commonly have 2-3/4". Measure before ordering; most quality handles accommodate both backsets with an adjustable latch included in the box.
For doors fitted with European hardware systems, the spindle size and rose thread diameter are additional specifications that must match the existing door preparation. The how to install interior French doors guide covers European hardware fitting in the context of full door installation, including spindle sizing and latch alignment.
See more: Luxury Interior Doors: A Complete Guide to Premium Styles, Materials and Design
Looking for a replacement handle that works with your door system?
Doors and Beyond carries European lever door handles in passage, privacy, and keyed configurations, along with US standard knob sets, concealed hinges, and soft-close hardware. Visit the showroom in Milltown, NJ or Hallandale Beach, FL to match your existing door preparation. Call 888-221-7848.
Conclusion
Removing a door handle comes down to two things: identifying the mechanism type and using the right tool for that mechanism. Visible screws, concealed release slots, detent holes, hex set screws, and threaded European roses all release differently - but each releases cleanly when approached correctly. Take the four measurements in the table above before ordering a replacement, and the new handle will fit the existing door preparation without additional modification.


