


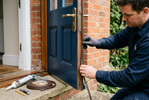
A drafty exterior door is one of the most common and costly home comfort problems. When the seal around your front door fails, conditioned air escapes freely and your heating or cooling system works overtime to compensate. The good news is that weatherproofing an exterior door is a straightforward DIY project most homeowners can complete in a single afternoon, with materials available at any hardware store. This guide walks you through every step, from diagnosing the problem to choosing the right fix for your specific door material.
To weatherproof an exterior door, inspect the door frame and bottom for gaps, then install or replace weatherstripping along the sides and top, add a door sweep at the bottom, and apply exterior-grade caulk around the door frame. For wood doors, apply a waterproof sealant to the surface as well. Most projects take two to four hours and require no special tools.

Signs Your Exterior Door Needs Weatherproofing
Not every draft or energy spike points to a failing door seal, but knowing the specific warning signs helps you confirm the problem before spending time on repairs. A quick visual check and two simple tests will tell you everything you need to know.
The Paper Test and Light Test
The paper test is one of the most reliable ways to check for air leaks. Close the door on a piece of paper so it is held between the door and the jamb, then try to pull the paper out. If it slides free without resistance, the seal at that spot is not making full contact and needs attention. Repeat this test along all four edges of the door, including the bottom.
For the light test, wait until dark, stand outside, and have someone hold a flashlight along the interior perimeter of the closed door. Any visible light around the edges or bottom indicates a gap where air and moisture can enter. Pay close attention to the corners, which are common failure points for weatherstripping.
Common Signs of a Failing Door Seal
Beyond the tests, several other symptoms point to a door that needs weatherproofing. Noticeable drafts near the door on windy days, visible daylight around the door frame, or a door that rattles when closed all suggest the weatherstripping or sweep has worn out. Water stains or paint peeling near the bottom of the door frame are signs that moisture is finding its way past the threshold seal. If your energy bills have climbed without explanation, an air-leaking door is a strong candidate.
What You Need Before You Start
Gathering all materials before you begin prevents mid-project trips to the hardware store and keeps the work moving efficiently. The list below covers a full weatherproofing job from top to bottom.
|
Item |
Purpose |
Notes |
|
Tubular silicone weatherstripping |
Seal sides and top of door |
Silicone lasts longer than foam or felt |
|
Door sweep |
Seal the bottom gap |
Choose automatic drop sweep for best results |
|
Exterior-grade caulk |
Seal door frame to siding |
100% silicone or polyurethane formula |
|
Caulk gun |
Apply caulk evenly |
Standard pistol-grip type works fine |
|
Utility knife or putty knife |
Remove old weatherstripping |
For scraping debris and old adhesive |
|
Tape measure |
Size weatherstripping and sweep |
Measure all four sides |
|
Hammer and finish nails or screws |
Secure flange-style weatherstripping |
Screws hold better than nails over time |
|
Rubbing alcohol or mild soap |
Clean surfaces before applying |
Improves adhesion for tape-backed strips |
|
Waterproof wood sealant (wood doors only) |
Protect door surface from moisture |
Exterior-grade, UV-resistant formula |
The core items for any weatherproofing job are weatherstripping, a door sweep, and exterior caulk. The wood sealant applies only to wood doors. If your existing weatherstripping is intact and your main issue is a gap at the bottom, a door sweep alone may be enough to resolve it.
Step 1: Inspect and Prepare the Door
Before installing any new materials, take time to assess the door itself. Weatherstripping and caulk can only work well when the door is properly aligned and the surfaces are clean. Skipping this step is the most common reason DIY weatherproofing fails within a season.

Check the Door Alignment
Open and close the door slowly while watching the gap between the door slab and the door jamb on both sides and at the top. The gap should be roughly even all the way around, typically between 1/8 and 3/16 of an inch. An uneven gap, often wider at the top on one side and narrower at the bottom, means the door has shifted in the frame. This usually happens when hinge screws work loose over time.
Tighten all hinge screws before proceeding. If the screw holes have stripped out, remove the screws and fill the holes with wooden toothpicks and wood glue, let it cure, then re-drive the screws into solid material. For more significant alignment issues, adjusting the strike plate or shimming a hinge may be needed. A door that closes and latches evenly is the foundation for a seal that actually performs.
Clean the Frame and Jamb
Remove all old weatherstripping by peeling or scraping it away, then clean the surface with rubbing alcohol or a mild soap-and-water solution to remove adhesive residue, dirt, and paint dust. Let the surface dry completely before applying anything new. On the exterior, use a putty knife to scrape away any cracked or loose caulk around the door frame, and wipe the area clean. New weatherstripping and caulk bond far better to clean, dry surfaces than to dusty or oily ones.
Step 2: Install or Replace Weatherstripping
Weatherstripping creates the seal where the door meets the jamb on the sides and top. This is the most impactful single step in weatherproofing an exterior door, and it is also the component that fails most often from repeated use.
How to Install Weatherstripping on the Sides and Top
Measure each side of the door opening from the sill to the top corner, then measure the width across the top. Cut weatherstripping to length using scissors or tin snips depending on the material. For foam or tape-backed strips, peel the backing and press firmly into place along the door stop, which is the narrow strip of wood the door closes against. Work from top to bottom on the sides so each strip overlaps or meets cleanly at the corners.
For flange-style or V-strip weatherstripping, position the strip so it will compress against the door face when the door is closed, then nail or screw the flange to the door stop. Tack it in place first, close the door to check the fit, then drive the remaining fasteners. The goal is firm, even contact across the full length of each strip with no gaps at the corners.
Choosing the Right Weatherstripping Material
The material you choose affects how well the seal holds up and how long it lasts. Silicone is the most durable option for exterior doors because it stays flexible through temperature swings and resists compression set, meaning it does not flatten out permanently over time the way foam does. The table below compares the four most common types.
|
Material |
Best Application |
Lifespan |
DIY Difficulty |
Notes |
|
Tubular silicone |
Sides and top of exterior door |
10+ years |
Easy |
Best overall for exterior use |
|
V-strip (tension seal) |
Sides and top, wood frames |
5-10 years |
Moderate |
Good for uneven gaps |
|
Foam tape |
Infrequently used doors |
1-3 years |
Very easy |
Low cost, short lifespan |
|
Bulb/tubular vinyl |
Sides and top, metal flange |
5-8 years |
Moderate |
Durable, screws or nails required |
For most exterior front doors, tubular silicone on the sides and top paired with a silicone twin-fin sweep at the bottom offers the best combination of performance and longevity. Foam tape is a reasonable short-term fix but will need replacement within a season or two if the door is used daily.
Step 3: Seal the Bottom with a Door Sweep
The gap at the bottom of an exterior door is where the majority of air and moisture infiltration occurs. A door sweep closes this gap when the door is shut, preventing drafts, rain-driven moisture, and insects from entering. Unlike weatherstripping on the jamb, door sweeps attach directly to the door slab itself.

Types of Door Sweeps
The most basic type is the face-mount sweep, a strip of rubber or bristles attached to a metal or plastic base that screws to the interior face of the door near the bottom. These are straightforward to install and work well on flat thresholds. An automatic door sweep uses a spring-loaded mechanism to drop the seal into position when the door closes and lift it clear when the door opens, which makes it easier to operate on thick carpet and reduces wear on the sweep material. For the most complete seal, an under-door sweep with a flexible fin that contacts the threshold from below offers excellent draft prevention on doors with uneven thresholds.
How to Install a Door Sweep
Close the door and measure the width of the door slab. Most sweeps come in standard widths and can be cut to fit with a hacksaw or tin snips. For a face-mount sweep, hold it against the interior face of the door with the sealing element just touching the threshold when the door is closed, mark the screw holes, then drill pilot holes and drive the screws. Do not over-tighten, as this can cause the sweep to drag and wear unevenly. Open and close the door several times to confirm the sweep makes full contact with the threshold without binding.
For additional guidance on how a pre-hung door's threshold and bottom seal work together, see: What Is a Prehung Interior Door on the Doors and Beyond blog.
Step 4: Caulk Around the Exterior Door Frame
Weatherstripping handles the moving parts of the door seal, but caulk handles the static joints: the seam where the door frame meets the exterior siding of your home. These gaps often go unnoticed for years while silently admitting moisture and air. Caulking the exterior frame is a critical step in a complete weatherproofing job, and it is often the one most homeowners skip.
Where to Apply Caulk
Focus on the seam between the exterior door casing, also called the brick mold or door trim, and the siding material on your home's exterior. Run a continuous bead along both sides and across the top where the casing meets the wall. Also check the joint between the door sill and the threshold, and any visible gaps at the corners of the frame. Do not caulk the bottom of the door casing or the bottom edge of horizontal siding boards, as these areas need to drain water rather than seal it in.
Silicone vs. Polyurethane Caulk: Which to Use
For exterior door frames, the two best-performing caulk types are 100% silicone and polyurethane. Silicone cures to a permanently flexible seal that will not crack or shrink through seasonal temperature changes, makes it ideal for joints between dissimilar materials such as wood casing against vinyl siding. Polyurethane caulk is slightly more rigid when cured but bonds strongly to wood, masonry, and metal, and can be painted over, which silicone generally cannot. If the door frame will be repainted, polyurethane is the practical choice. If the joint will remain unpainted and experiences significant movement, silicone is more reliable long-term.
To apply, load the cartridge into the caulk gun and cut the nozzle at a 45-degree angle. Starting at a top corner, run a steady bead along the seam by pulling the gun toward you at a consistent speed. Immediately smooth the bead with a wet finger or caulk tool to press it into the joint and create a clean finish. Allow the caulk to cure fully before exposure to rain, typically 24 hours for silicone.
Understanding how door parts like the jamb, casing, and threshold connect helps identify every spot that needs sealing. See: Door Parts Names: A Complete Glossary on the Doors and Beyond blog.

Step 5: Weatherproofing Tips by Door Material
The steps above apply to any exterior door, but different door materials have specific vulnerabilities and maintenance needs. Matching your approach to your door's construction ensures the weatherproofing lasts and protects the door itself, not just the opening around it.
How to Weatherproof a Wood Exterior Door
Wood is a natural material that expands and contracts with humidity and temperature changes throughout the year. This movement is one reason wood doors tend to develop air gaps over time, particularly at the bottom and along the sides. After completing the weatherstripping and caulk steps, inspect the door surface itself for cracked, peeling, or worn finish. Any exposed bare wood is a direct path for moisture to enter the door slab, which can lead to warping, swelling, and eventual seal failure.
Apply a quality exterior-grade waterproof sealant or stain-sealant combination to all exposed wood surfaces, including the door edges and especially the bottom edge, which is most vulnerable. Use a UV-resistant formula to prevent color fading and surface cracking from sun exposure. Plan to reapply sealant every one to two years or whenever the finish shows signs of wear.
Choosing the right door material for your climate and usage patterns makes long-term maintenance easier. See: Types of Door Material: What Works Best for Your Home on the Doors and Beyond blog.
How to Weatherproof a Steel Exterior Door
Steel doors are dimensionally stable and do not expand and contract the way wood does, which means weatherstripping tends to hold its fit better over time. However, steel doors are susceptible to rust at the edges and bottom if the factory finish is chipped or scratched. Inspect the door edges for paint damage and touch up any bare metal with a rust-inhibiting primer and exterior paint before moisture takes hold. Pay particular attention to the bottom edge and any areas around the door hardware where the finish sees the most wear.
The threshold and door sweep are especially important on steel doors because any gap at the bottom allows moisture to pool against the metal edge. A high-quality automatic door sweep keeps this area dry and reduces wear on the door bottom over time.
How to Weatherproof a Fiberglass Exterior Door
Fiberglass doors are among the most weather-resistant options available, combining the dimensional stability of steel with resistance to rust and rot. However, the weatherstripping and threshold seal still wear out over time and need periodic replacement just as they do on any other door type. Fiberglass door surfaces benefit from a UV-protective coating or gel coat refresh every several years to prevent fading and surface degradation.
One advantage of fiberglass over wood is that the door slab itself requires far less maintenance, so weatherproofing effort can focus almost entirely on the perimeter seals rather than the door surface.
When Weatherproofing Is Not Enough
Most draft and moisture problems can be resolved with new weatherstripping, a door sweep, and fresh caulk. But there are situations where repeated repairs are a sign that the door itself has reached the end of its useful life. Recognizing these signs early prevents ongoing energy loss and avoids the frustration of re-doing the same repairs every season.

Consider replacing your exterior door if the door slab is visibly warped or bowed to the point where no amount of weatherstripping creates an even seal, if a wood door has swollen and stuck or shrunk and rattles despite adjusted hinges and new seals, if the door frame shows signs of structural rot that compromise the fit of the door, or if the door has single-pane glass or no thermal break and is a major source of heat loss despite a fully intact perimeter seal.
A replacement front door built with integrated weatherseals, multi-point locking hardware, and high-performance thresholds will outperform even the best DIY weatherproofing on an aging door.
Looking to upgrade your exterior door? Doors and Beyond carries modern front doors, fiberglass front doors, and steel security doors designed for lasting weather performance. Browse the full exterior door collection at doorsandbeyond.com/collections/exterior-doors.
If your exterior door has glass panels or sidelights that are adding to your draft problem, see: How to Insulate French Doors: Diagnose the Draft First, Then Fix It on the Doors and Beyond blog.
Frequently Asked Questions
How often should I replace weatherstripping on an exterior door?
Silicone weatherstripping on a frequently used exterior door typically lasts five to ten years before it compresses enough to lose its seal. Foam tape deteriorates much faster, often within one to three years. Inspect the weatherstripping each fall by running the paper test along all four edges. If the paper pulls free without resistance, it is time for a replacement.
Can I weatherproof a door with a large gap?
Standard weatherstripping works for gaps up to about 3/16 of an inch. For larger gaps, look for wide-profile bulb or tubular weatherstripping designed to bridge bigger openings, or use a foam backer rod as a base layer before applying caulk on static joints. Gaps larger than 1/4 inch around a door often indicate an alignment issue that should be corrected first.
How long does it take to weatherproof an exterior door?
A full weatherproofing job covering inspection, weatherstripping, a door sweep, and exterior caulk takes most homeowners two to four hours. The longest step is usually waiting for caulk to cure before the door sees rain. If you are only replacing a door sweep or re-caulking the frame, expect under an hour for each task.
What is the best caulk for an exterior door frame?
For most exterior door frames, 100% silicone caulk is the most reliable long-term choice because it remains permanently flexible, resists UV degradation, and will not crack through seasonal temperature swings. If the area needs to be painted over after application, polyurethane caulk is a practical alternative with strong adhesion to wood, masonry, and metal.
Does weatherproofing an exterior door actually reduce energy bills?
Yes, sealing air leaks around exterior doors is one of the most cost-effective home energy improvements available. The U.S. Department of Energy estimates that air sealing and weatherization can reduce heating and cooling costs meaningfully in homes with significant leakage. The savings are most noticeable in climates with extreme winter or summer temperatures, where conditioned air escaping through gaps represents a direct, ongoing expense.
Do I need to remove the door to install weatherstripping?
In most cases, no. Foam tape and flange-style weatherstripping install with the door in place. Cutting a dado groove for silicone weatherstripping is one exception that may require removing the door for easier access, though it can be done with the door hung if you work carefully. Door sweeps always install with the door in place.
Weatherproofing an exterior door is one of the most practical maintenance tasks a homeowner can take on. A careful inspection, fresh weatherstripping, a quality door sweep, and exterior caulk address the most common sources of draft and moisture infiltration and restore comfort and energy efficiency to any entry. When the door itself can no longer be sealed effectively, a well-chosen replacement will deliver results no amount of repair can match.
Ready to upgrade your front entry? Explore modern front doors, fiberglass doors, and solid wood front doors at Doors and Beyond. Visit doorsandbeyond.com/collections/exterior-doors to browse the full collection or call 888-221-7848 to speak with a door specialist.
How to Weatherproof an Exterior Door: A Complete Step-by-Step Guide

A drafty exterior door is one of the most common and costly home comfort problems. When the seal around your front door fails, conditioned air escapes freely and your heating or cooling system works overtime to compensate. The good news is that weatherproofing an exterior door is a straightforward DIY project most homeowners can complete in a single afternoon, with materials available at any hardware store. This guide walks you through every step, from diagnosing the problem to choosing the right fix for your specific door material.
To weatherproof an exterior door, inspect the door frame and bottom for gaps, then install or replace weatherstripping along the sides and top, add a door sweep at the bottom, and apply exterior-grade caulk around the door frame. For wood doors, apply a waterproof sealant to the surface as well. Most projects take two to four hours and require no special tools.
Signs Your Exterior Door Needs Weatherproofing
Not every draft or energy spike points to a failing door seal, but knowing the specific warning signs helps you confirm the problem before spending time on repairs. A quick visual check and two simple tests will tell you everything you need to know.
The Paper Test and Light Test
The paper test is one of the most reliable ways to check for air leaks. Close the door on a piece of paper so it is held between the door and the jamb, then try to pull the paper out. If it slides free without resistance, the seal at that spot is not making full contact and needs attention. Repeat this test along all four edges of the door, including the bottom.
For the light test, wait until dark, stand outside, and have someone hold a flashlight along the interior perimeter of the closed door. Any visible light around the edges or bottom indicates a gap where air and moisture can enter. Pay close attention to the corners, which are common failure points for weatherstripping.
Common Signs of a Failing Door Seal
Beyond the tests, several other symptoms point to a door that needs weatherproofing. Noticeable drafts near the door on windy days, visible daylight around the door frame, or a door that rattles when closed all suggest the weatherstripping or sweep has worn out. Water stains or paint peeling near the bottom of the door frame are signs that moisture is finding its way past the threshold seal. If your energy bills have climbed without explanation, an air-leaking door is a strong candidate.
What You Need Before You Start
Gathering all materials before you begin prevents mid-project trips to the hardware store and keeps the work moving efficiently. The list below covers a full weatherproofing job from top to bottom.
|
Item |
Purpose |
Notes |
|
Tubular silicone weatherstripping |
Seal sides and top of door |
Silicone lasts longer than foam or felt |
|
Door sweep |
Seal the bottom gap |
Choose automatic drop sweep for best results |
|
Exterior-grade caulk |
Seal door frame to siding |
100% silicone or polyurethane formula |
|
Caulk gun |
Apply caulk evenly |
Standard pistol-grip type works fine |
|
Utility knife or putty knife |
Remove old weatherstripping |
For scraping debris and old adhesive |
|
Tape measure |
Size weatherstripping and sweep |
Measure all four sides |
|
Hammer and finish nails or screws |
Secure flange-style weatherstripping |
Screws hold better than nails over time |
|
Rubbing alcohol or mild soap |
Clean surfaces before applying |
Improves adhesion for tape-backed strips |
|
Waterproof wood sealant (wood doors only) |
Protect door surface from moisture |
Exterior-grade, UV-resistant formula |
The core items for any weatherproofing job are weatherstripping, a door sweep, and exterior caulk. The wood sealant applies only to wood doors. If your existing weatherstripping is intact and your main issue is a gap at the bottom, a door sweep alone may be enough to resolve it.
Step 1: Inspect and Prepare the Door
Before installing any new materials, take time to assess the door itself. Weatherstripping and caulk can only work well when the door is properly aligned and the surfaces are clean. Skipping this step is the most common reason DIY weatherproofing fails within a season.
Check the Door Alignment
Open and close the door slowly while watching the gap between the door slab and the door jamb on both sides and at the top. The gap should be roughly even all the way around, typically between 1/8 and 3/16 of an inch. An uneven gap, often wider at the top on one side and narrower at the bottom, means the door has shifted in the frame. This usually happens when hinge screws work loose over time.
Tighten all hinge screws before proceeding. If the screw holes have stripped out, remove the screws and fill the holes with wooden toothpicks and wood glue, let it cure, then re-drive the screws into solid material. For more significant alignment issues, adjusting the strike plate or shimming a hinge may be needed. A door that closes and latches evenly is the foundation for a seal that actually performs.
Clean the Frame and Jamb
Remove all old weatherstripping by peeling or scraping it away, then clean the surface with rubbing alcohol or a mild soap-and-water solution to remove adhesive residue, dirt, and paint dust. Let the surface dry completely before applying anything new. On the exterior, use a putty knife to scrape away any cracked or loose caulk around the door frame, and wipe the area clean. New weatherstripping and caulk bond far better to clean, dry surfaces than to dusty or oily ones.
Step 2: Install or Replace Weatherstripping
Weatherstripping creates the seal where the door meets the jamb on the sides and top. This is the most impactful single step in weatherproofing an exterior door, and it is also the component that fails most often from repeated use.
How to Install Weatherstripping on the Sides and Top
Measure each side of the door opening from the sill to the top corner, then measure the width across the top. Cut weatherstripping to length using scissors or tin snips depending on the material. For foam or tape-backed strips, peel the backing and press firmly into place along the door stop, which is the narrow strip of wood the door closes against. Work from top to bottom on the sides so each strip overlaps or meets cleanly at the corners.
For flange-style or V-strip weatherstripping, position the strip so it will compress against the door face when the door is closed, then nail or screw the flange to the door stop. Tack it in place first, close the door to check the fit, then drive the remaining fasteners. The goal is firm, even contact across the full length of each strip with no gaps at the corners.
Choosing the Right Weatherstripping Material
The material you choose affects how well the seal holds up and how long it lasts. Silicone is the most durable option for exterior doors because it stays flexible through temperature swings and resists compression set, meaning it does not flatten out permanently over time the way foam does. The table below compares the four most common types.
|
Material |
Best Application |
Lifespan |
DIY Difficulty |
Notes |
|
Tubular silicone |
Sides and top of exterior door |
10+ years |
Easy |
Best overall for exterior use |
|
V-strip (tension seal) |
Sides and top, wood frames |
5-10 years |
Moderate |
Good for uneven gaps |
|
Foam tape |
Infrequently used doors |
1-3 years |
Very easy |
Low cost, short lifespan |
|
Bulb/tubular vinyl |
Sides and top, metal flange |
5-8 years |
Moderate |
Durable, screws or nails required |
For most exterior front doors, tubular silicone on the sides and top paired with a silicone twin-fin sweep at the bottom offers the best combination of performance and longevity. Foam tape is a reasonable short-term fix but will need replacement within a season or two if the door is used daily.
Step 3: Seal the Bottom with a Door Sweep
The gap at the bottom of an exterior door is where the majority of air and moisture infiltration occurs. A door sweep closes this gap when the door is shut, preventing drafts, rain-driven moisture, and insects from entering. Unlike weatherstripping on the jamb, door sweeps attach directly to the door slab itself.
Types of Door Sweeps
The most basic type is the face-mount sweep, a strip of rubber or bristles attached to a metal or plastic base that screws to the interior face of the door near the bottom. These are straightforward to install and work well on flat thresholds. An automatic door sweep uses a spring-loaded mechanism to drop the seal into position when the door closes and lift it clear when the door opens, which makes it easier to operate on thick carpet and reduces wear on the sweep material. For the most complete seal, an under-door sweep with a flexible fin that contacts the threshold from below offers excellent draft prevention on doors with uneven thresholds.
How to Install a Door Sweep
Close the door and measure the width of the door slab. Most sweeps come in standard widths and can be cut to fit with a hacksaw or tin snips. For a face-mount sweep, hold it against the interior face of the door with the sealing element just touching the threshold when the door is closed, mark the screw holes, then drill pilot holes and drive the screws. Do not over-tighten, as this can cause the sweep to drag and wear unevenly. Open and close the door several times to confirm the sweep makes full contact with the threshold without binding.
For additional guidance on how a pre-hung door's threshold and bottom seal work together, see: What Is a Prehung Interior Door on the Doors and Beyond blog.
Step 4: Caulk Around the Exterior Door Frame
Weatherstripping handles the moving parts of the door seal, but caulk handles the static joints: the seam where the door frame meets the exterior siding of your home. These gaps often go unnoticed for years while silently admitting moisture and air. Caulking the exterior frame is a critical step in a complete weatherproofing job, and it is often the one most homeowners skip.
Where to Apply Caulk
Focus on the seam between the exterior door casing, also called the brick mold or door trim, and the siding material on your home's exterior. Run a continuous bead along both sides and across the top where the casing meets the wall. Also check the joint between the door sill and the threshold, and any visible gaps at the corners of the frame. Do not caulk the bottom of the door casing or the bottom edge of horizontal siding boards, as these areas need to drain water rather than seal it in.
Silicone vs. Polyurethane Caulk: Which to Use
For exterior door frames, the two best-performing caulk types are 100% silicone and polyurethane. Silicone cures to a permanently flexible seal that will not crack or shrink through seasonal temperature changes, makes it ideal for joints between dissimilar materials such as wood casing against vinyl siding. Polyurethane caulk is slightly more rigid when cured but bonds strongly to wood, masonry, and metal, and can be painted over, which silicone generally cannot. If the door frame will be repainted, polyurethane is the practical choice. If the joint will remain unpainted and experiences significant movement, silicone is more reliable long-term.
To apply, load the cartridge into the caulk gun and cut the nozzle at a 45-degree angle. Starting at a top corner, run a steady bead along the seam by pulling the gun toward you at a consistent speed. Immediately smooth the bead with a wet finger or caulk tool to press it into the joint and create a clean finish. Allow the caulk to cure fully before exposure to rain, typically 24 hours for silicone.
Understanding how door parts like the jamb, casing, and threshold connect helps identify every spot that needs sealing. See: Door Parts Names: A Complete Glossary on the Doors and Beyond blog.
Step 5: Weatherproofing Tips by Door Material
The steps above apply to any exterior door, but different door materials have specific vulnerabilities and maintenance needs. Matching your approach to your door's construction ensures the weatherproofing lasts and protects the door itself, not just the opening around it.
How to Weatherproof a Wood Exterior Door
Wood is a natural material that expands and contracts with humidity and temperature changes throughout the year. This movement is one reason wood doors tend to develop air gaps over time, particularly at the bottom and along the sides. After completing the weatherstripping and caulk steps, inspect the door surface itself for cracked, peeling, or worn finish. Any exposed bare wood is a direct path for moisture to enter the door slab, which can lead to warping, swelling, and eventual seal failure.
Apply a quality exterior-grade waterproof sealant or stain-sealant combination to all exposed wood surfaces, including the door edges and especially the bottom edge, which is most vulnerable. Use a UV-resistant formula to prevent color fading and surface cracking from sun exposure. Plan to reapply sealant every one to two years or whenever the finish shows signs of wear.
Choosing the right door material for your climate and usage patterns makes long-term maintenance easier. See: Types of Door Material: What Works Best for Your Home on the Doors and Beyond blog.
How to Weatherproof a Steel Exterior Door
Steel doors are dimensionally stable and do not expand and contract the way wood does, which means weatherstripping tends to hold its fit better over time. However, steel doors are susceptible to rust at the edges and bottom if the factory finish is chipped or scratched. Inspect the door edges for paint damage and touch up any bare metal with a rust-inhibiting primer and exterior paint before moisture takes hold. Pay particular attention to the bottom edge and any areas around the door hardware where the finish sees the most wear.
The threshold and door sweep are especially important on steel doors because any gap at the bottom allows moisture to pool against the metal edge. A high-quality automatic door sweep keeps this area dry and reduces wear on the door bottom over time.
How to Weatherproof a Fiberglass Exterior Door
Fiberglass doors are among the most weather-resistant options available, combining the dimensional stability of steel with resistance to rust and rot. However, the weatherstripping and threshold seal still wear out over time and need periodic replacement just as they do on any other door type. Fiberglass door surfaces benefit from a UV-protective coating or gel coat refresh every several years to prevent fading and surface degradation.
One advantage of fiberglass over wood is that the door slab itself requires far less maintenance, so weatherproofing effort can focus almost entirely on the perimeter seals rather than the door surface.
When Weatherproofing Is Not Enough
Most draft and moisture problems can be resolved with new weatherstripping, a door sweep, and fresh caulk. But there are situations where repeated repairs are a sign that the door itself has reached the end of its useful life. Recognizing these signs early prevents ongoing energy loss and avoids the frustration of re-doing the same repairs every season.
Consider replacing your exterior door if the door slab is visibly warped or bowed to the point where no amount of weatherstripping creates an even seal, if a wood door has swollen and stuck or shrunk and rattles despite adjusted hinges and new seals, if the door frame shows signs of structural rot that compromise the fit of the door, or if the door has single-pane glass or no thermal break and is a major source of heat loss despite a fully intact perimeter seal.
A replacement front door built with integrated weatherseals, multi-point locking hardware, and high-performance thresholds will outperform even the best DIY weatherproofing on an aging door.
Looking to upgrade your exterior door? Doors and Beyond carries modern front doors, fiberglass front doors, and steel security doors designed for lasting weather performance. Browse the full exterior door collection at doorsandbeyond.com/collections/exterior-doors.
If your exterior door has glass panels or sidelights that are adding to your draft problem, see: How to Insulate French Doors: Diagnose the Draft First, Then Fix It on the Doors and Beyond blog.
Frequently Asked Questions
How often should I replace weatherstripping on an exterior door?
Silicone weatherstripping on a frequently used exterior door typically lasts five to ten years before it compresses enough to lose its seal. Foam tape deteriorates much faster, often within one to three years. Inspect the weatherstripping each fall by running the paper test along all four edges. If the paper pulls free without resistance, it is time for a replacement.
Can I weatherproof a door with a large gap?
Standard weatherstripping works for gaps up to about 3/16 of an inch. For larger gaps, look for wide-profile bulb or tubular weatherstripping designed to bridge bigger openings, or use a foam backer rod as a base layer before applying caulk on static joints. Gaps larger than 1/4 inch around a door often indicate an alignment issue that should be corrected first.
How long does it take to weatherproof an exterior door?
A full weatherproofing job covering inspection, weatherstripping, a door sweep, and exterior caulk takes most homeowners two to four hours. The longest step is usually waiting for caulk to cure before the door sees rain. If you are only replacing a door sweep or re-caulking the frame, expect under an hour for each task.
What is the best caulk for an exterior door frame?
For most exterior door frames, 100% silicone caulk is the most reliable long-term choice because it remains permanently flexible, resists UV degradation, and will not crack through seasonal temperature swings. If the area needs to be painted over after application, polyurethane caulk is a practical alternative with strong adhesion to wood, masonry, and metal.
Does weatherproofing an exterior door actually reduce energy bills?
Yes, sealing air leaks around exterior doors is one of the most cost-effective home energy improvements available. The U.S. Department of Energy estimates that air sealing and weatherization can reduce heating and cooling costs meaningfully in homes with significant leakage. The savings are most noticeable in climates with extreme winter or summer temperatures, where conditioned air escaping through gaps represents a direct, ongoing expense.
Do I need to remove the door to install weatherstripping?
In most cases, no. Foam tape and flange-style weatherstripping install with the door in place. Cutting a dado groove for silicone weatherstripping is one exception that may require removing the door for easier access, though it can be done with the door hung if you work carefully. Door sweeps always install with the door in place.
Weatherproofing an exterior door is one of the most practical maintenance tasks a homeowner can take on. A careful inspection, fresh weatherstripping, a quality door sweep, and exterior caulk address the most common sources of draft and moisture infiltration and restore comfort and energy efficiency to any entry. When the door itself can no longer be sealed effectively, a well-chosen replacement will deliver results no amount of repair can match.
Ready to upgrade your front entry? Explore modern front doors, fiberglass doors, and solid wood front doors at Doors and Beyond. Visit doorsandbeyond.com/collections/exterior-doors to browse the full collection or call 888-221-7848 to speak with a door specialist.


