


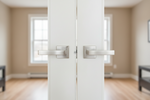
For most bifold doors, place the handle on the leading panel at a height of 34 to 48 inches from the finished floor, with 36 inches as the standard residential target. Position it horizontally at the center of the panel width. The leading panel is the one that moves first when you open the door.
Bifold door handle placement involves three decisions in order: which panel to use, how high to mount it, and where on the panel face to position it. Getting any one wrong can make the door hard to use, strain the track hardware, or leave bore holes in the wrong spot. This guide gives the correct measurement for each decision across every common bifold door configuration.
Leading vs Trailing Panel: Which Panel Gets the Handle
This is the most important and most frequently misunderstood part of bifold door handle placement. Choosing the wrong panel makes the door harder to operate and puts uneven stress on the pivot hardware over time.
A bifold door has two types of panels. The trailing panel, also called the following or fixed panel, has its pivot pin anchored to the jamb bracket at the bottom corner of the opening. This panel rotates around a fixed point and does not travel along the track. The leading panel is attached to the top track via a guide roller, which allows it to move freely along the track as the door folds. The handle goes on the leading panel in every configuration.
The reason comes down to leverage. When you grab the leading panel near its center and pull, you apply force close to the panel's center of gravity and the folding action begins smoothly. If the handle is on the trailing panel, you are pulling from a point far removed from the pivot, which creates a longer lever arm and generates significantly more torque on the bottom pivot bracket and the top guide pin. Over time, this torque causes the guide pin to wear its track slot faster, the bottom bracket to work loose, and the door to sag or misalign.
To identify your leading panel: open the door slightly and watch which panel travels along the top track. That is the leading panel. Mark it lightly before starting the handle installation.
Read more: What Is a Swing Door? Types of Swing Doors Explained

Bifold Door Handle Height: Standard, ADA, and Special Cases
Once the correct panel is identified, height is the next decision. US residential practice and accessibility standards approach this from slightly different angles, and the right answer depends on who will be using the door.
The Residential Standard: 36 Inches
36 inches from the finished floor to the center of the handle is the widely used target for residential bifold door installations. This measurement places the handle at approximately hip-to-waist height for an average US adult, which allows the arm's natural downward swing to start the folding motion without bending or reaching. This figure is industry convention rather than code. The International Residential Code sets no mandated handle height for single-family homes. The acceptable residential range is 34 to 48 inches, and most builders stay within 36 to 40 inches for visual consistency with other hardware in the same room.
ADA Range for Multi-Family and Commercial Applications
The 2010 ADA Standards for Accessible Design, Section 404.2.7, require operable door hardware to be centered between 34 and 48 inches above the finished floor and operable with one hand without tight grasping, pinching, or twisting. This applies to public accommodations and multi-family residential common areas rather than private single-family homes. For aging-in-place residential installations, applying the ADA range voluntarily is a practical approach to long-term usability and is worth considering at the initial installation stage since retrofitting is more disruptive than doing it right the first time.
Special Cases: Children's Closets and Taller Doors
Children's closets benefit from a lower handle position. A range of 28 to 32 inches places the handle within comfortable reach for children between ages 3 and 10 without requiring them to reach up or use both hands. Taller bifold doors at 84 inches or 96 inches use the same 36-inch standard rather than scaling the handle position proportionally. Vertical proportion matters less than ergonomic reach. If the same room contains multiple bifold doors, standardize on one height measurement and use a laser level to maintain visual consistency across all panels.
Horizontal Position on the Panel
Horizontal position determines where across the panel face the handle is mounted. Two positions work well in residential practice, and the best choice depends on panel width and how often the door is used.
Center of Panel Width (Recommended for Most Doors)
Placing the handle exactly in the middle of the panel width distributes the pulling force evenly across the panel, puts the least stress on the panel material at the grip point, and represents the best compromise between opening ease and closing ease. Hardware manufacturers and home improvement resources consistently identify center placement as the default recommendation for standard residential bifold closet doors. For panels under 18 inches wide, center placement is the only practical position that provides adequate clearance from both edges.

1 to 2 Inches Inset From the Leading Edge
A handle positioned 1 to 2 inches inset from the leading edge increases leverage when opening the door because the pull point sits farther from the fold line. This makes the initial opening motion easier, which is why this position is preferred on wider room-divider bifold panels where the panel needs more force to start moving. The trade-off is that closing becomes slightly less intuitive because users must reach farther across the folded stack to grab the handle on the way back. This position works best on panels 20 inches wide or wider.
Avoid positioning the handle within half an inch of the leading edge regardless of panel width. At that distance, fingers rub against the jamb or adjacent panel when gripping, hollow-core panels are at risk of edge splitting around the mounting screws, and users default to grabbing the raw panel edge, which accelerates finish wear.
Read more: How to Install Interior French Doors: Step-by-Step Guide
Bifold Door Handle Placement by Configuration
The three placement coordinates above apply to every configuration, but the number of handles and their positioning relative to each other changes depending on how many panels the door has.
2-Panel Bifold Door (Single Fold)
One leading panel and one trailing panel. One handle mounted on the leading panel is the complete hardware requirement. If the pivot pin is on the left side of the opening, the leading panel is on the right and the handle goes on the right panel. If the pivot is on the right, the leading panel is on the left. A single 2-panel bifold requires exactly one handle.
4-Panel Bifold Door (Double Fold, Meeting in Center)
A 4-panel configuration is two independent 2-panel sets that meet at the center of the opening when closed. Each set has its own leading panel, and each leading panel gets one handle, giving the door two handles total. The two handles mirror each other across the center of the opening. From the user's perspective standing in front of the closed door, the handles should be positioned symmetrically, roughly equidistant from the center gap.
Multi-Panel Bifold Doors (3 or More Panels Per Side)
Configurations with three or more panels per side are common in wide closet openings and room divider applications. The leading panel is the outermost panel on the opening side, not the panel closest to the pivot. The trailing panels in a multi-panel stack fold behind the leading panel and do not require their own handles. One handle per leading panel is sufficient for most residential applications.

Bifold Door Handle Placement Reference Table
The table below consolidates the correct placement for every common configuration. Use it as a jobsite reference to avoid remeasuring during installation.
|
Configuration |
Panel to Use |
Height from Floor |
Horizontal Position |
Handles |
|---|---|---|---|---|
|
2-panel (single fold) |
Leading panel |
36" (range: 34-48") |
Center of panel width |
1 |
|
4-panel (double fold) |
Leading panel, each side |
36" (range: 34-48") |
Center of each leading panel |
2 |
|
Multi-panel (3+ per side) |
Outermost leading panel |
36" (range: 34-48") |
Center or 1-2" from edge |
1 per side |
|
Children's closet |
Leading panel |
28-32" |
Center of panel width |
1 per leading |
|
ADA-compliant install |
Leading panel |
34-48" (ADA range) |
Center of panel width |
1 per leading |
Leading panel, 36 inches, centered covers 90 percent of residential bifold installations. The table above handles the exceptions. If you are working across multiple bifold doors in the same room, standardize on a single height measurement and use a laser level to maintain consistency across all panels.
Common Placement Mistakes and What They Cause
Most bifold door problems that develop after installation trace back to handle placement decisions made during the initial setup. Three mistakes account for the majority of cases.
The first is mounting the handle on the trailing panel. This is the single most common mistake, and it is not immediately obvious because the door works on the first day. What is actually happening is that every pull creates a torque force on the bottom pivot bracket that the bracket was not designed to absorb. Over months of use, the pivot loosens, the panel begins to drag on the floor, and the door falls out of alignment. The fix requires removing the handle, filling and refinishing the original bore holes, and drilling new ones on the correct panel.
The second is measuring from the subfloor rather than the finished floor. A finished floor of 3/4 inch solid hardwood shifts the handle position downward by that amount after the flooring is installed. A handle drilled at 36 inches from the subfloor ends up at approximately 35.25 inches after the hardwood goes in, which is within the acceptable range but visually inconsistent if other handles in the same room were measured from the finished surface. For new construction where flooring has not yet been installed, add the known floor thickness to the 36-inch target before marking.
The third is positioning the handle too close to the leading edge, typically within half an inch. On hollow-core bifold panels, which are the most common in residential closet installations, the edge area does not provide enough material depth for secure screw engagement. The result is mounting screws that work loose under repeated use and, in the worst cases, edge splits that require panel replacement.
Read more: Door Slab vs Prehung: What Is the Difference and Which One Is Right for Your Project?

How to Mark and Install the Handle
With the three placement decisions made, accurate marking before drilling prevents the most common installation errors. The sequence below applies to any bifold door configuration.
Step 1: Verify the Finished Floor Measurement
Stand on the flooring that is already installed. If flooring has not yet been laid, add the known finished floor thickness to the target height: 3/4 inch for solid hardwood, 3/8 inch for tile on a standard bed, 3/8 to 1/2 inch for engineered hardwood or luxury vinyl plank.
Step 2: Identify and Mark the Leading Panel
Open the door slightly to confirm which panel travels along the top track. That is the leading panel. Mark its face lightly with a pencil on the installation side so the correct panel is not confused during the next steps.
Step 3: Measure and Mark the Height
Use a tape measure from the finished floor surface to 36 inches, or to your confirmed target height. Make a small horizontal pencil mark across the panel face at that measurement. For installations across multiple panels, use a laser level to transfer this mark consistently without measuring each panel individually.
Step 4: Find and Mark the Horizontal Center
Measure the full width of the panel and divide by two. Mark a small vertical pencil line at that point. The intersection of the horizontal height mark and the vertical center mark is the mounting hole location. If positioning 1 to 2 inches from the edge instead, measure inward from the leading edge and mark accordingly.
Step 5: Use the Drilling Template
If the handle includes a paper drilling template, tape it over the intersection mark, verify it is level, and drill through the template holes using the bit size specified by the handle manufacturer. If no template is provided, transfer the mounting hole spacing from the handle hardware directly to the panel face using the center mark as the reference point.
Step 6: Check Clearance Before Drilling
Hold the handle against the marked position, fold the panels toward the wall, and confirm the handle does not contact the jamb, the wall, or adjacent panels when the door is fully open. Adjust the mark if needed before the first drill bit makes contact. This step takes under one minute and avoids bore holes in the wrong position.
Handle Type Considerations for Bifold Doors
Handle type affects how the placement dimensions translate in practice because different handle formats have different projection distances, hole patterns, and edge-distance requirements.
Round Knob
Round knobs are the most common choice for residential closet bifold doors. They require a single bore hole at the center mark and project about 1.5 to 2 inches from the panel face. Knobs are not ADA-compliant because they require wrist rotation, but for private residential closets this is not a code concern. The low projection makes knobs unlikely to interfere with the folded panel stack, which is why they remain the standard for closet installations.

Pull Handle (Bar Pull)
Pull handles are better suited to wider room-divider panels and doors that are operated frequently throughout the day. A bar pull distributes gripping force over a longer span, reducing flex at the panel mounting point. Bar pulls require two mounting holes rather than one, so horizontal spacing must be transferred accurately from the hardware spec sheet before drilling. For bifold doors, a pull length of 3 to 4 inches works well without projecting far enough to catch on adjacent panels when folded.
Recessed Finger Pull
Recessed finger pulls are the most practical choice for bifold doors in narrow corridors, pantries, or utility closets where the folded stack passes close to walls or furniture. Because recessed pulls sit flush with the panel face, they create no additional projection beyond the panel thickness and cannot snag clothing. Installation requires a larger routing depth than a standard bore hole, but the clearance advantage in tight spaces is significant.
When planning a bifold door installation, our bi-fold doors collection includes standard and custom-sized panels in hollow-core and solid-core construction, compatible with all three handle types described above.
See more: Bi-Folding Door Hardware
Read more: What Is a Prehung Interior Door? Difference Between Prehung and Slab Door
Conclusion
Bifold door handle placement comes down to three decisions in order: leading panel first, 36 inches from the finished floor as the standard height, and centered on the panel width. Use the reference table above for configurations with four or more panels. Mark before drilling, measure from the finished floor, and check clearance against the folded stack before committing the bore holes.
Bifold Door Handle Placement: Which Panel, What Height, and Where to Mount It

For most bifold doors, place the handle on the leading panel at a height of 34 to 48 inches from the finished floor, with 36 inches as the standard residential target. Position it horizontally at the center of the panel width. The leading panel is the one that moves first when you open the door.
Bifold door handle placement involves three decisions in order: which panel to use, how high to mount it, and where on the panel face to position it. Getting any one wrong can make the door hard to use, strain the track hardware, or leave bore holes in the wrong spot. This guide gives the correct measurement for each decision across every common bifold door configuration.
Leading vs Trailing Panel: Which Panel Gets the Handle
This is the most important and most frequently misunderstood part of bifold door handle placement. Choosing the wrong panel makes the door harder to operate and puts uneven stress on the pivot hardware over time.
A bifold door has two types of panels. The trailing panel, also called the following or fixed panel, has its pivot pin anchored to the jamb bracket at the bottom corner of the opening. This panel rotates around a fixed point and does not travel along the track. The leading panel is attached to the top track via a guide roller, which allows it to move freely along the track as the door folds. The handle goes on the leading panel in every configuration.
The reason comes down to leverage. When you grab the leading panel near its center and pull, you apply force close to the panel's center of gravity and the folding action begins smoothly. If the handle is on the trailing panel, you are pulling from a point far removed from the pivot, which creates a longer lever arm and generates significantly more torque on the bottom pivot bracket and the top guide pin. Over time, this torque causes the guide pin to wear its track slot faster, the bottom bracket to work loose, and the door to sag or misalign.
To identify your leading panel: open the door slightly and watch which panel travels along the top track. That is the leading panel. Mark it lightly before starting the handle installation.
Read more: What Is a Swing Door? Types of Swing Doors Explained
Bifold Door Handle Height: Standard, ADA, and Special Cases
Once the correct panel is identified, height is the next decision. US residential practice and accessibility standards approach this from slightly different angles, and the right answer depends on who will be using the door.
The Residential Standard: 36 Inches
36 inches from the finished floor to the center of the handle is the widely used target for residential bifold door installations. This measurement places the handle at approximately hip-to-waist height for an average US adult, which allows the arm's natural downward swing to start the folding motion without bending or reaching. This figure is industry convention rather than code. The International Residential Code sets no mandated handle height for single-family homes. The acceptable residential range is 34 to 48 inches, and most builders stay within 36 to 40 inches for visual consistency with other hardware in the same room.
ADA Range for Multi-Family and Commercial Applications
The 2010 ADA Standards for Accessible Design, Section 404.2.7, require operable door hardware to be centered between 34 and 48 inches above the finished floor and operable with one hand without tight grasping, pinching, or twisting. This applies to public accommodations and multi-family residential common areas rather than private single-family homes. For aging-in-place residential installations, applying the ADA range voluntarily is a practical approach to long-term usability and is worth considering at the initial installation stage since retrofitting is more disruptive than doing it right the first time.
Special Cases: Children's Closets and Taller Doors
Children's closets benefit from a lower handle position. A range of 28 to 32 inches places the handle within comfortable reach for children between ages 3 and 10 without requiring them to reach up or use both hands. Taller bifold doors at 84 inches or 96 inches use the same 36-inch standard rather than scaling the handle position proportionally. Vertical proportion matters less than ergonomic reach. If the same room contains multiple bifold doors, standardize on one height measurement and use a laser level to maintain visual consistency across all panels.
Horizontal Position on the Panel
Horizontal position determines where across the panel face the handle is mounted. Two positions work well in residential practice, and the best choice depends on panel width and how often the door is used.
Center of Panel Width (Recommended for Most Doors)
Placing the handle exactly in the middle of the panel width distributes the pulling force evenly across the panel, puts the least stress on the panel material at the grip point, and represents the best compromise between opening ease and closing ease. Hardware manufacturers and home improvement resources consistently identify center placement as the default recommendation for standard residential bifold closet doors. For panels under 18 inches wide, center placement is the only practical position that provides adequate clearance from both edges.
1 to 2 Inches Inset From the Leading Edge
A handle positioned 1 to 2 inches inset from the leading edge increases leverage when opening the door because the pull point sits farther from the fold line. This makes the initial opening motion easier, which is why this position is preferred on wider room-divider bifold panels where the panel needs more force to start moving. The trade-off is that closing becomes slightly less intuitive because users must reach farther across the folded stack to grab the handle on the way back. This position works best on panels 20 inches wide or wider.
Avoid positioning the handle within half an inch of the leading edge regardless of panel width. At that distance, fingers rub against the jamb or adjacent panel when gripping, hollow-core panels are at risk of edge splitting around the mounting screws, and users default to grabbing the raw panel edge, which accelerates finish wear.
Read more: How to Install Interior French Doors: Step-by-Step Guide
Bifold Door Handle Placement by Configuration
The three placement coordinates above apply to every configuration, but the number of handles and their positioning relative to each other changes depending on how many panels the door has.
2-Panel Bifold Door (Single Fold)
One leading panel and one trailing panel. One handle mounted on the leading panel is the complete hardware requirement. If the pivot pin is on the left side of the opening, the leading panel is on the right and the handle goes on the right panel. If the pivot is on the right, the leading panel is on the left. A single 2-panel bifold requires exactly one handle.
4-Panel Bifold Door (Double Fold, Meeting in Center)
A 4-panel configuration is two independent 2-panel sets that meet at the center of the opening when closed. Each set has its own leading panel, and each leading panel gets one handle, giving the door two handles total. The two handles mirror each other across the center of the opening. From the user's perspective standing in front of the closed door, the handles should be positioned symmetrically, roughly equidistant from the center gap.
Multi-Panel Bifold Doors (3 or More Panels Per Side)
Configurations with three or more panels per side are common in wide closet openings and room divider applications. The leading panel is the outermost panel on the opening side, not the panel closest to the pivot. The trailing panels in a multi-panel stack fold behind the leading panel and do not require their own handles. One handle per leading panel is sufficient for most residential applications.
Bifold Door Handle Placement Reference Table
The table below consolidates the correct placement for every common configuration. Use it as a jobsite reference to avoid remeasuring during installation.
|
Configuration |
Panel to Use |
Height from Floor |
Horizontal Position |
Handles |
|---|---|---|---|---|
|
2-panel (single fold) |
Leading panel |
36" (range: 34-48") |
Center of panel width |
1 |
|
4-panel (double fold) |
Leading panel, each side |
36" (range: 34-48") |
Center of each leading panel |
2 |
|
Multi-panel (3+ per side) |
Outermost leading panel |
36" (range: 34-48") |
Center or 1-2" from edge |
1 per side |
|
Children's closet |
Leading panel |
28-32" |
Center of panel width |
1 per leading |
|
ADA-compliant install |
Leading panel |
34-48" (ADA range) |
Center of panel width |
1 per leading |
Leading panel, 36 inches, centered covers 90 percent of residential bifold installations. The table above handles the exceptions. If you are working across multiple bifold doors in the same room, standardize on a single height measurement and use a laser level to maintain consistency across all panels.
Common Placement Mistakes and What They Cause
Most bifold door problems that develop after installation trace back to handle placement decisions made during the initial setup. Three mistakes account for the majority of cases.
The first is mounting the handle on the trailing panel. This is the single most common mistake, and it is not immediately obvious because the door works on the first day. What is actually happening is that every pull creates a torque force on the bottom pivot bracket that the bracket was not designed to absorb. Over months of use, the pivot loosens, the panel begins to drag on the floor, and the door falls out of alignment. The fix requires removing the handle, filling and refinishing the original bore holes, and drilling new ones on the correct panel.
The second is measuring from the subfloor rather than the finished floor. A finished floor of 3/4 inch solid hardwood shifts the handle position downward by that amount after the flooring is installed. A handle drilled at 36 inches from the subfloor ends up at approximately 35.25 inches after the hardwood goes in, which is within the acceptable range but visually inconsistent if other handles in the same room were measured from the finished surface. For new construction where flooring has not yet been installed, add the known floor thickness to the 36-inch target before marking.
The third is positioning the handle too close to the leading edge, typically within half an inch. On hollow-core bifold panels, which are the most common in residential closet installations, the edge area does not provide enough material depth for secure screw engagement. The result is mounting screws that work loose under repeated use and, in the worst cases, edge splits that require panel replacement.
Read more: Door Slab vs Prehung: What Is the Difference and Which One Is Right for Your Project?
How to Mark and Install the Handle
With the three placement decisions made, accurate marking before drilling prevents the most common installation errors. The sequence below applies to any bifold door configuration.
Step 1: Verify the Finished Floor Measurement
Stand on the flooring that is already installed. If flooring has not yet been laid, add the known finished floor thickness to the target height: 3/4 inch for solid hardwood, 3/8 inch for tile on a standard bed, 3/8 to 1/2 inch for engineered hardwood or luxury vinyl plank.
Step 2: Identify and Mark the Leading Panel
Open the door slightly to confirm which panel travels along the top track. That is the leading panel. Mark its face lightly with a pencil on the installation side so the correct panel is not confused during the next steps.
Step 3: Measure and Mark the Height
Use a tape measure from the finished floor surface to 36 inches, or to your confirmed target height. Make a small horizontal pencil mark across the panel face at that measurement. For installations across multiple panels, use a laser level to transfer this mark consistently without measuring each panel individually.
Step 4: Find and Mark the Horizontal Center
Measure the full width of the panel and divide by two. Mark a small vertical pencil line at that point. The intersection of the horizontal height mark and the vertical center mark is the mounting hole location. If positioning 1 to 2 inches from the edge instead, measure inward from the leading edge and mark accordingly.
Step 5: Use the Drilling Template
If the handle includes a paper drilling template, tape it over the intersection mark, verify it is level, and drill through the template holes using the bit size specified by the handle manufacturer. If no template is provided, transfer the mounting hole spacing from the handle hardware directly to the panel face using the center mark as the reference point.
Step 6: Check Clearance Before Drilling
Hold the handle against the marked position, fold the panels toward the wall, and confirm the handle does not contact the jamb, the wall, or adjacent panels when the door is fully open. Adjust the mark if needed before the first drill bit makes contact. This step takes under one minute and avoids bore holes in the wrong position.
Handle Type Considerations for Bifold Doors
Handle type affects how the placement dimensions translate in practice because different handle formats have different projection distances, hole patterns, and edge-distance requirements.
Round Knob
Round knobs are the most common choice for residential closet bifold doors. They require a single bore hole at the center mark and project about 1.5 to 2 inches from the panel face. Knobs are not ADA-compliant because they require wrist rotation, but for private residential closets this is not a code concern. The low projection makes knobs unlikely to interfere with the folded panel stack, which is why they remain the standard for closet installations.
Pull Handle (Bar Pull)
Pull handles are better suited to wider room-divider panels and doors that are operated frequently throughout the day. A bar pull distributes gripping force over a longer span, reducing flex at the panel mounting point. Bar pulls require two mounting holes rather than one, so horizontal spacing must be transferred accurately from the hardware spec sheet before drilling. For bifold doors, a pull length of 3 to 4 inches works well without projecting far enough to catch on adjacent panels when folded.
Recessed Finger Pull
Recessed finger pulls are the most practical choice for bifold doors in narrow corridors, pantries, or utility closets where the folded stack passes close to walls or furniture. Because recessed pulls sit flush with the panel face, they create no additional projection beyond the panel thickness and cannot snag clothing. Installation requires a larger routing depth than a standard bore hole, but the clearance advantage in tight spaces is significant.
When planning a bifold door installation, our bi-fold doors collection includes standard and custom-sized panels in hollow-core and solid-core construction, compatible with all three handle types described above.
See more: Bi-Folding Door Hardware
Read more: What Is a Prehung Interior Door? Difference Between Prehung and Slab Door
Conclusion
Bifold door handle placement comes down to three decisions in order: leading panel first, 36 inches from the finished floor as the standard height, and centered on the panel width. Use the reference table above for configurations with four or more panels. Mark before drilling, measure from the finished floor, and check clearance against the folded stack before committing the bore holes.


