


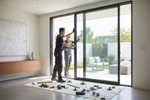
Sliding glass doors installation involves five stages: preparing and squaring the rough opening, setting and shimming the frame, installing the stationary panel, hanging and adjusting the sliding panel, then sealing all edges with caulk and weatherstripping. Done in the right order with accurate measurements, the entire process takes one day and delivers a weathertight, smooth-operating door.

Installing a sliding glass door is one of the most impactful home upgrades you can make: more natural light, a better connection to outdoor space, and real energy savings when done correctly. Most problems that appear later, from sticking to leaking to drafting, trace back to installation errors rather than the door itself. This guide covers every step in order, plus the cost data and key decisions you need before you start.
Installation Tip: While DIY installation is perfectly fine if you are comfortable with home projects, we strongly recommend hiring a professional. Proper alignment is key to ensuring your doors slide, latch, and lock smoothly for years to come.
Is a Sliding Glass Door the Right Choice for Your Opening?
Before ordering anything, the most useful step is confirming that a sliding glass door is the right fit for the specific opening you have in mind. Understanding what the sliding glass doors installation process involves helps clarify whether the opening is genuinely suitable before any money is spent on the unit itself.
Sliding glass doors work best where floor space on either side of the opening is limited, because the panels glide parallel to the wall rather than swinging into the room. They are a strong choice for patio and backyard access points where a wide, unobstructed view matters. The practical limitation is that only one panel opens at a time in a standard two-panel configuration, which narrows the usable opening width compared to a full French door swing. If you want to see how different glass doors configurations compare across panel counts and sizes before committing to a specific model, browsing by door type is the fastest way to narrow down the options.
Read more: Swing vs Sliding vs Pocket vs Barn Doors - Which Interior Door Is Right for You

How to Choose and Size Your Sliding Glass Door
Once sliding is confirmed as the right door type, the next decision is material and size. Getting both right before ordering saves more time and money than any other preparation step. Selecting the correct unit before installing sliding glass doors prevents the most common and costly mid-project corrections.
|
Material |
Best For |
Energy Efficiency |
|
Vinyl |
Budget, low maintenance |
High (double-pane standard) |
|
Aluminum |
Modern look, outstanding durability |
High (superior thermal performance) |
|
Wood-clad |
Traditional aesthetic |
Moderate |
Vinyl is the most balanced choice on price and performance for most US homes.
Aluminum is highly durable and engineered with excellent energy efficiency, making it a perfect fit for modern aesthetics and diverse climates without sacrificing thermal performance.
Wood-clad offers a premium, traditional look on the inside with protective cladding on the outside.
Standard sizing covers 6-foot and 8-foot wide by 80-inch tall openings, which fits the majority of residential applications. For homeowners who want tighter tolerances, better thermal performance, and the slim sightlines that most US-market options rarely achieve, European patio doors bring multi-point locking systems and engineering standards that go significantly beyond what standard box-store sliding doors provide.
Tools and Materials You Need
Missing even one item from this list can stop the job partway through. Gathering everything before the work starts is the most practical preparation step, and it eliminates the mid-project runs that cause delays and rushed decisions. These are the tools required for a proper installation of sliding glass doors in any standard residential opening.
|
Tool |
Purpose |
|
Tape measure (25ft+) |
Measure rough opening accurately |
|
4-foot level |
Ensure frame is plumb and sill is flat |
|
Power drill + bits |
Drive screws through frame and shims |
|
Pry bar |
Remove old door or trim cleanly |
|
Cedar or plastic shims |
Level and square the frame in the opening |
|
Caulk gun + exterior sealant |
Weatherproof all edges after installation |
|
Flashing tape (6" wide) |
Waterproof the sill before frame goes in |
|
Safety glasses + gloves |
Handle heavy glass panels safely |
This is a two-person (or more) job without exception. Glass door panels are heavy and awkward to position alone, and attempting to set a panel without a second person creates real risk of breakage or injury. Plan accordingly before the door arrives.

Step-by-Step: How to Install Sliding Glass Doors
Whether you are learning how to put in sliding glass doors for the first time or tackling a full replacement, the sequence below applies to both scenarios. The order of these steps is not interchangeable. The frame must go in before the panels, the stationary panel before the sliding one, and sealant always comes last. Reversing any of these stages requires full disassembly to correct.
Step 1 - Prepare the Rough Opening
Clear the opening of any old frame, caulk, nails, and debris before install sliding glass doors. Use a level to confirm the sill is flat, then measure diagonally from corner to corner in both directions. The two diagonal measurements must match within 1/8 inch for the opening to be square. Wrap the entire opening with weather-resistant house wrap, then apply flashing tape along the sill and up each side. Allow 1/4 inch of clearance on each side and 1/2 inch at the top to leave room for shimming.
Step 2 - Set and Shim the Frame
Carry the frame into the opening from the exterior. Insert cedar or plastic shims at each anchor point along the sides and head jamb, adjusting until the frame reads level and plumb on all planes. Drive screws through the jamb, shims, and into the 2x4 framing. Check level again after each screw before driving the next. Once all screws are in, cut or snap off the excess shim material flush with the frame face.
Step 3 - Install the Stationary Panel
Working from the exterior, tilt the top of the stationary panel into the outer channel of the head jamb first. Then rotate the bottom inward until it seats into the lower groove. Slide the panel tightly against the side jamb. Secure it using the panel anchor and the specified screws through the anchor into the frame header and bottom rail.
Step 4 - Hang the Sliding Panel and Adjust Rollers
Tilt the top of the sliding panel into the upper track, then lower the rollers down into the lower track. Slide the door back and forth several times to test movement. Locate the roller adjustment screws at the bottom edges of the panel and turn them clockwise to raise the panel or counterclockwise to lower it. The target is an even gap along both sides and a latch that aligns precisely with the strike plate on the jamb.
Step 5 - Seal, Weatherstrip, and Install Hardware
Apply a continuous bead of exterior-grade silicone sealant around the entire perimeter of the frame on the outside. Run a wet finger along the bead to smooth it before it skins over. Install weatherstripping along all contact edges using a T-shape or brush-style seal. Mount the handle, lock, and latch according to the manufacturer's instructions, then test the lock engagement with the door closed. Trim any protruding shims flush to the wall surface before adding interior trim.
Completing a successful sliding glass doors installation requires patience at the measurement and shimming stages far more than at the sealant stage. Rushing the early steps is the primary cause of doors that underperform long-term.
Read more: French Doors vs Sliding Glass Doors - The Complete Comparison for US Homeowners

DIY vs Professional Installation - What to Weigh Before You Decide
Sliding glass door installation involves more variables than most homeowners expect. The decision between doing this yourself and hiring a professional is not purely about money -- skill level, opening condition, and door size all factor in, and making the wrong call can cost more in the long run than the labor savings justify.
|
Factor |
DIY |
Professional |
|
Time required |
1-2 days (intermediate skill) |
4-8 hours |
|
Structural issues |
Risk missing problems |
Caught and fixed on-site |
|
Permit handling |
Homeowner's responsibility |
Often included in service |
|
Warranty impact |
May void manufacturer warranty |
Protected |
|
Risk of leaks/misalignment |
Higher |
Low |
While a DIY approach is acceptable if you are highly experienced and comfortable with complex home improvement projects, we do not encourage it. We strongly recommend professional installation for all sliding glass door projects to guarantee proper sealing, structural alignment, and long-term performance. Professional installation is especially critical when creating a new opening, making structural modifications, or fitting custom-sized doors.
One additional factor that does not appear in the table: most professional installations are completed in 4 to 8 hours. A first-time DIY project on the same door commonly stretches across a full weekend, and any errors discovered late in the process mean going back to earlier steps to disassemble and redo.
Read more: How to Replace a Sliding Glass Door with French Doors - Cost, Steps and What to Know
Common Installation Mistakes That Cause Long-Term Problems
Most sliding glass doors installation failures are not caused by a poor-quality door. They were poorly installed. Four mistakes account for the majority of these long-term problems.
The most common is skipping the diagonal measurement check before setting the frame. If the rough opening is not square and the frame goes in anyway, the door will never slide evenly. The gap on one side will be wider than the other, the rollers will wear unevenly, and no amount of adjustment will fully correct it after the fact.
The second is leaving the sill unprotected before the frame goes in. Flashing tape on the sill is not an optional upgrade. Without it, any water that gets past the exterior sealant has a direct path into the subfloor. In most climates, wood rot becomes visible within one to two seasons.
The third is reaching for WD-40 instead of a silicone-based lubricant when the rollers feel stiff. WD-40 is oil-based and attracts dust and debris into the track over time. What starts as a stiff door becomes a door that is genuinely difficult to move within a few months. Silicone lubricant leaves no residue that collects particulates.
The fourth is skipping the permit step. Many jurisdictions require a permit for any exterior door replacement that touches an exterior wall, and some require inspection before the work is concealed by trim. Installing without a permit can create real complications when selling the property or filing an insurance claim.
Read more: Are French Doors More Secure Than Sliding Doors - A Full Comparison

Conclusion
Sliding glass doors installation comes down to five steps done in the right sequence: prepare the opening, set the frame, install the stationary panel, hang and adjust the sliding panel, then seal and finish. Get the measurements right from the start, use the correct materials at each stage, and the result is a door that operates smoothly and holds its seal for decades.
Frequently Asked Questions (FAQs)
1. Can I install a sliding glass door by myself (DIY)?
While DIY is possible if you are highly experienced, we strongly recommend professional installation. Proper alignment and sealing are critical to prevent leaks and ensure smooth operation.
2. How long does it typically take to install a sliding glass door?
Professionals can usually complete the installation in 4 to 8 hours. A first-time DIY project often takes a full weekend and risks costly mistakes.
3. What is the most critical step in the installation process?
Ensuring the rough opening and sill are perfectly level, square, and waterproofed. Even a tiny misalignment will cause the door to stick, leak, or fail to lock.
4. Do I need to apply flashing or waterproofing tape around the opening?
Yes, absolutely. Proper flashing and sill pan flashing are essential to prevent rainwater from leaking into your walls and causing structural rot or mold.
5. How do I know if my newly installed sliding door is aligned correctly?
The door should slide effortlessly with one hand, latch smoothly without forcing, and show an even gap between the door panel and the frame when closed.
Sliding Glass Doors Installation: A Complete Step-by-Step Guide

Sliding glass doors installation involves five stages: preparing and squaring the rough opening, setting and shimming the frame, installing the stationary panel, hanging and adjusting the sliding panel, then sealing all edges with caulk and weatherstripping. Done in the right order with accurate measurements, the entire process takes one day and delivers a weathertight, smooth-operating door.
Installing a sliding glass door is one of the most impactful home upgrades you can make: more natural light, a better connection to outdoor space, and real energy savings when done correctly. Most problems that appear later, from sticking to leaking to drafting, trace back to installation errors rather than the door itself. This guide covers every step in order, plus the cost data and key decisions you need before you start.
Installation Tip: While DIY installation is perfectly fine if you are comfortable with home projects, we strongly recommend hiring a professional. Proper alignment is key to ensuring your doors slide, latch, and lock smoothly for years to come.
Is a Sliding Glass Door the Right Choice for Your Opening?
Before ordering anything, the most useful step is confirming that a sliding glass door is the right fit for the specific opening you have in mind. Understanding what the sliding glass doors installation process involves helps clarify whether the opening is genuinely suitable before any money is spent on the unit itself.
Sliding glass doors work best where floor space on either side of the opening is limited, because the panels glide parallel to the wall rather than swinging into the room. They are a strong choice for patio and backyard access points where a wide, unobstructed view matters. The practical limitation is that only one panel opens at a time in a standard two-panel configuration, which narrows the usable opening width compared to a full French door swing. If you want to see how different glass doors configurations compare across panel counts and sizes before committing to a specific model, browsing by door type is the fastest way to narrow down the options.
Read more: Swing vs Sliding vs Pocket vs Barn Doors - Which Interior Door Is Right for You
How to Choose and Size Your Sliding Glass Door
Once sliding is confirmed as the right door type, the next decision is material and size. Getting both right before ordering saves more time and money than any other preparation step. Selecting the correct unit before installing sliding glass doors prevents the most common and costly mid-project corrections.
|
Material |
Best For |
Energy Efficiency |
|
Vinyl |
Budget, low maintenance |
High (double-pane standard) |
|
Aluminum |
Modern look, outstanding durability |
High (superior thermal performance) |
|
Wood-clad |
Traditional aesthetic |
Moderate |
Vinyl is the most balanced choice on price and performance for most US homes.
Aluminum is highly durable and engineered with excellent energy efficiency, making it a perfect fit for modern aesthetics and diverse climates without sacrificing thermal performance.
Wood-clad offers a premium, traditional look on the inside with protective cladding on the outside.
Standard sizing covers 6-foot and 8-foot wide by 80-inch tall openings, which fits the majority of residential applications. For homeowners who want tighter tolerances, better thermal performance, and the slim sightlines that most US-market options rarely achieve, European patio doors bring multi-point locking systems and engineering standards that go significantly beyond what standard box-store sliding doors provide.
Tools and Materials You Need
Missing even one item from this list can stop the job partway through. Gathering everything before the work starts is the most practical preparation step, and it eliminates the mid-project runs that cause delays and rushed decisions. These are the tools required for a proper installation of sliding glass doors in any standard residential opening.
|
Tool |
Purpose |
|
Tape measure (25ft+) |
Measure rough opening accurately |
|
4-foot level |
Ensure frame is plumb and sill is flat |
|
Power drill + bits |
Drive screws through frame and shims |
|
Pry bar |
Remove old door or trim cleanly |
|
Cedar or plastic shims |
Level and square the frame in the opening |
|
Caulk gun + exterior sealant |
Weatherproof all edges after installation |
|
Flashing tape (6" wide) |
Waterproof the sill before frame goes in |
|
Safety glasses + gloves |
Handle heavy glass panels safely |
This is a two-person (or more) job without exception. Glass door panels are heavy and awkward to position alone, and attempting to set a panel without a second person creates real risk of breakage or injury. Plan accordingly before the door arrives.
Step-by-Step: How to Install Sliding Glass Doors
Whether you are learning how to put in sliding glass doors for the first time or tackling a full replacement, the sequence below applies to both scenarios. The order of these steps is not interchangeable. The frame must go in before the panels, the stationary panel before the sliding one, and sealant always comes last. Reversing any of these stages requires full disassembly to correct.
Step 1 - Prepare the Rough Opening
Clear the opening of any old frame, caulk, nails, and debris before install sliding glass doors. Use a level to confirm the sill is flat, then measure diagonally from corner to corner in both directions. The two diagonal measurements must match within 1/8 inch for the opening to be square. Wrap the entire opening with weather-resistant house wrap, then apply flashing tape along the sill and up each side. Allow 1/4 inch of clearance on each side and 1/2 inch at the top to leave room for shimming.
Step 2 - Set and Shim the Frame
Carry the frame into the opening from the exterior. Insert cedar or plastic shims at each anchor point along the sides and head jamb, adjusting until the frame reads level and plumb on all planes. Drive screws through the jamb, shims, and into the 2x4 framing. Check level again after each screw before driving the next. Once all screws are in, cut or snap off the excess shim material flush with the frame face.
Step 3 - Install the Stationary Panel
Working from the exterior, tilt the top of the stationary panel into the outer channel of the head jamb first. Then rotate the bottom inward until it seats into the lower groove. Slide the panel tightly against the side jamb. Secure it using the panel anchor and the specified screws through the anchor into the frame header and bottom rail.
Step 4 - Hang the Sliding Panel and Adjust Rollers
Tilt the top of the sliding panel into the upper track, then lower the rollers down into the lower track. Slide the door back and forth several times to test movement. Locate the roller adjustment screws at the bottom edges of the panel and turn them clockwise to raise the panel or counterclockwise to lower it. The target is an even gap along both sides and a latch that aligns precisely with the strike plate on the jamb.
Step 5 - Seal, Weatherstrip, and Install Hardware
Apply a continuous bead of exterior-grade silicone sealant around the entire perimeter of the frame on the outside. Run a wet finger along the bead to smooth it before it skins over. Install weatherstripping along all contact edges using a T-shape or brush-style seal. Mount the handle, lock, and latch according to the manufacturer's instructions, then test the lock engagement with the door closed. Trim any protruding shims flush to the wall surface before adding interior trim.
Completing a successful sliding glass doors installation requires patience at the measurement and shimming stages far more than at the sealant stage. Rushing the early steps is the primary cause of doors that underperform long-term.
Read more: French Doors vs Sliding Glass Doors - The Complete Comparison for US Homeowners
DIY vs Professional Installation - What to Weigh Before You Decide
Sliding glass door installation involves more variables than most homeowners expect. The decision between doing this yourself and hiring a professional is not purely about money -- skill level, opening condition, and door size all factor in, and making the wrong call can cost more in the long run than the labor savings justify.
|
Factor |
DIY |
Professional |
|
Time required |
1-2 days (intermediate skill) |
4-8 hours |
|
Structural issues |
Risk missing problems |
Caught and fixed on-site |
|
Permit handling |
Homeowner's responsibility |
Often included in service |
|
Warranty impact |
May void manufacturer warranty |
Protected |
|
Risk of leaks/misalignment |
Higher |
Low |
While a DIY approach is acceptable if you are highly experienced and comfortable with complex home improvement projects, we do not encourage it. We strongly recommend professional installation for all sliding glass door projects to guarantee proper sealing, structural alignment, and long-term performance. Professional installation is especially critical when creating a new opening, making structural modifications, or fitting custom-sized doors.
One additional factor that does not appear in the table: most professional installations are completed in 4 to 8 hours. A first-time DIY project on the same door commonly stretches across a full weekend, and any errors discovered late in the process mean going back to earlier steps to disassemble and redo.
Read more: How to Replace a Sliding Glass Door with French Doors - Cost, Steps and What to Know
Common Installation Mistakes That Cause Long-Term Problems
Most sliding glass doors installation failures are not caused by a poor-quality door. They were poorly installed. Four mistakes account for the majority of these long-term problems.
The most common is skipping the diagonal measurement check before setting the frame. If the rough opening is not square and the frame goes in anyway, the door will never slide evenly. The gap on one side will be wider than the other, the rollers will wear unevenly, and no amount of adjustment will fully correct it after the fact.
The second is leaving the sill unprotected before the frame goes in. Flashing tape on the sill is not an optional upgrade. Without it, any water that gets past the exterior sealant has a direct path into the subfloor. In most climates, wood rot becomes visible within one to two seasons.
The third is reaching for WD-40 instead of a silicone-based lubricant when the rollers feel stiff. WD-40 is oil-based and attracts dust and debris into the track over time. What starts as a stiff door becomes a door that is genuinely difficult to move within a few months. Silicone lubricant leaves no residue that collects particulates.
The fourth is skipping the permit step. Many jurisdictions require a permit for any exterior door replacement that touches an exterior wall, and some require inspection before the work is concealed by trim. Installing without a permit can create real complications when selling the property or filing an insurance claim.
Read more: Are French Doors More Secure Than Sliding Doors - A Full Comparison
Conclusion
Sliding glass doors installation comes down to five steps done in the right sequence: prepare the opening, set the frame, install the stationary panel, hang and adjust the sliding panel, then seal and finish. Get the measurements right from the start, use the correct materials at each stage, and the result is a door that operates smoothly and holds its seal for decades.
Frequently Asked Questions (FAQs)
1. Can I install a sliding glass door by myself (DIY)?
While DIY is possible if you are highly experienced, we strongly recommend professional installation. Proper alignment and sealing are critical to prevent leaks and ensure smooth operation.
2. How long does it typically take to install a sliding glass door?
Professionals can usually complete the installation in 4 to 8 hours. A first-time DIY project often takes a full weekend and risks costly mistakes.
3. What is the most critical step in the installation process?
Ensuring the rough opening and sill are perfectly level, square, and waterproofed. Even a tiny misalignment will cause the door to stick, leak, or fail to lock.
4. Do I need to apply flashing or waterproofing tape around the opening?
Yes, absolutely. Proper flashing and sill pan flashing are essential to prevent rainwater from leaking into your walls and causing structural rot or mold.
5. How do I know if my newly installed sliding door is aligned correctly?
The door should slide effortlessly with one hand, latch smoothly without forcing, and show an even gap between the door panel and the frame when closed.


