


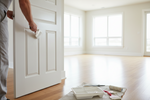
The best way to paint interior doors is to use an angled brush for recessed panel molding and edges, and a 4-inch foam roller for all flat surfaces. Apply two thin coats of semi-gloss or satin waterborne alkyd paint, sanding lightly with 220-grit sandpaper between coats. For panel doors, paint in sequence: recessed panels first, then vertical stiles, then horizontal rails, then edges last.
This guide covers all three for painting interior doors, with separate guidance for panel and flush door types since the correct approach is different for each.

Choosing the Right Tools
When painting interior doors, the tool determines finish quality as much as the paint itself. Each option has a situation where it produces the best result, and most successful DIY door painting projects use a combination of two tools rather than relying on one alone.
|
Tool |
Best For |
Finish Quality |
Speed |
Notes |
|
Angled brush (2 inch) |
Recessed molding, edges, corners |
Good; may show marks on flat surfaces |
Slow |
Essential for panel doors; use on detailed areas only |
|
4-inch foam roller |
Flat panel centers, stiles, rails, flush doors |
Excellent; smooth and minimal texture |
Medium |
Best all-around tool for flat door surfaces |
|
Brush and foam roller combo |
Panel doors and most DIY projects |
Best DIY result overall |
Medium |
Brush the details, immediately roll to level while wet |
|
Paint sprayer |
Multiple doors at once; factory-smooth finish preferred |
Excellent; spray-smooth |
Fast (with setup) |
Requires masking all hardware; more prep and cleanup |
For most homeowners looking for the best way to paint interior doors, the brush-and-foam-roller combination produces the best result when painting interior doors: the least technical difficulty. A sprayer is worth considering when painting six or more doors in a single session, where the setup time pays off in application speed. A brush alone works for painting interior doors but requires more skill to avoid visible marks.
See more: Types of Interior Doors: Every Style, How They Work, and Which Room They Suit
Preparing the Door
Preparation takes longer than painting interior doors and determines whether the final result lasts. A poorly prepped door shows every flaw through the new paint layer, and no technique or paint quality can compensate for skipped prep steps.
Remove Hardware and Clean
Remove the door handle, strike plate, and any visible hardware before starting. If taking the door off its hinges to paint flat on sawhorses, have a helper and confirm the sawhorses are stable before lifting. Cleaning is non-negotiable: grease, dust, and fingerprints on the door surface prevent paint from adhering evenly. Wipe the full door surface with a cloth dampened with a mild detergent or TSP substitute and let it dry completely before proceeding to sanding.
Sand and Fill
Sand the entire door lightly with 220-grit sandpaper to scuff the existing finish and give the new paint something to grip. For older doors with gouges, dents, or surface imperfections, fill these with lightweight wood filler, allow it to dry fully, then sand smooth before priming. After sanding, wipe the door with a tack cloth or damp microfiber cloth to remove all dust. Painting over sanding dust creates a gritty texture in the cured finish that cannot be corrected without sanding down and repainting.

Prime When Needed
Primer is required when painting bare or unfinished wood for the first time; when switching from a significantly darker to a lighter color; or when the existing finish is glossy and has not been adequately scuff-sanded. For repainting a door already in good condition with a similar color, a thorough scuff-sand and clean is often sufficient without a dedicated primer coat. When primer is used on interior doors, let it dry fully and sand lightly with 220-grit before applying the first coat of finish paint.
How Long Does Prep Take?
For a standard interior door, prep before you paint interior doors takes, prep takes approximately 30 to 60 minutes: around 10 minutes to remove hardware, 10 to 15 minutes to clean, 10 to 15 minutes to sand, and 5 minutes for the tack cloth wipe-down. If wood filler is needed, add 30 to 60 minutes of drying time before sanding can resume. Removing the door from its hinges and remounting it afterward adds approximately 15 to 20 minutes to the total project time but produces a noticeably better result for panel doors by eliminating drip risk on vertical surfaces.
Choosing the Right Paint
Not all interior paints are suitable for painting interior doors. Doors receive more physical contact than walls, so the paint needs to cure to a harder finish that can withstand cleaning, handle friction, and repeated contact without chipping or scuffing.
The best paint for painting interior doors is a waterborne alkyd, sometimes labeled as cabinet and trim enamel. Products like Benjamin Moore Advance and Sherwin-Williams Emerald Urethane Trim Enamel are well regarded for their self-leveling properties, which allow brush and roller marks to flow out and disappear as the paint cures to a hard, durable finish. The sheen for interior doors should be semi-gloss or satin: semi-gloss is the most widely used finish, cleans easily, and gives doors the right level of reflectivity for architectural detail. Satin provides a softer appearance and suits lower-traffic bedroom doors. Flat and eggshell finishes are not appropriate for doors because they show scuffs, do not clean well, and wear through at contact points. Standard latex wall paint will work short-term but does not cure hard enough for door use and tends to chip at handles and latch areas within a year or two of heavy use.

Starting with a Pre-Primed Door
If you are buying a new interior door rather than repainting an existing one, starting with the right base surface makes a significant difference to the final result. At Doors and Beyond, flush doors are available with a smooth, primed and paint-ready surface in both hollow core and solid core construction. The flat, uniform face accepts paint evenly and cleanly, with no need to sand or spot-prime before the first coat.
We particularly recommend our pre-finished MDF doors over primed-only options for painting projects. Pre-finished MDF doors arrive with a factory-applied top coat that is already smooth, consistent, and durable from the first day of installation. Unlike a primed-only surface, a pre-finished door requires no additional paint coats to achieve a clean result, and the factory finish holds up better to cleaning and daily contact than a single-color coat applied on-site.
If you want a specific custom color, our team at Doors and Beyond can advise on the right preparation to apply your chosen finish over a pre-finished MDF door without compromising the surface quality.
How to Paint Panel Doors
Painting interior panel doors requires a specific sequence to avoid lap marks, drips at recessed corners, and hard edges where brushed molding meets rolled flat sections. Following the correct order when painting interior panel doors is the single most important technique difference between a result that looks professional and one that looks lumpy in the detail areas.
The Correct Sequence for Panel Doors
Step 1: Paint the edges. Using the brush or small roller, paint all four edges of the door first: the hinge side, the latch side, and the top and bottom edges. Note that the top and bottom edges should be painted only on the edge itself, not on the face, to prevent the door from sticking in the frame when it swings.
Step 2: Brush the recessed molding. Using the angled brush, paint the recessed profile around each panel. Work carefully into the corners and along the molding detail. Keep the brush strokes short and consistent in direction.
Step 3: Immediately roll the flat panel centers. While the brushed molding is still wet, use the 4-inch foam roller to cover the flat center of each panel. The roller levels the brushed paint and blends the two sections before either has dried. Do not wait for the brushed areas to dry before rolling.
Step 4: Roll the vertical stiles. Working from top to bottom with consistent strokes, roll the vertical sections between the panels. These are the longest vertical flat surfaces on the door.
Step 5: Roll the horizontal rails. Roll the horizontal sections connecting the stiles, working from left to right and maintaining a wet edge to prevent lap marks where sections meet.
Step 6: Check corners and edges for drips. Run a lightly loaded brush along any corner or edge where paint has pooled and smooth it out before it dries. Drips in recessed corners are the most common visible defect on finished panel doors.
Step 7: Allow full dry time and apply the second coat. Let the first coat dry according to the paint manufacturer's instructions, typically 2 to 4 hours, then sand lightly with 220-grit, wipe with a tack cloth, and repeat the same sequence for the second coat.
Tips for the Brush-and-Roller Combo on Panel Doors
The key to the brush-and-roller technique on panel doors is working quickly on each section: brush the recessed molding and immediately follow with the foam roller while the paint is still wet. Do not let brushed areas start to dry before rolling over them, or the roller will drag the partially dried paint and create texture. Feather the boundary between the brushed molding and the rolled flat surface by lightly drawing the brush tip along the meeting line while both sections are still wet.

How to Paint Flush Doors
The best way to paint interior flush doors is faster than panel doors since there is no recessed molding and simpler. The main challenge when painting interior flush doors is maintaining a wet edge across the full width and height of the door to prevent lap marks where sections of paint overlap as they dry.
For flush doors, the 4-inch foam roller is the primary tool. Start at the top and work in consistent horizontal or vertical sections, overlapping each pass by about one-third before the previous section dries. Use the angled brush only for the edges and any tight corners at the frame. Try not to stop partway down the door: rejoining a dried section with a wet roller creates a visible ridge in the cured finish. If the door is removed and lying flat on sawhorses, this problem largely disappears because gravity is not pulling paint toward drip points and the full surface can be rolled in one consistent session. For in-place painting, work quickly, keep the roller pressure consistent, and avoid going back over areas that have started to set.
See more: Door Slab vs Prehung: What's the Difference and Which One Is Right for Your Project?
Common Mistakes to Avoid
Most unsatisfying results when you paint interior doors come from a handful of consistent mistakes. Recognizing them before starting is faster than correcting them afterward.
Applying Paint Too Thickly
The most common mistake is trying to cover the door in one heavy coat. Thick coats sag, drip on vertical surfaces, and take significantly longer to dry without producing a better result than two thin coats. Apply thin, even coats and allow each to dry fully before adding the next. Two thin coats cure harder and look smoother than one heavy coat every time.
Painting Over Sanding Dust
Skipping the tack cloth step after sanding embeds grit into the wet paint that is fully visible in the cured finish. After every sanding step, whether between prep and priming or between paint coats, wipe the door with a tack cloth or damp microfiber cloth and let it dry before applying the next coat.
Back-Rolling Over Paint That Has Started to Set
Once a section of paint has been applied and has been sitting for more than two to three minutes, going back over it with a loaded roller creates texture rather than smoothing it. Work each section once, maintaining a wet edge by overlapping the next section before the current one dries, and then move on. Do not attempt to fix a section by rolling over it repeatedly once it has started to level and set.
Closing the Door Before Paint Has Cured
Drying and curing are different. A waterborne alkyd paint may feel dry to the touch within two hours but can take 24 to 72 hours to cure to its full hardness depending on temperature and humidity. Closing or latching a door before the paint has cured causes the paint to stick at the latch and hinge contact points and peel when the door is opened. Leave the door propped open or remove it from the hinges until the paint has fully cured.
See more: What Is a Prehung Interior Door? Difference Between Prehung and Slab Door
Final Thoughts
The best result when painting interior doors comes from using the right tool for each surface, preparing thoroughly before the first coat, and applying thin coats consistently. Interior panel doors need a specific painting sequence to look right; interior flush doors need a maintained wet edge when you paint them. Both need adequate cure time before hardware is reinstalled and the door is put back into regular use.
Looking for new interior doors? Browse the full range at Doors and Beyond: Browse Interior Doors at Doors and Beyond
The Best Way to Paint Interior Doors: Tools, Prep, and Technique for a Pro Finish

The best way to paint interior doors is to use an angled brush for recessed panel molding and edges, and a 4-inch foam roller for all flat surfaces. Apply two thin coats of semi-gloss or satin waterborne alkyd paint, sanding lightly with 220-grit sandpaper between coats. For panel doors, paint in sequence: recessed panels first, then vertical stiles, then horizontal rails, then edges last.
This guide covers all three for painting interior doors, with separate guidance for panel and flush door types since the correct approach is different for each.
Choosing the Right Tools
When painting interior doors, the tool determines finish quality as much as the paint itself. Each option has a situation where it produces the best result, and most successful DIY door painting projects use a combination of two tools rather than relying on one alone.
|
Tool |
Best For |
Finish Quality |
Speed |
Notes |
|
Angled brush (2 inch) |
Recessed molding, edges, corners |
Good; may show marks on flat surfaces |
Slow |
Essential for panel doors; use on detailed areas only |
|
4-inch foam roller |
Flat panel centers, stiles, rails, flush doors |
Excellent; smooth and minimal texture |
Medium |
Best all-around tool for flat door surfaces |
|
Brush and foam roller combo |
Panel doors and most DIY projects |
Best DIY result overall |
Medium |
Brush the details, immediately roll to level while wet |
|
Paint sprayer |
Multiple doors at once; factory-smooth finish preferred |
Excellent; spray-smooth |
Fast (with setup) |
Requires masking all hardware; more prep and cleanup |
For most homeowners looking for the best way to paint interior doors, the brush-and-foam-roller combination produces the best result when painting interior doors: the least technical difficulty. A sprayer is worth considering when painting six or more doors in a single session, where the setup time pays off in application speed. A brush alone works for painting interior doors but requires more skill to avoid visible marks.
See more: Types of Interior Doors: Every Style, How They Work, and Which Room They Suit
Preparing the Door
Preparation takes longer than painting interior doors and determines whether the final result lasts. A poorly prepped door shows every flaw through the new paint layer, and no technique or paint quality can compensate for skipped prep steps.
Remove Hardware and Clean
Remove the door handle, strike plate, and any visible hardware before starting. If taking the door off its hinges to paint flat on sawhorses, have a helper and confirm the sawhorses are stable before lifting. Cleaning is non-negotiable: grease, dust, and fingerprints on the door surface prevent paint from adhering evenly. Wipe the full door surface with a cloth dampened with a mild detergent or TSP substitute and let it dry completely before proceeding to sanding.
Sand and Fill
Sand the entire door lightly with 220-grit sandpaper to scuff the existing finish and give the new paint something to grip. For older doors with gouges, dents, or surface imperfections, fill these with lightweight wood filler, allow it to dry fully, then sand smooth before priming. After sanding, wipe the door with a tack cloth or damp microfiber cloth to remove all dust. Painting over sanding dust creates a gritty texture in the cured finish that cannot be corrected without sanding down and repainting.
Prime When Needed
Primer is required when painting bare or unfinished wood for the first time; when switching from a significantly darker to a lighter color; or when the existing finish is glossy and has not been adequately scuff-sanded. For repainting a door already in good condition with a similar color, a thorough scuff-sand and clean is often sufficient without a dedicated primer coat. When primer is used on interior doors, let it dry fully and sand lightly with 220-grit before applying the first coat of finish paint.
How Long Does Prep Take?
For a standard interior door, prep before you paint interior doors takes, prep takes approximately 30 to 60 minutes: around 10 minutes to remove hardware, 10 to 15 minutes to clean, 10 to 15 minutes to sand, and 5 minutes for the tack cloth wipe-down. If wood filler is needed, add 30 to 60 minutes of drying time before sanding can resume. Removing the door from its hinges and remounting it afterward adds approximately 15 to 20 minutes to the total project time but produces a noticeably better result for panel doors by eliminating drip risk on vertical surfaces.
Choosing the Right Paint
Not all interior paints are suitable for painting interior doors. Doors receive more physical contact than walls, so the paint needs to cure to a harder finish that can withstand cleaning, handle friction, and repeated contact without chipping or scuffing.
The best paint for painting interior doors is a waterborne alkyd, sometimes labeled as cabinet and trim enamel. Products like Benjamin Moore Advance and Sherwin-Williams Emerald Urethane Trim Enamel are well regarded for their self-leveling properties, which allow brush and roller marks to flow out and disappear as the paint cures to a hard, durable finish. The sheen for interior doors should be semi-gloss or satin: semi-gloss is the most widely used finish, cleans easily, and gives doors the right level of reflectivity for architectural detail. Satin provides a softer appearance and suits lower-traffic bedroom doors. Flat and eggshell finishes are not appropriate for doors because they show scuffs, do not clean well, and wear through at contact points. Standard latex wall paint will work short-term but does not cure hard enough for door use and tends to chip at handles and latch areas within a year or two of heavy use.
Starting with a Pre-Primed Door
If you are buying a new interior door rather than repainting an existing one, starting with the right base surface makes a significant difference to the final result. At Doors and Beyond, flush doors are available with a smooth, primed and paint-ready surface in both hollow core and solid core construction. The flat, uniform face accepts paint evenly and cleanly, with no need to sand or spot-prime before the first coat.
We particularly recommend our pre-finished MDF doors over primed-only options for painting projects. Pre-finished MDF doors arrive with a factory-applied top coat that is already smooth, consistent, and durable from the first day of installation. Unlike a primed-only surface, a pre-finished door requires no additional paint coats to achieve a clean result, and the factory finish holds up better to cleaning and daily contact than a single-color coat applied on-site.
If you want a specific custom color, our team at Doors and Beyond can advise on the right preparation to apply your chosen finish over a pre-finished MDF door without compromising the surface quality.
How to Paint Panel Doors
Painting interior panel doors requires a specific sequence to avoid lap marks, drips at recessed corners, and hard edges where brushed molding meets rolled flat sections. Following the correct order when painting interior panel doors is the single most important technique difference between a result that looks professional and one that looks lumpy in the detail areas.
The Correct Sequence for Panel Doors
Step 1: Paint the edges. Using the brush or small roller, paint all four edges of the door first: the hinge side, the latch side, and the top and bottom edges. Note that the top and bottom edges should be painted only on the edge itself, not on the face, to prevent the door from sticking in the frame when it swings.
Step 2: Brush the recessed molding. Using the angled brush, paint the recessed profile around each panel. Work carefully into the corners and along the molding detail. Keep the brush strokes short and consistent in direction.
Step 3: Immediately roll the flat panel centers. While the brushed molding is still wet, use the 4-inch foam roller to cover the flat center of each panel. The roller levels the brushed paint and blends the two sections before either has dried. Do not wait for the brushed areas to dry before rolling.
Step 4: Roll the vertical stiles. Working from top to bottom with consistent strokes, roll the vertical sections between the panels. These are the longest vertical flat surfaces on the door.
Step 5: Roll the horizontal rails. Roll the horizontal sections connecting the stiles, working from left to right and maintaining a wet edge to prevent lap marks where sections meet.
Step 6: Check corners and edges for drips. Run a lightly loaded brush along any corner or edge where paint has pooled and smooth it out before it dries. Drips in recessed corners are the most common visible defect on finished panel doors.
Step 7: Allow full dry time and apply the second coat. Let the first coat dry according to the paint manufacturer's instructions, typically 2 to 4 hours, then sand lightly with 220-grit, wipe with a tack cloth, and repeat the same sequence for the second coat.
Tips for the Brush-and-Roller Combo on Panel Doors
The key to the brush-and-roller technique on panel doors is working quickly on each section: brush the recessed molding and immediately follow with the foam roller while the paint is still wet. Do not let brushed areas start to dry before rolling over them, or the roller will drag the partially dried paint and create texture. Feather the boundary between the brushed molding and the rolled flat surface by lightly drawing the brush tip along the meeting line while both sections are still wet.
How to Paint Flush Doors
The best way to paint interior flush doors is faster than panel doors since there is no recessed molding and simpler. The main challenge when painting interior flush doors is maintaining a wet edge across the full width and height of the door to prevent lap marks where sections of paint overlap as they dry.
For flush doors, the 4-inch foam roller is the primary tool. Start at the top and work in consistent horizontal or vertical sections, overlapping each pass by about one-third before the previous section dries. Use the angled brush only for the edges and any tight corners at the frame. Try not to stop partway down the door: rejoining a dried section with a wet roller creates a visible ridge in the cured finish. If the door is removed and lying flat on sawhorses, this problem largely disappears because gravity is not pulling paint toward drip points and the full surface can be rolled in one consistent session. For in-place painting, work quickly, keep the roller pressure consistent, and avoid going back over areas that have started to set.
See more: Door Slab vs Prehung: What's the Difference and Which One Is Right for Your Project?
Common Mistakes to Avoid
Most unsatisfying results when you paint interior doors come from a handful of consistent mistakes. Recognizing them before starting is faster than correcting them afterward.
Applying Paint Too Thickly
The most common mistake is trying to cover the door in one heavy coat. Thick coats sag, drip on vertical surfaces, and take significantly longer to dry without producing a better result than two thin coats. Apply thin, even coats and allow each to dry fully before adding the next. Two thin coats cure harder and look smoother than one heavy coat every time.
Painting Over Sanding Dust
Skipping the tack cloth step after sanding embeds grit into the wet paint that is fully visible in the cured finish. After every sanding step, whether between prep and priming or between paint coats, wipe the door with a tack cloth or damp microfiber cloth and let it dry before applying the next coat.
Back-Rolling Over Paint That Has Started to Set
Once a section of paint has been applied and has been sitting for more than two to three minutes, going back over it with a loaded roller creates texture rather than smoothing it. Work each section once, maintaining a wet edge by overlapping the next section before the current one dries, and then move on. Do not attempt to fix a section by rolling over it repeatedly once it has started to level and set.
Closing the Door Before Paint Has Cured
Drying and curing are different. A waterborne alkyd paint may feel dry to the touch within two hours but can take 24 to 72 hours to cure to its full hardness depending on temperature and humidity. Closing or latching a door before the paint has cured causes the paint to stick at the latch and hinge contact points and peel when the door is opened. Leave the door propped open or remove it from the hinges until the paint has fully cured.
See more: What Is a Prehung Interior Door? Difference Between Prehung and Slab Door
Final Thoughts
The best result when painting interior doors comes from using the right tool for each surface, preparing thoroughly before the first coat, and applying thin coats consistently. Interior panel doors need a specific painting sequence to look right; interior flush doors need a maintained wet edge when you paint them. Both need adequate cure time before hardware is reinstalled and the door is put back into regular use.
Looking for new interior doors? Browse the full range at Doors and Beyond: Browse Interior Doors at Doors and Beyond


